-->

aws s3

Amazon Simple Storage Service (Amazon S3) is Amazon’s object storage service. It has lots of uses and integrates nicely with other AWS services when you need to store data. One thing it’s not meant to be used is publicly sharing your files.

File sharing services such as Box.com, Dropbox.com or Google Drive make public folders very easy. You visit the folder and get a nice web-based user interface that you can use to browse the files and subfolders. Amazon S3, on the other hand, tries its hardest to disallow public access.
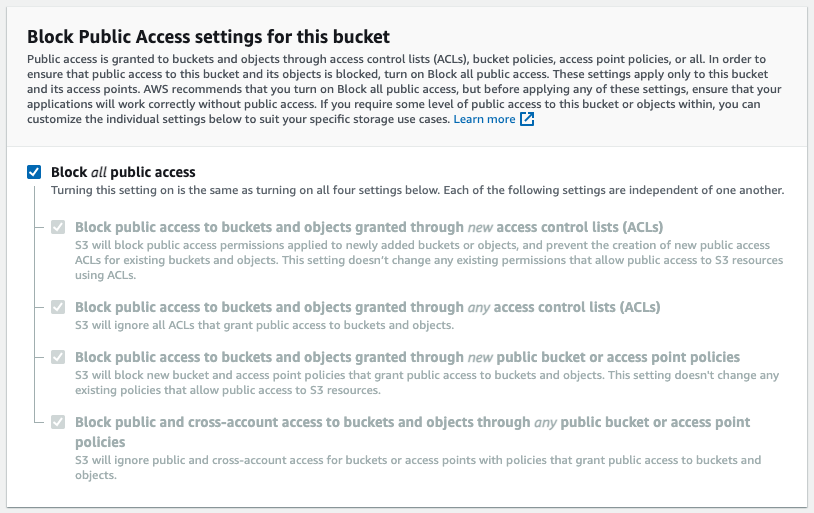
Amazon S3 setting  showing block all public access is selected by default

Why is public access blocked by default?

Even though it would be convenient to access files publicly in some scenarios, it’s a security vulnerability in most cases. A poorly configured S3 bucket may leak confidential and sensitive documents. It’s a common occurrence that leaky buckets are the root cause of data breaches,
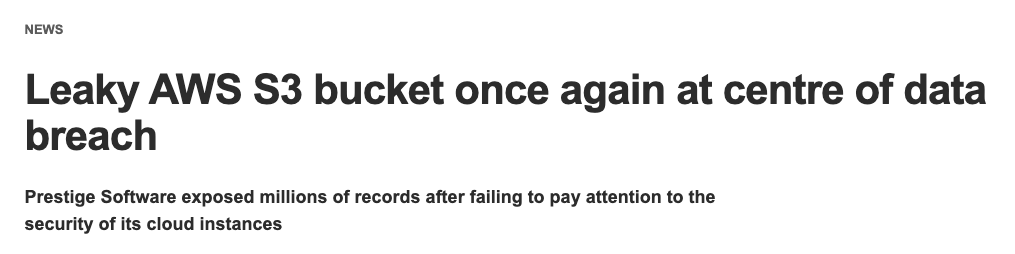
News about leaky AWS S3 bucket

It’s such a lucrative opportunity for hackers that many S3 bucket vulnerability scanners are out there. Take a look at this list to understand how popular it is: Amazon S3 bucket scanners.

So, unless you are absolutely sure you need public access, stick with the default settings and block public access.

How to share and browse files publicly with Amazon S3

Please double-check the bucket name before enabling public access to anything.

First, turn off Block public access settings.
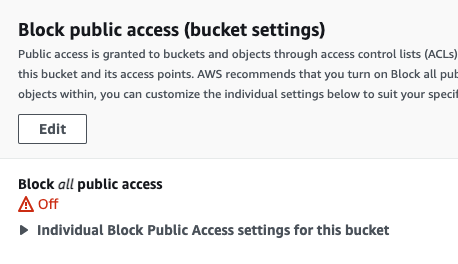
Block public access settings turned off

Disabling block public access setting does not automatically make objects public. It opens the possibility of making objects public. After you’ve disabled the block public access, you see the permissions overview changes as shown below:
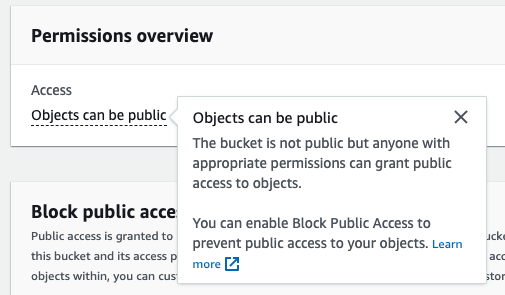
As the information box tells us, the bucket is not public at the moment but can be made public. You can test this easily by simply uploading a file and trying to access the file URL.

The uploaded file looks like this:
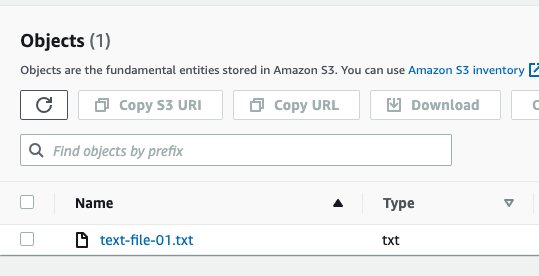
S3 object uploaded

Select the file and click the Copy URL button.

Then open a new browser tab and paste the URL. You should see an access denied error such as this:
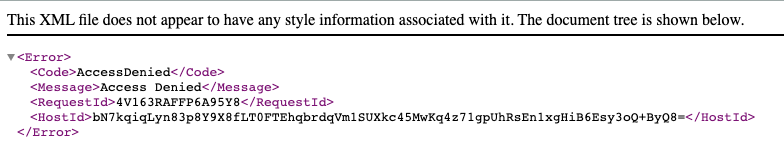
Access denied to S3 object

The easiest way to make objects publicly readable and listable is to edit the bucket policy.

To do that, scroll down a bit and click the Edit button in the Bucket policy section.
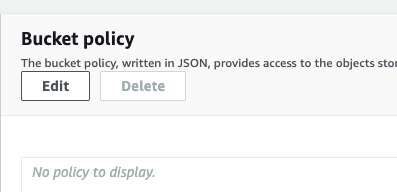
Bucket policy Edit button

In the Edit bucket policy window, paste the following policy JSON:

{
  "Version": "2012-10-17",
  "Statement": [
    {
      "Sid": "PublicRead",
      "Effect": "Allow",
      "Principal": "*",
      "Action": [
        "s3:ListBucket",
        "s3:GetObject"
      ],
      "Resource": [
        "arn:aws:s3:::YOUR_BUCKET_NAME",
        "arn:aws:s3:::YOUR_BUCKET_NAME/*"
      ]
    }
  ]
}

Before you proceed, replace YOUR_BUCKET_NAME with the actual name of your bucket.

After you’ve updated the policy, check the Permission overview section, and you should see this:
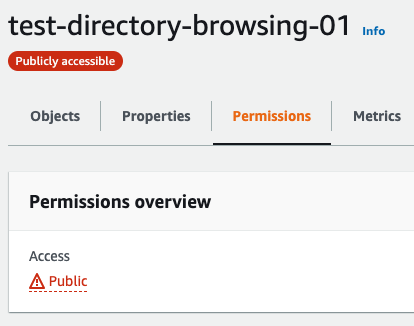
Bucket permissions showing public access

Upload a few test objects to your bucket. In my example, my bucket looks like this:
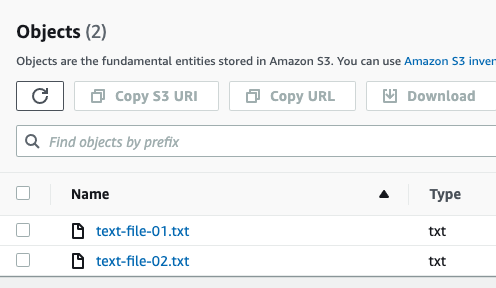
The object list in the bucket showing 2 files

Select a file and click the Copy URL button. Now paste the URL in a new browser tab, and you should see your file’s contents (assuming it’s a file your browser can open like a text file in my example):
![](/images/vpblogimg/2025/09/s3-browser/10-test-file-contents.png)
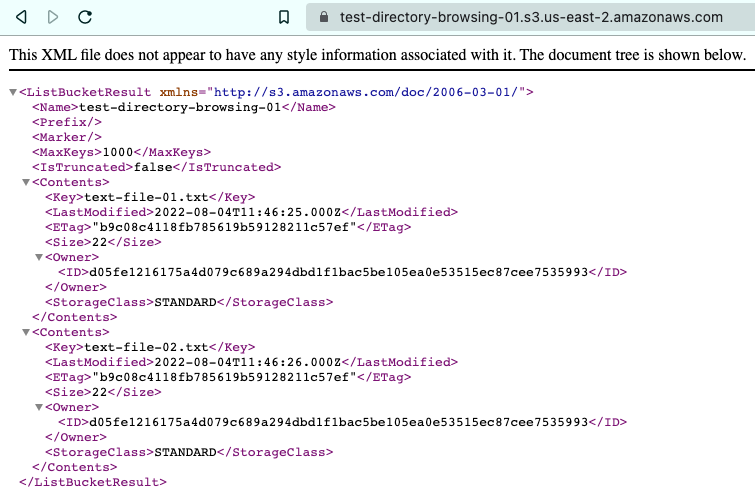
To browse the bucket's contents, remove the file name from the URL and try the bucket root. This time you should see something like this:

File list showing file details

As you can see, it now lists the files (key being the file name), MD5 hashes, lengths and last modified dates.

If you create folders in the bucket, they are also listed in the object list. For example, I created a folder named folder-01 and uploaded the same files under that folder, and the refreshed file list looked like this:
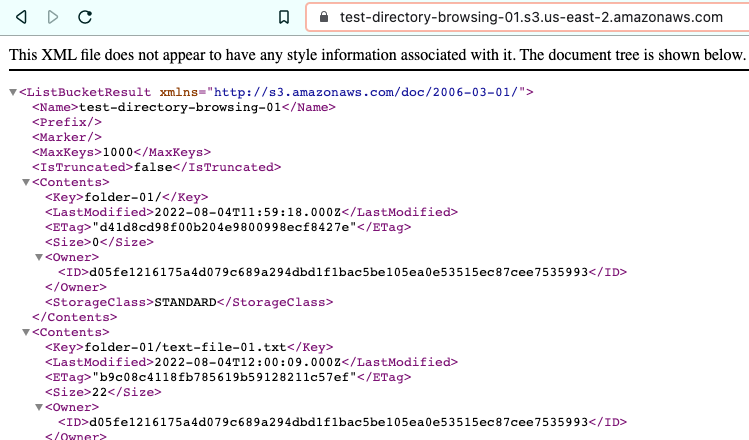
File list XML showing folders

This is the easiest way to give your clients access to your buckets. They can read/download the individual files and also get a list of the bucket contents in XML format.

AWS S3 Bucket Explorer

Raw XML is efficient but may not exactly work for you if you are dealing with external clients. They may need a simpler user interface to view the files. There are a few experimental open-source projects out there. Some of them are now defunct; some of them barely work or are very primitive. In my research, I grew fond of this open source project, particularly: AWS S3 Bucket Browser.

The usage is quite simple: You download the template index.html file and update a few settings. Make sure to update the bucket policy and CORS permissions, and you’re all set.

In the following example, the bucket name is test-directory-browsing and the relevant part of index.html looks like this:
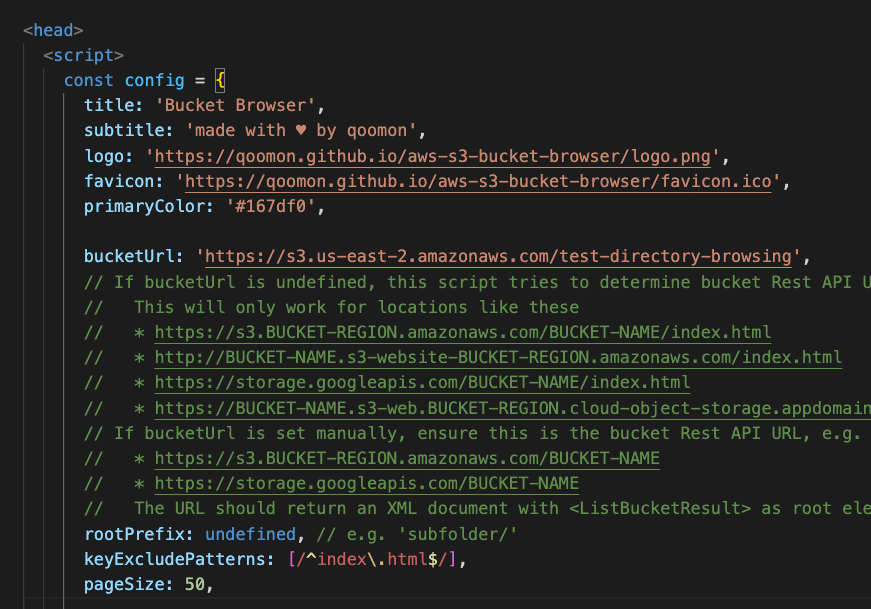
Screenshot of index.html showing the bucketUrl

My bucket policy is as shown below:

{
  "Version": "2012-10-17",
  "Statement": [
    {
      "Sid": "PublicRead",
      "Effect": "Allow",
      "Principal": "*",
        "Action": [
          "s3:ListBucket",
          "s3:GetObject"
      ],
      "Resource": [
        "arn:aws:s3:::test-directory-browsing",
        "arn:aws:s3:::test-directory-browsing/*"
      ]
    }
  ]
}

Finally, my CORS configuration looks like this:

[
  {
    "AllowedHeaders": [
        "*"
    ],
    "AllowedMethods": [
        "GET"
    ],
    "AllowedOrigins": [
      "https://test-directory-browsing.s3.us-east-2.amazonaws.com"
    ],
    "ExposeHeaders": [
      "x-amz-server-side-encryption",
      "x-amz-request-id",
      "x-amz-id-2"
    ],
    "MaxAgeSeconds": 3000
  }
]

When implementing it for your bucket, make sure to replace all instances of test-directory-browsing with your bucket name. Also, change your region if you use a region other than us-east-2.

The contents of the example bucket look like this:
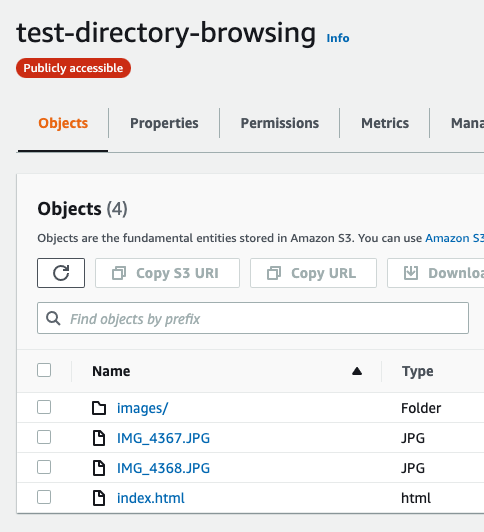
Contents of the example bucket showing and index.html, a folder and two images

When I copy the URL of the index.html file and paste it into a new browser tab, I get this:
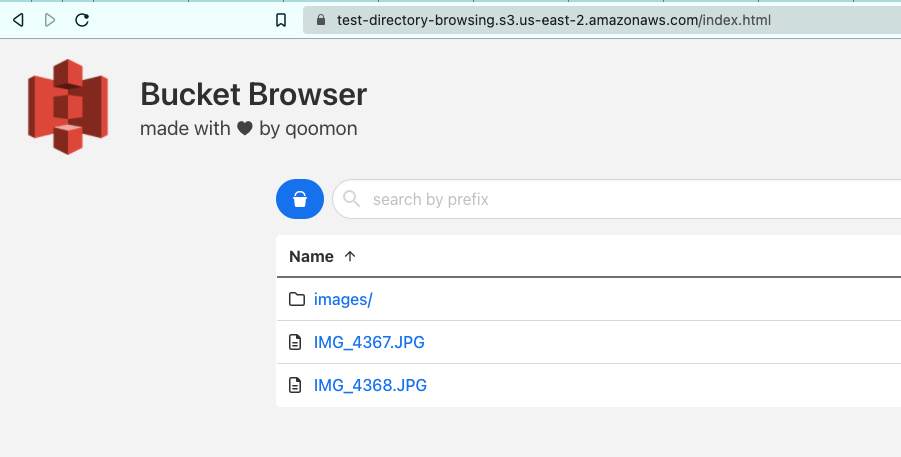
Bucket browser showing the files

It’s nicely formatted. Since it’s open source, you have full control over the CSS and the images so you can modify them to your liking. When you click a folder, it also shows its contents with the folder name placed on top, such as this:
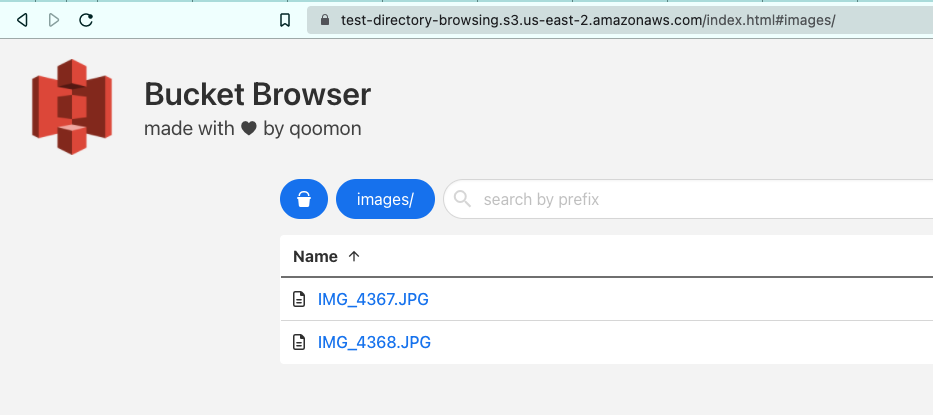
Files listed under a folder

As you can see, it’s very intuitive and allows your users to browse your public content very easily.

Conclusion

AWS tries their best to lock the buckets and their contents, but in some cases, you still might want to give your users public access to your buckets’ contents. You can achieve this by updating your bucket policy without needing any external tools.

In some scenarios, users may need an easy-to-use user interface to browse through the folders and files in your bucket. If that’s your use case, try out this GitHub repository. After a few quick modifications to your bucket and uploading an index.html file, you can give your customers a good experience browsing your files.
aws wordpress, lightsail

This article shows you how to host a WordPress website on AWS using Amazon Lightsail. AWS offers multiple ways of running applications. One of the most versatile services is Amazon Elastic Compute Cloud (EC2), where you can create virtual machines. The thing about EC2 is they may be overwhelming for simple use cases. For common use cases such as creating a basic virtual machine and starting a WordPress website, you might want to have a simpler alternative. Amazon Lightsail is intended to simplify achieving such basic goals.

In this post, we will look into creating a new WordPress website with Amazon Lightsail.

What is Amazon Lightsail?

AWS services are generally like LEGO bricks. You can mix and match them to build complex infrastructure. This comes at a cost, though. Sometimes, you need a pre-packaged simple solution to achieve a simple task. Some hosting providers offer virtual private servers (VPS) with one-click application deployments, such as Linode and Digital Ocean. Amazon Lightsail is AWS’s solution offered to this market.

It was announced in 2016. Unlike an EC2 instance, you don’t select individual components of a server. You rather select a pricing plan which includes a pre-packaged server with a configuration proportional to the pricing. This alone simplifies many tasks that might be daunting to people who are not tech-savvy and just want to get a site up and running as fast as possible.

Without further ado, let’s take a look at how Lightsail works.

Getting Started

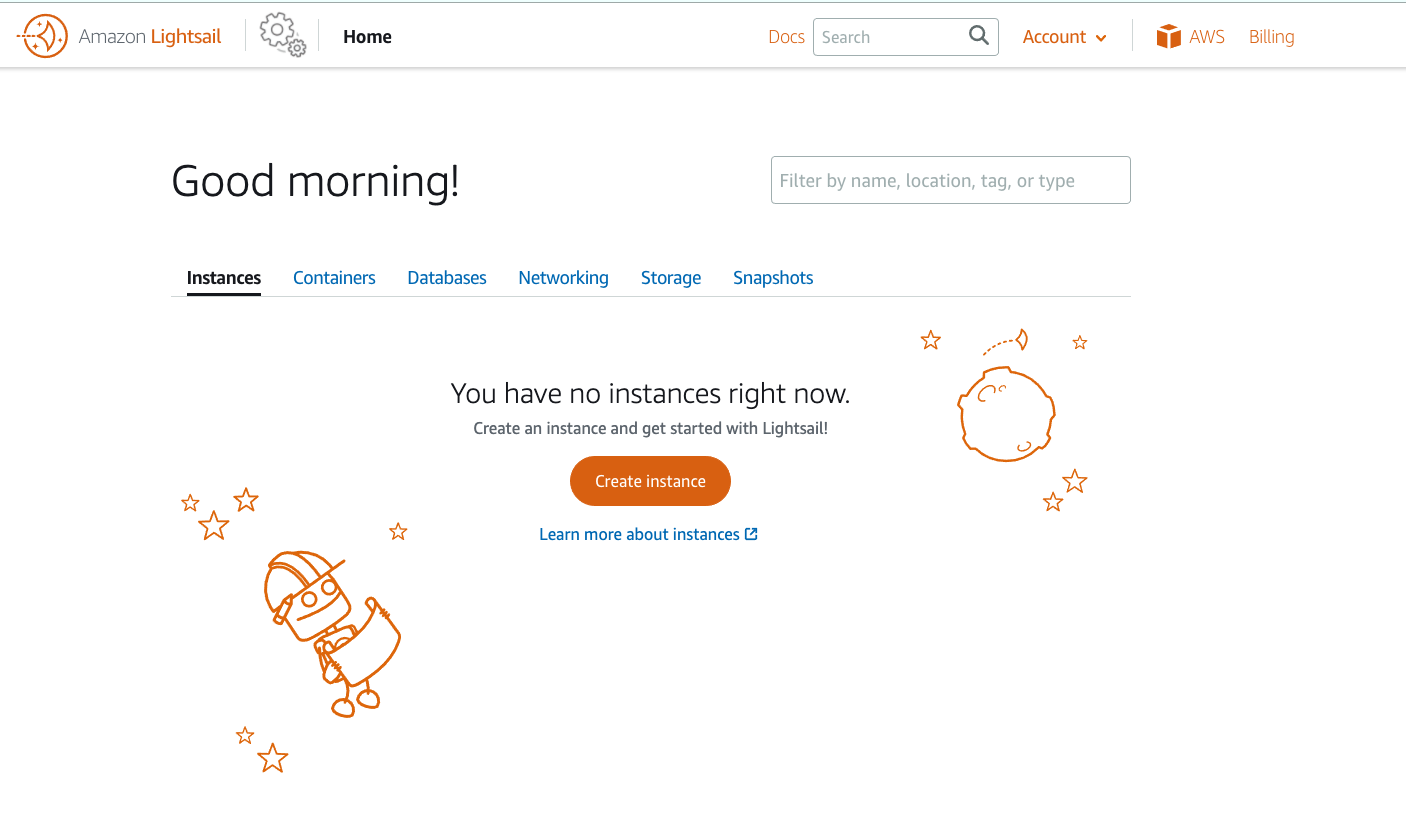
When you visit Amazon Lightsail Dashboard first thing you notice is that it’s quite different from a regular AWS service:

Amazon Lightsail dashboard

It might take some time to get used to this UI but fortunately, it’s quite intuitive so getting everything set up should not be too much of a hassle.

Let’s get started with our WordPress site:

  1. In the dashboard, click Create Instance button in the middle of the screen.

Create instance button

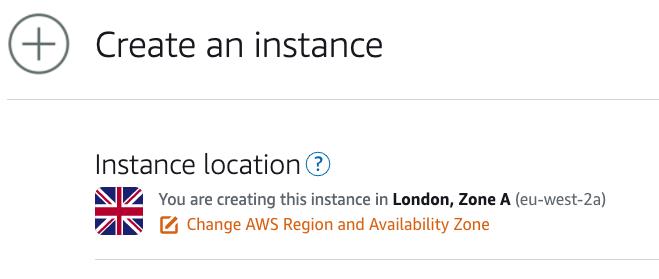
  1. The first thing you need to do is to approve or change the Instance location. The closest region to your location is pre-selected.

Change the availability zone button

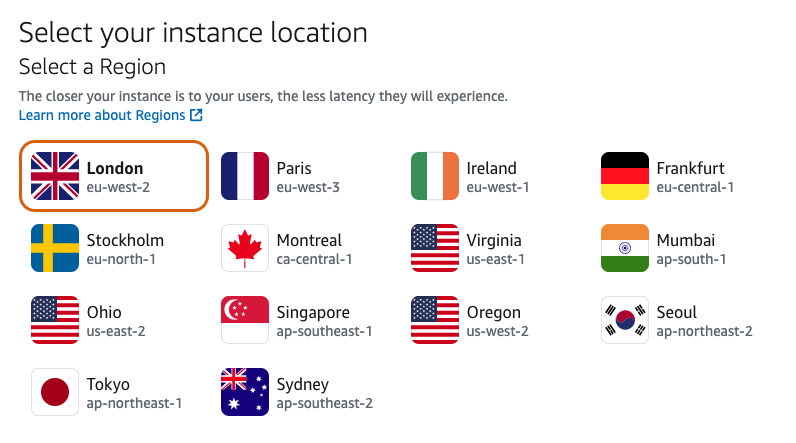
When choosing the instance location, be mindful of your target audience. Being close to your users will reduce the network latency and will make a better experience for your users.

Select availability zone

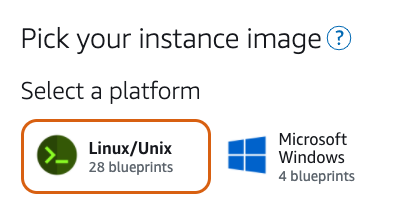
  1. Next, you pick your operating system image.

Select operating system image

In terms of price and performance, I’d strongly recommend choosing Linux/Unix as your platform, which we’ll be selecting in this article.

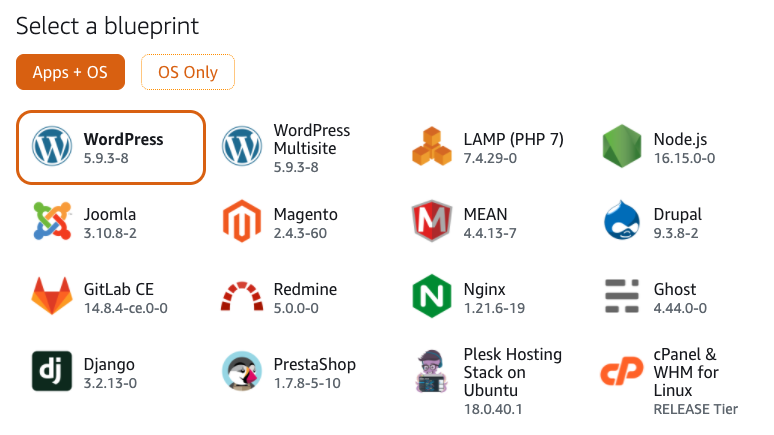
  1. Now it’s time to select WordPress, which is already the first item on the list and selected. WordPress is such a popular application that it’s always the first in such lists.

Quick Trivia

According to WordPress’s official site, WordPress is used by 43% of all websites on the Internet.

If you intend to host multiple websites, you can also choose WordPress Multisite option, the second option in the list.

Select application

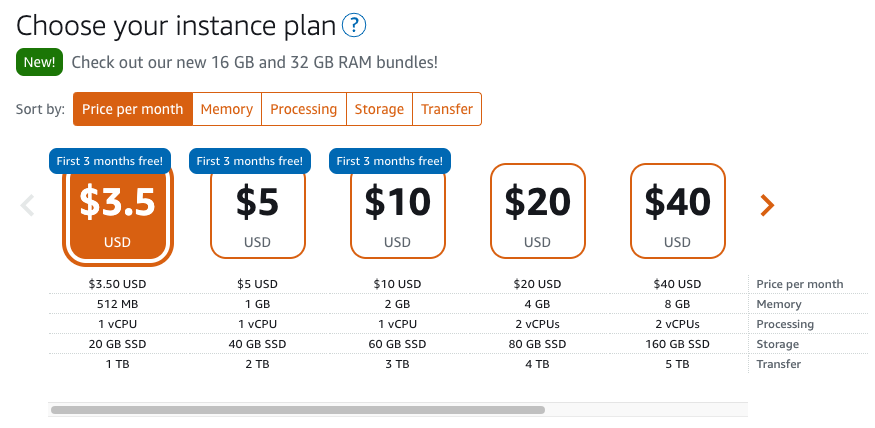
  1. Now it’s time to select the pricing plan. You don’t have to worry about the little details fo the instance. You just pick the plan closest to your budget.

Select instance plan

At the time of this writing, the first 3 months of the first 3 plans ($3.5, $5 and $10 plans) were free. This is a good opportunity to try out a new WordPress website for free and make a decision about going forward afterwards.

In this article, we are going to proceed with the $5 plan.

Select the $5 plan option

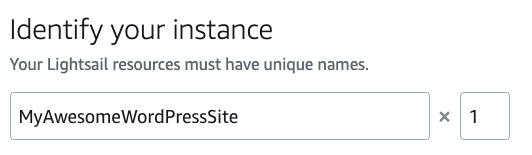
  1. Give your instance a unique and memorable name to identify your website

Change instance name

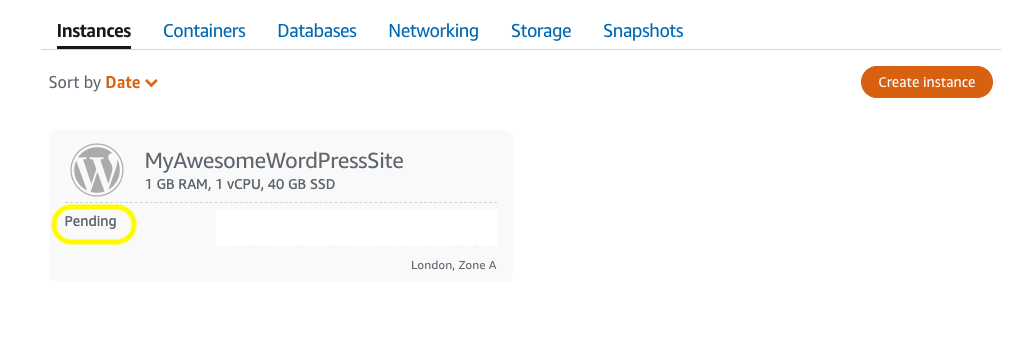
  1. Click Create Instance button at the bottom of the screen. You should be redirected to the instances dashboard and view the instance’s status.

New instance status

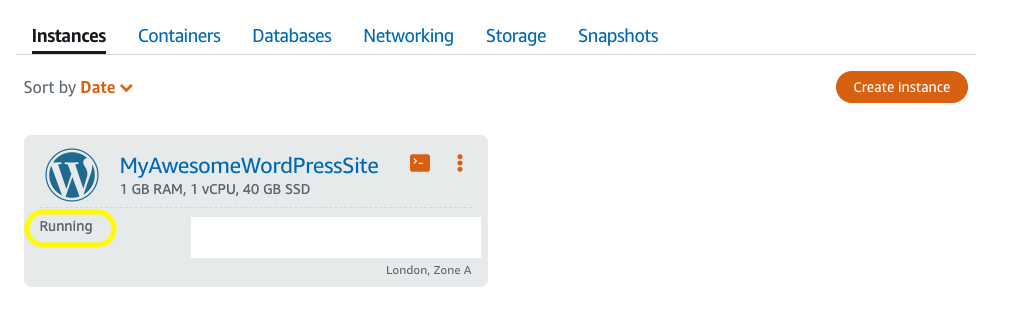
In about 2-3 minutes, the instance should be up and running:

New instance running

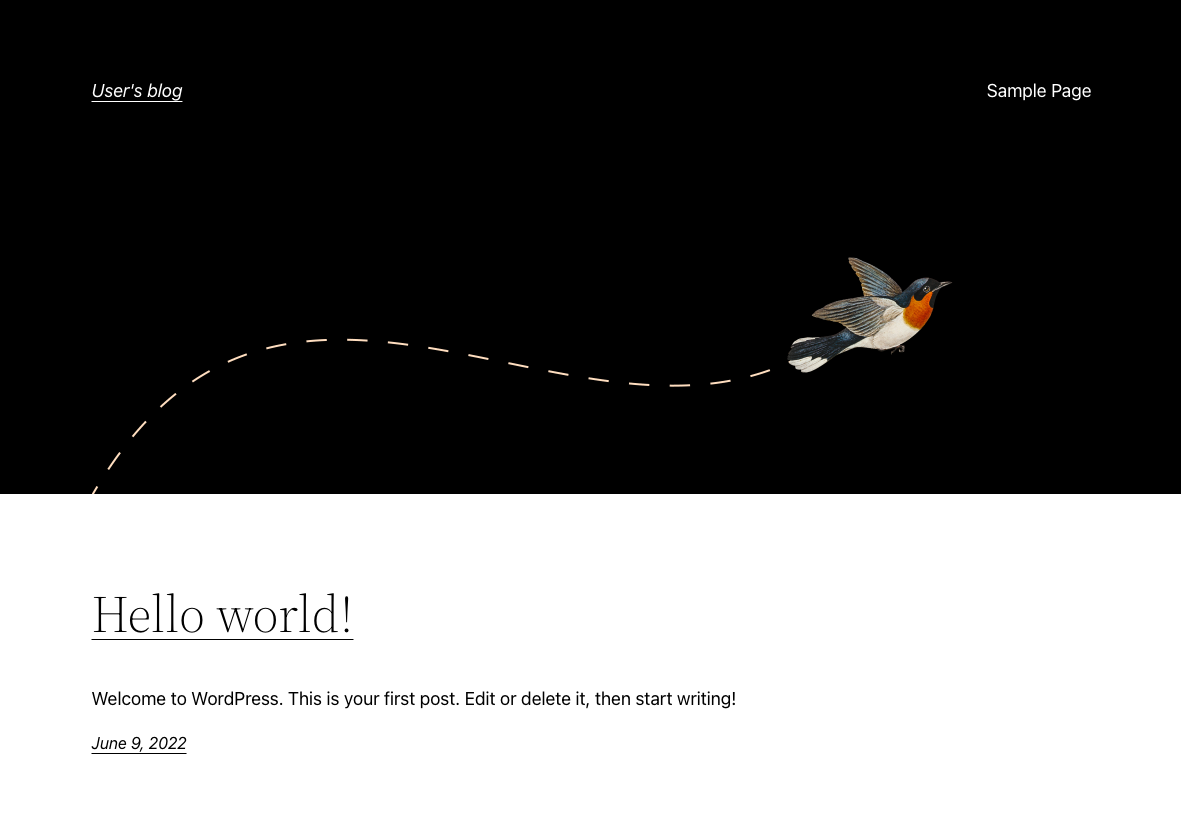
  1. Test installation. Visit the IP address allocated to your website, and you should see a default WordPress installation:

WordPress default home page

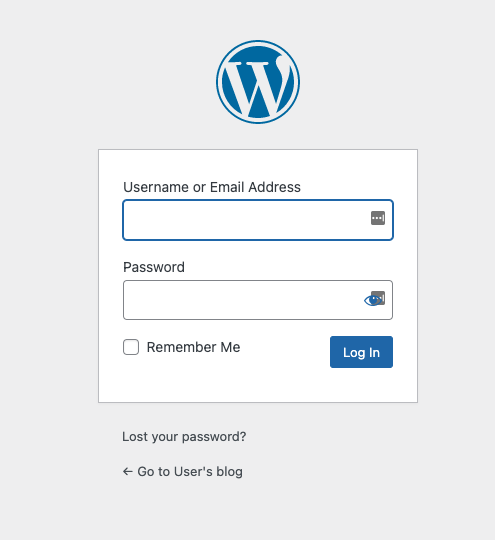
Add /wp-admin to the IP and you should be able to see the WordPress login page:

WordPress login page

Congratulations! Your website is up and running! 🎉🎊🍾

Configuring WordPress

Now that you have a freshly installed WordPress instance, it’s time to configure and add content. As you went through the steps in the installation process, you must have noticed that you didn’t provide a username and password to log in to your instance. So finding out the username and password is our next step.

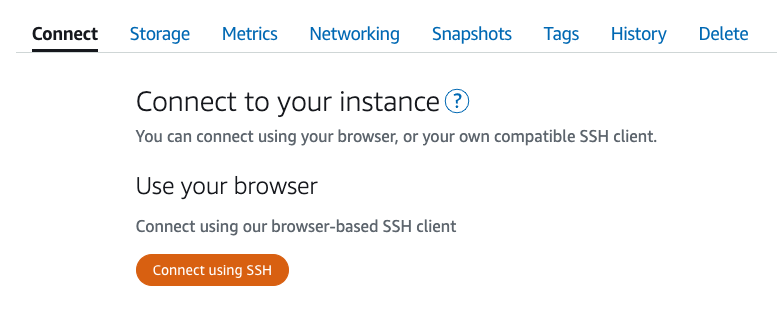
  1. In the Use your browser section, Click Connect using SSH button

Connect using SSH button

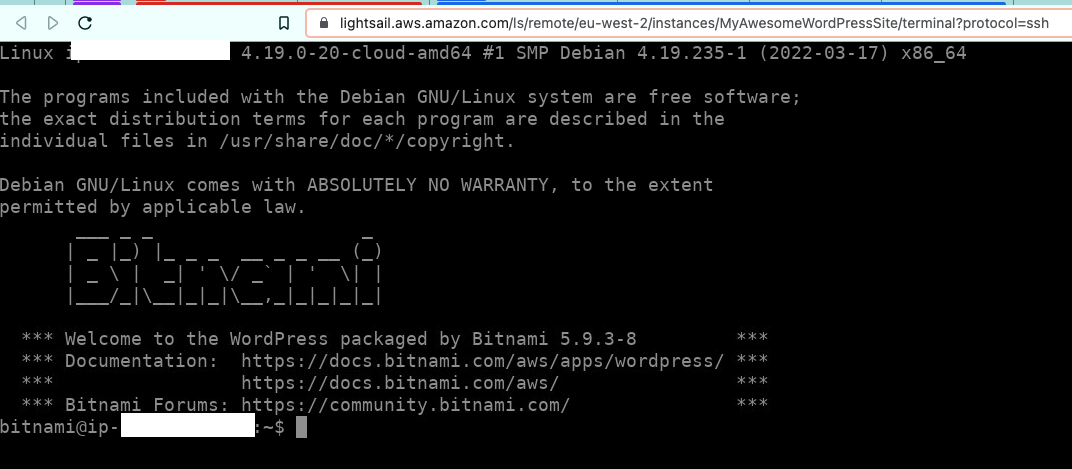
  1. You should end up in an SSH terminal in a new tab:

SSH terminal

  1. In the terminal, run the following command:
cat bitnami_application_password

This should simply print the default administrator password:

Default password in the terminal

Copy the password shown in the terminal

  1. In a new tab, go to https:// {your public IP address} /wp-admin
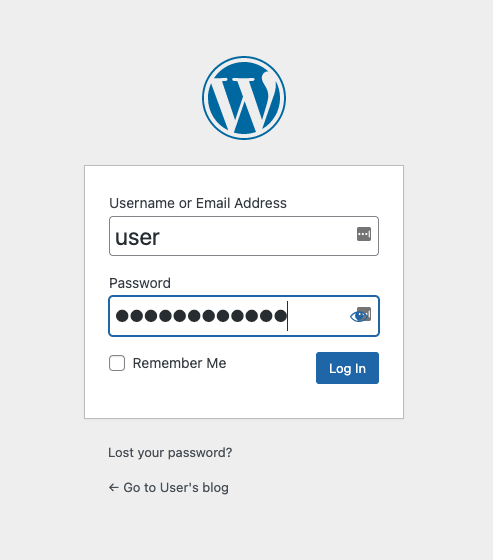
  2. Use the “user” as the default user and the password you previously copied from the terminal to log in to your WordPress dashboard.

Default password in the terminal

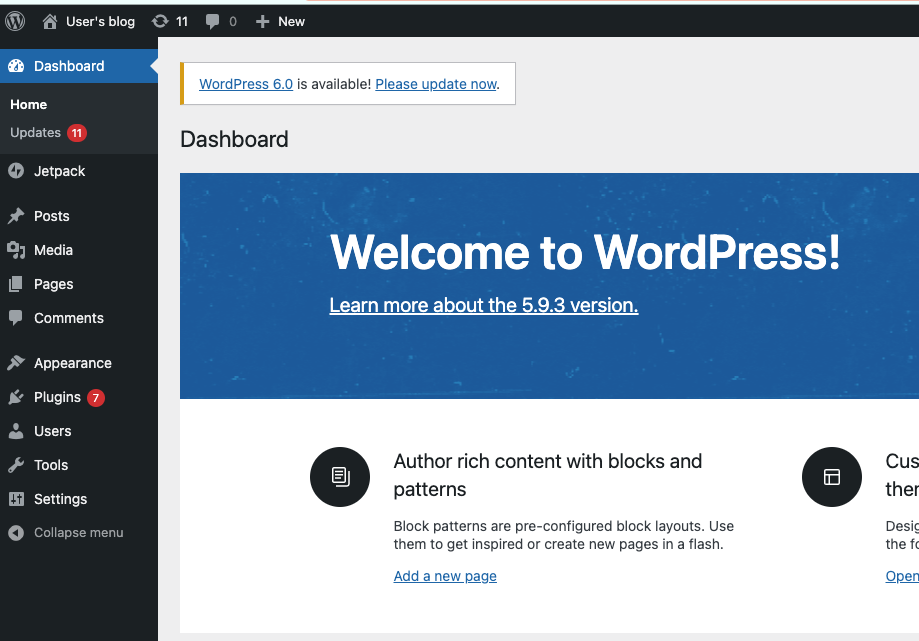
You should end up seeing something like this:

WordPress dashboard

At the time of this writing, the installed WordPress version was 5.9.3, but a major upgrade (6.0) was available. As upgrading WordPress is outside this article’s scope, we will not cover it. But please keep in mind that keeping your WordPress installation and all the plugins up-to-date is a good practice.

Set up Static IP Address and Custom Domain

Now we have a fully-fledged WordPress site, but we still have two problems:

  1. We can’t give our users an ugly-looking IP address
  2. The default IP address is dynamic and will change every time your instance is stopped and started again.

To address both issues, first, we need to set up a static IP address and point a domain or subdomain to that IP address.

IP Address

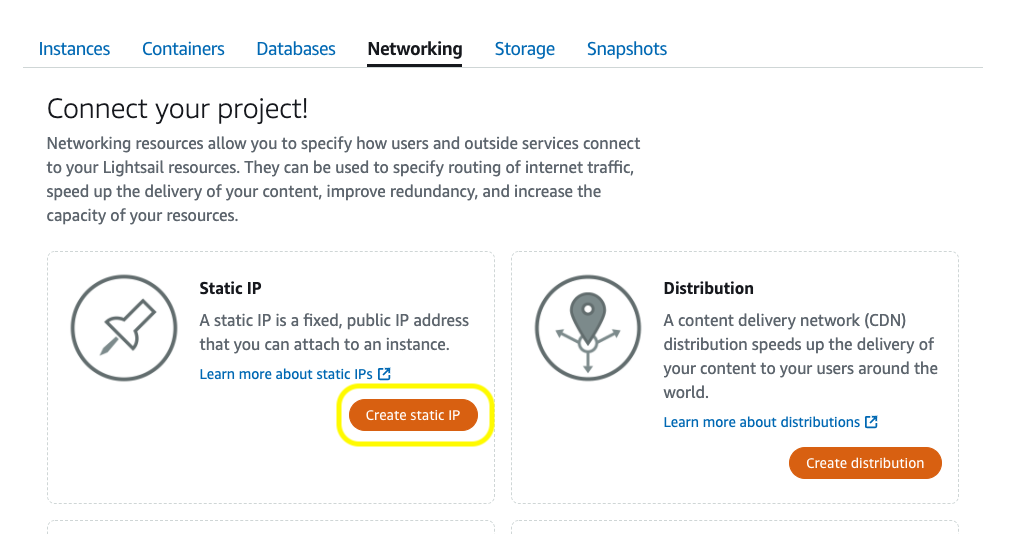
  1. Go to the Lightsail networking page: Lightsail Networking

It should look something like this:

Networking tab

Click Create Static IP button.

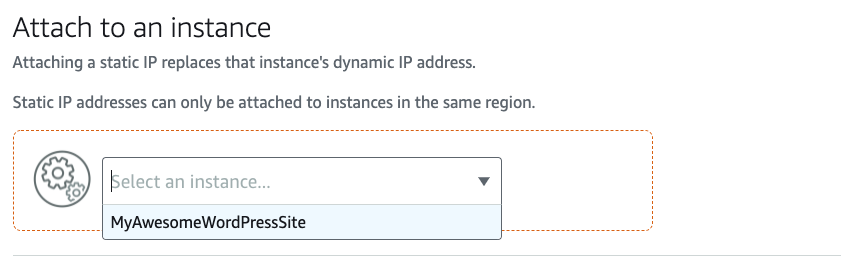
  1. In the Attach to an instance section, select your instance from the list:

Select instance to attach IP

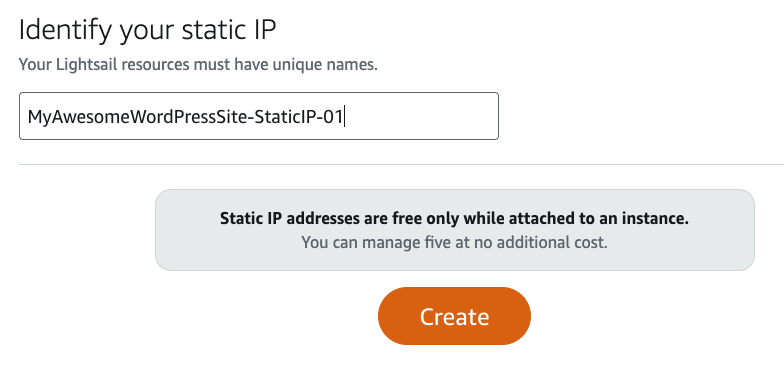
  1. Give it a meaningful name and click Create

Rename IP address and click create

Up to 5 static IP addresses are free of charge, ONLY when they are attached to an instance. So be mindful of releasing them when not in use.

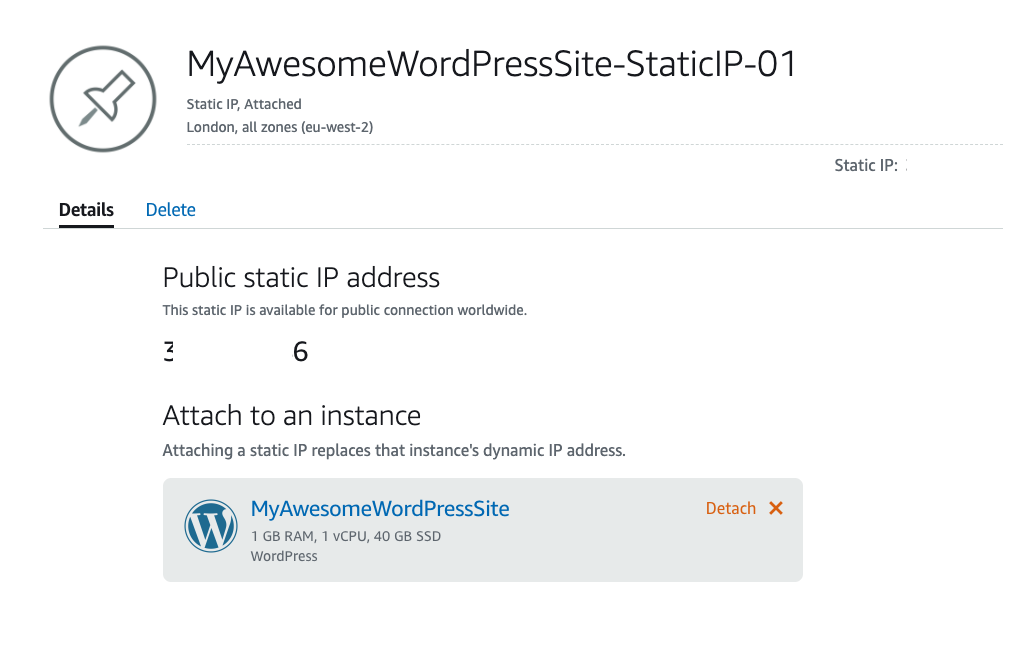
  1. This should take you to the IP address details and it should show that it’s been assigned to your instance:

Static IP attached to the instance

  1. Test your blog again by visiting the IP address and you should still see the blog running.

Custom Domain

Once you have your static IP address, it’s fairly straightforward to point to your domain/subdomain. It completely depends on your DNS provider. In this example, I’m going to assume your domain is already registered and hosted on Amazon Route53.

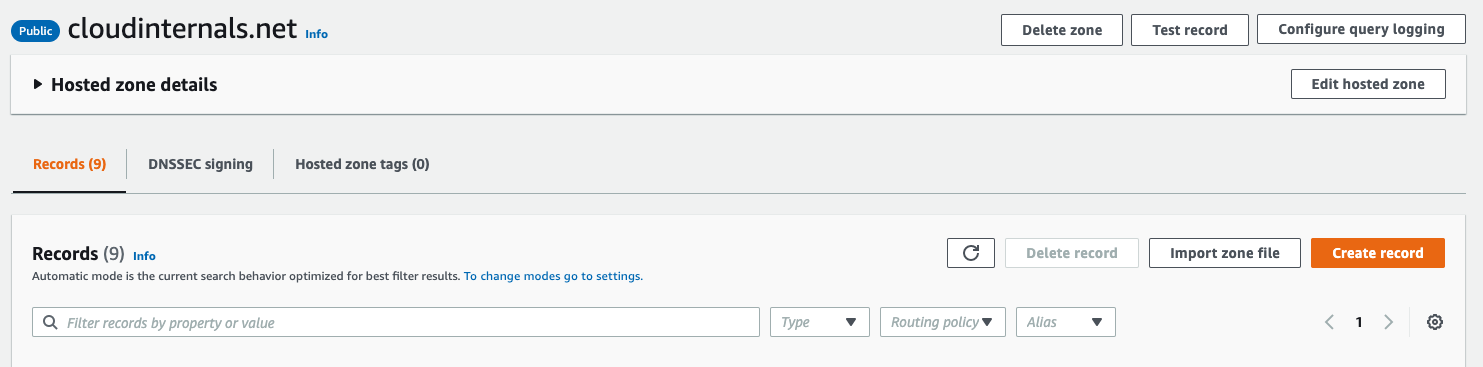
  1. Go to your hosted zone in Amazon Route53 and click Create record:

Create a record in Amazon Route53 hosted zone

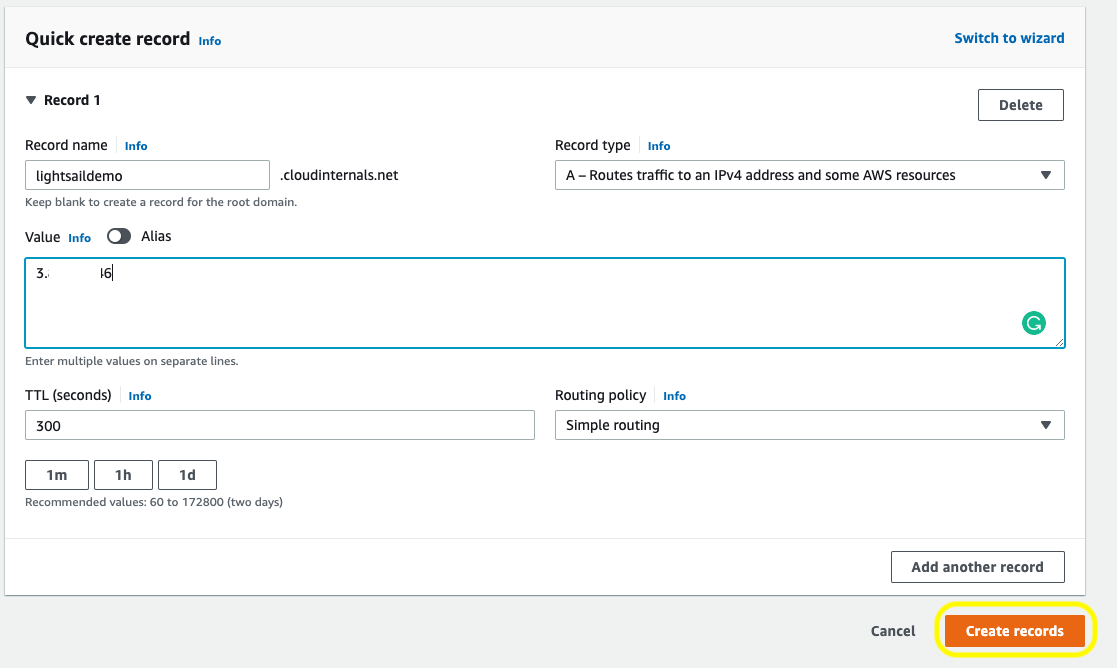
  1. Enter your subdomain in the Record name (or leave it blank if you’re going to point root domain)

Enter record details and click create records

Make sure the record type is A.

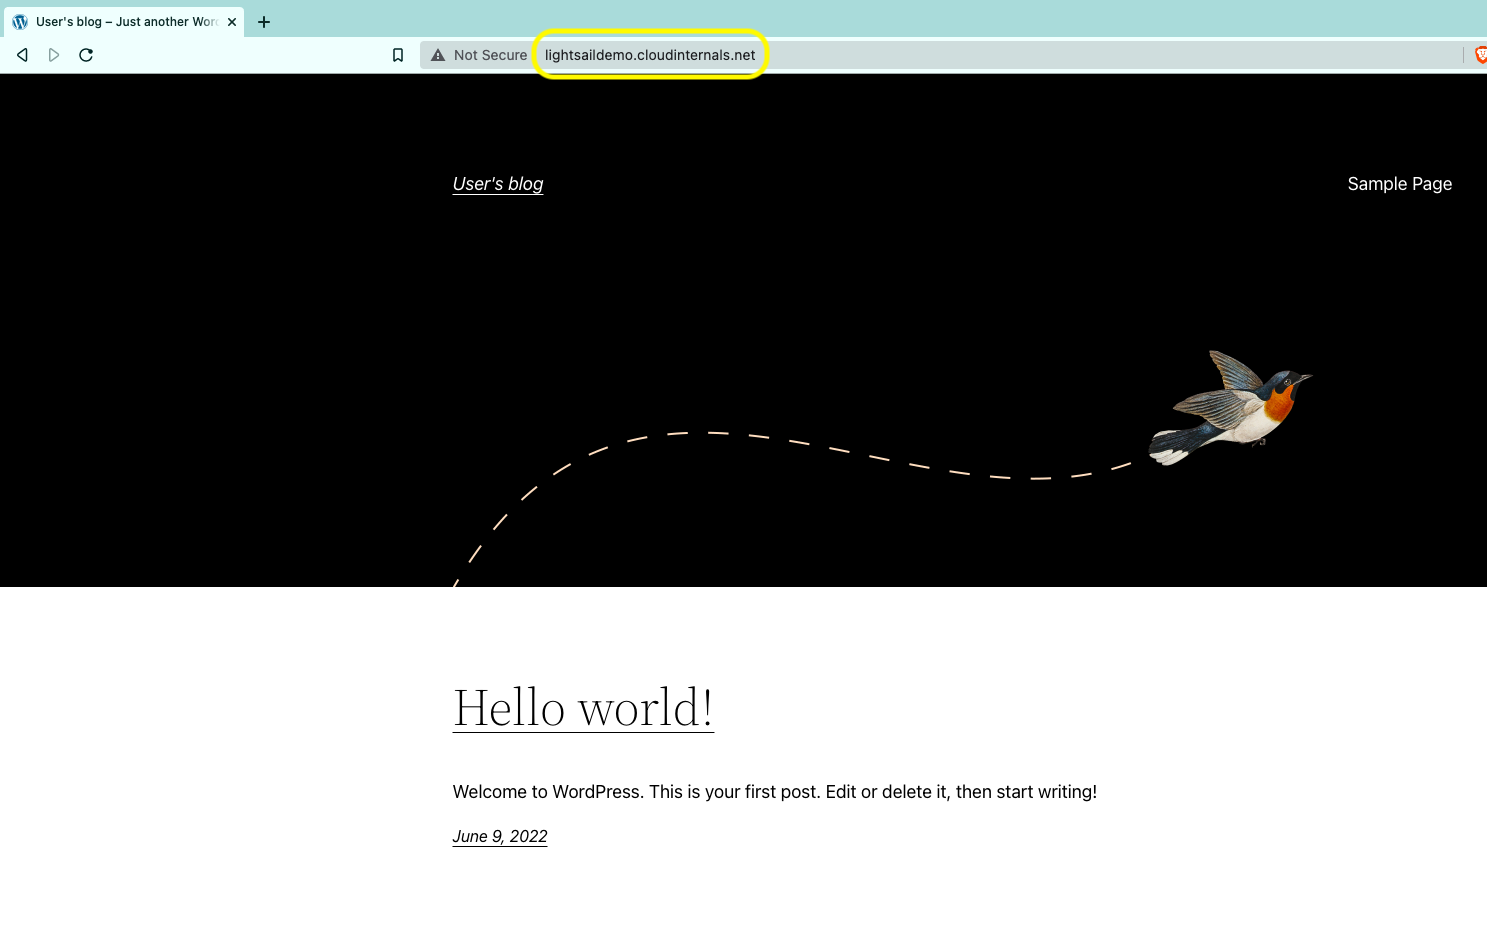
  1. It may take a few minutes for the DNS records to propagate. After a while when you visit your domain/subdomain, you should still your blog:

Test blog with the custom domain

Conclusion

This article covers the origins of Amazon Lightsail service and how it compares to Amazon EC2. It covers setting up a new WordPress instance from scratch and shows setting up an IP address and pointing a domain to the new blog.

Resources

aws lambda

By enabling Function URLs, you can now access Lambda Public URLs.

Lambda is AWS’s Function-as-a-Service(FaaS) service that gives us a serverless and event-driven compute service. Lambda functions can play an essential role in a microservice architecture. However, it had one significant limitation until recently: You couldn’t invoke a Lambda function as an API endpoint on its own. It was only possible using other services such as Amazon API Gateway. With the recent announcement, we can now create our APIs by only using the AWS Lambda service. Let’s take a look.

Part 1: Basics

Create a New Lambda Function

Let’s go ahead and create ourselves a simple Lambda function using AWS Management Console:

  1. Go to Lambda Dashboard (In this example, I’m using the us-east-1 region. If you prefer another one, switch to that region in the console)
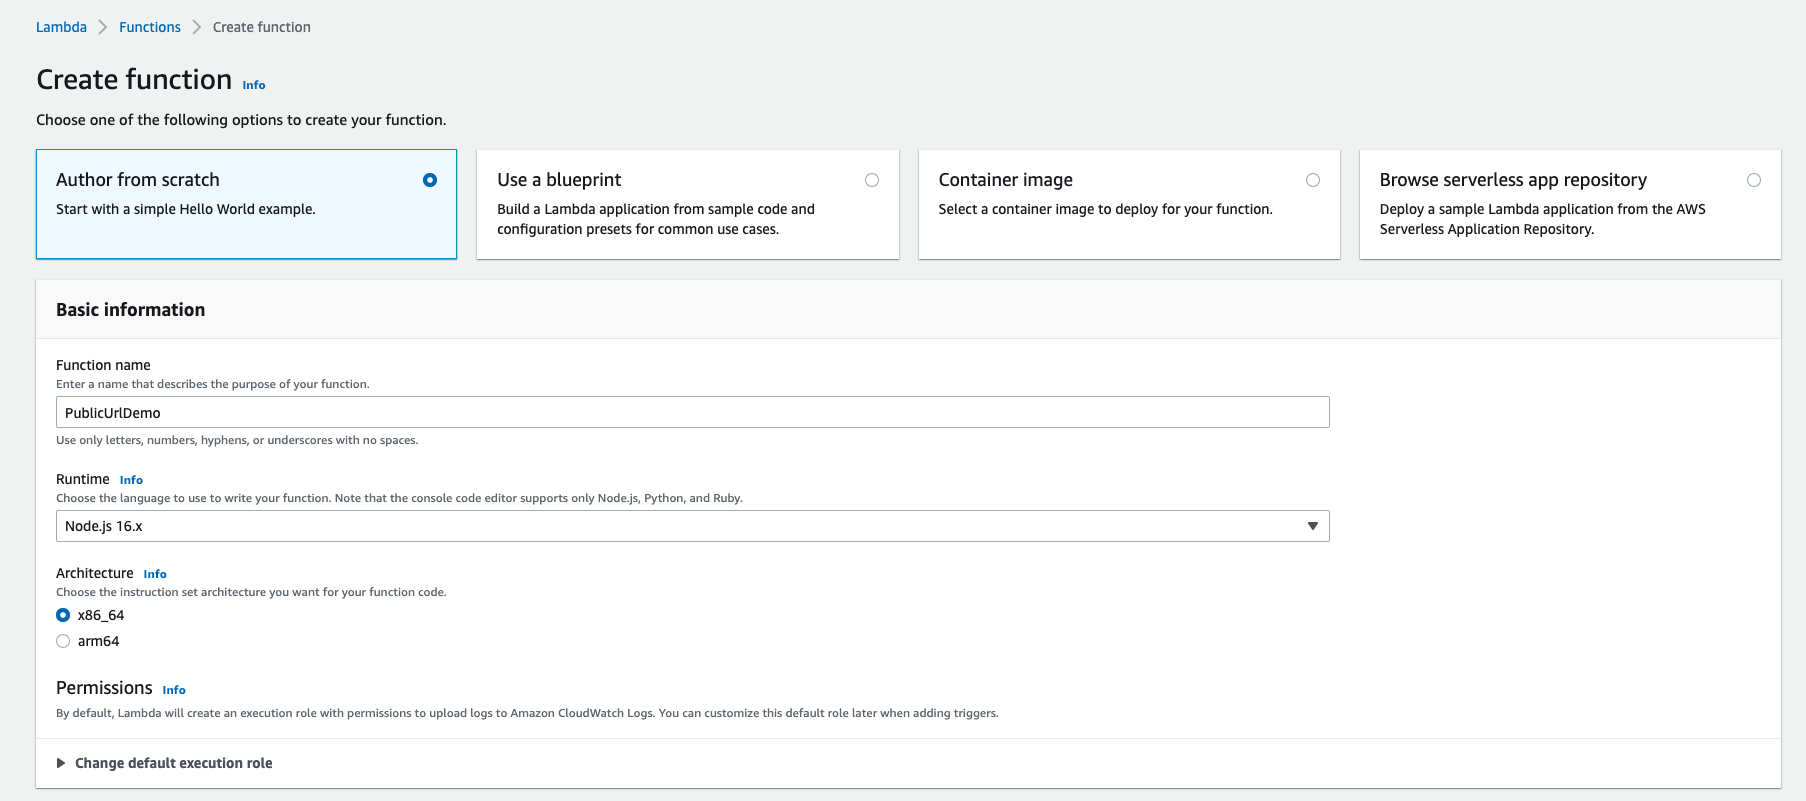
  2. Click Functions on the left pane and then Create function button.

Create Lambda Function - Step 1

  1. Keep the defaults in the Basic information section.

You can also expand Advanced settings and tick the Enable function URL option but we are going to do it later in this post.

  1. Click Create function

Enable Function URL

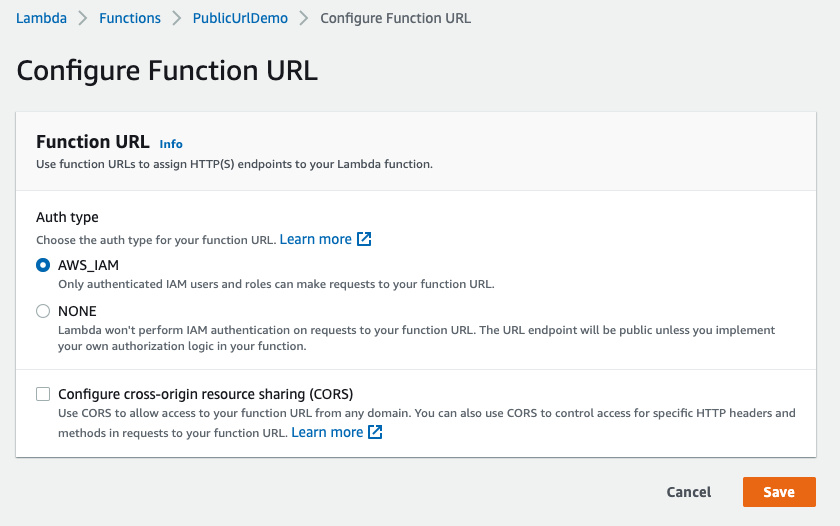
Now that we have a function available go to the Configuration tab and click on the Function URL. Then click Create function URL button. We’ve now come to the screen that was presented to us in the Advanced settings when we were creating the function:

Configure function URL section showing AWS_IAM selected by default

We are only trying to see a Lambda function we can call from the outside at this step. So, to keep things simple, let’s choose NONE as Auth type.

Click Save to update the settings.

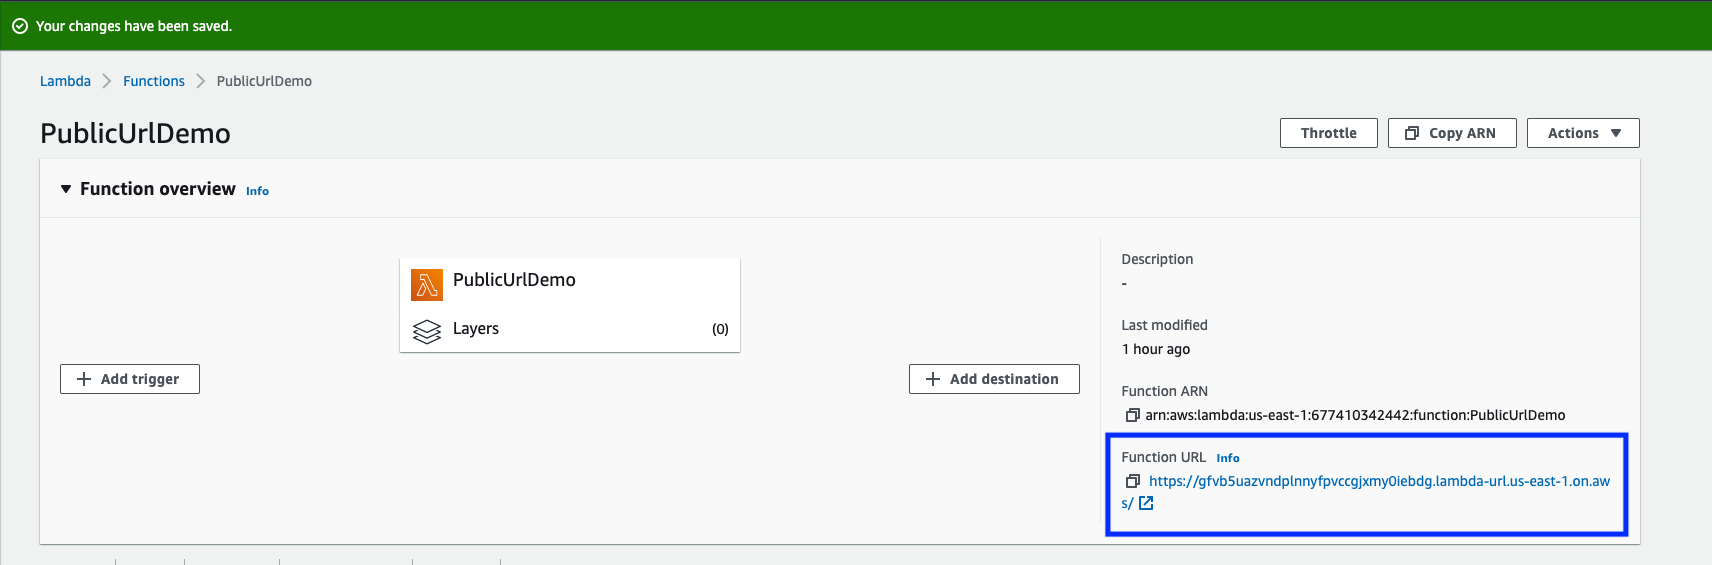
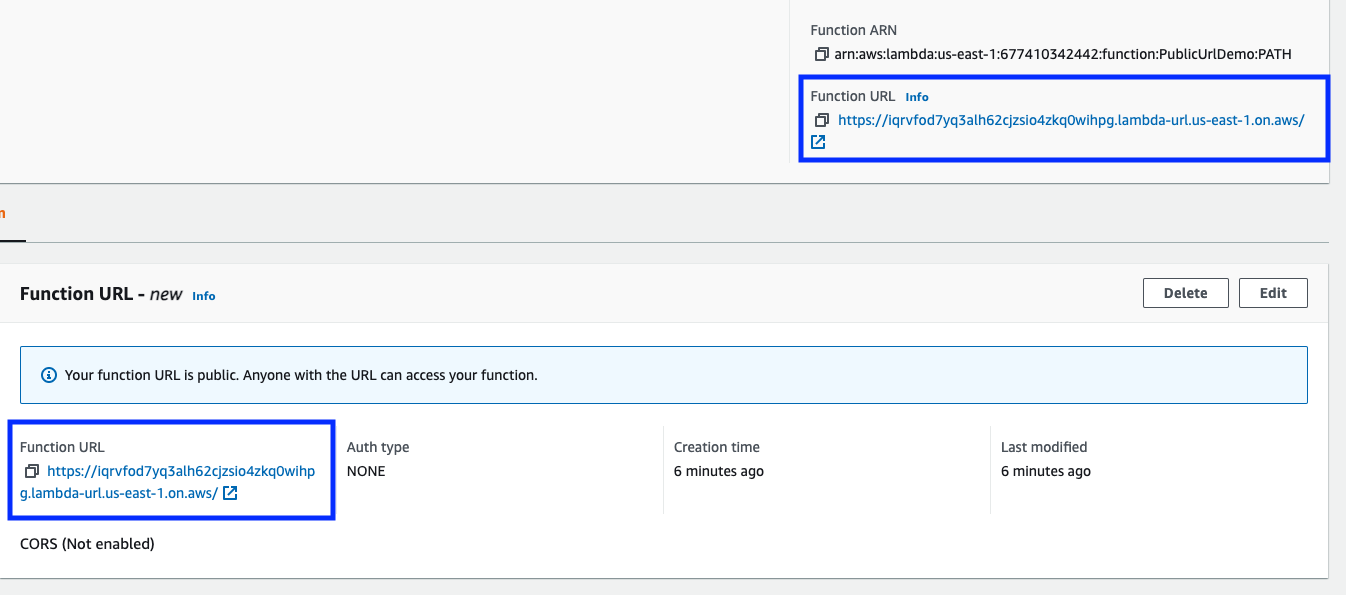
Now we are back on the Function overview page, and we can see our newly generated URL:

Function URL highlighted

and click on that link to see the URL in action:

Simple public function call result

Part 2: Advanced Topics

Now that we have a working publicly available API let’s dig deeper into authentication, CORS, custom domains and how this feature compares to API Gateway.

Authentication

In Part 1, we briefly saw there are two authentication options:

  • AWS_IAM
  • NONE

Auth type: NONE

We chose NONE to keep things simple. However, even though we selected NONE, AWS still created a policy for us and added to functions permissions. We can view the created the policy in Permissions section:

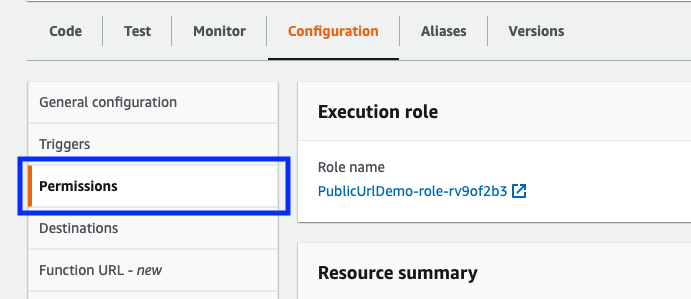
First, click Permissions on the left pane.

Permissions highlighted in the Configuration tab

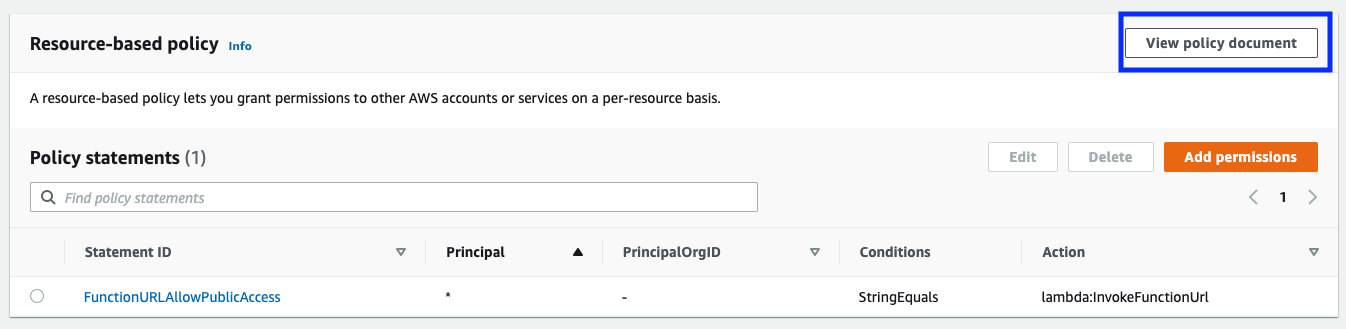
Then scroll down on the right to the Resource-based policy section and click View policy document:

Recource-based policy section

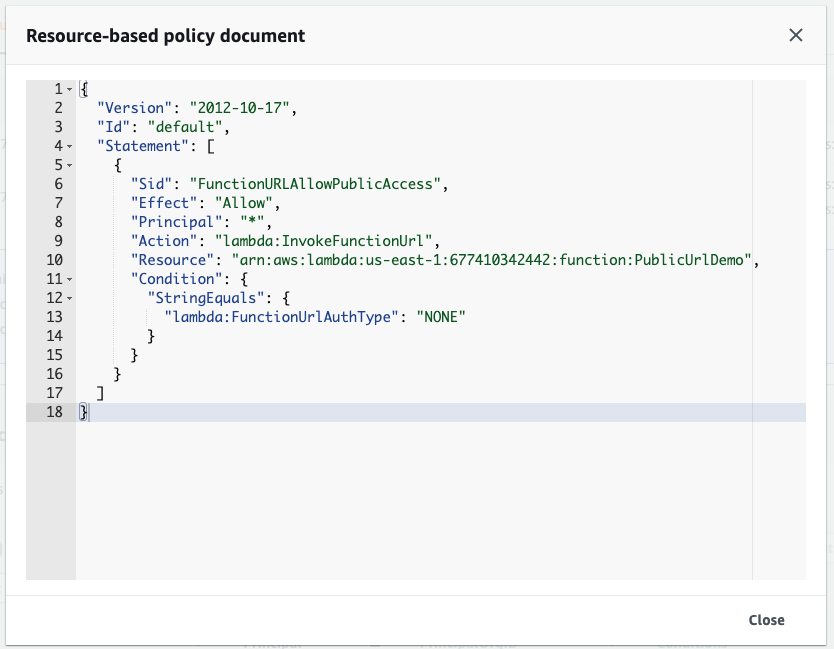
and you can see the policy document that allows everyone (“Principal”: “*”) to invoke the function URL (“Action”: “lambda:InvokeFunctionUrl”)

Policy document

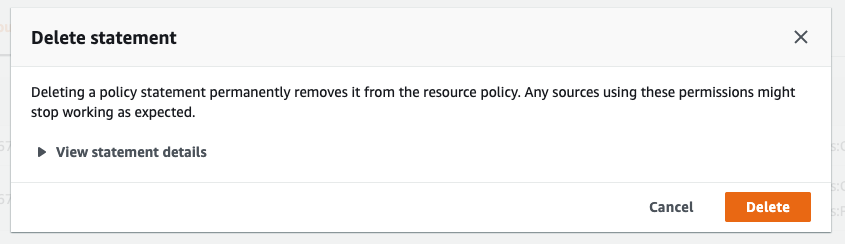
Without this permission in place, we wouldn’t be able the invoke the function. To test that, we can delete the policy statement and try the URL again:

Delete policy confirmation

If you scroll up and call the URL again, you will get a Forbidden (HTTP 403) error.

Forbidden

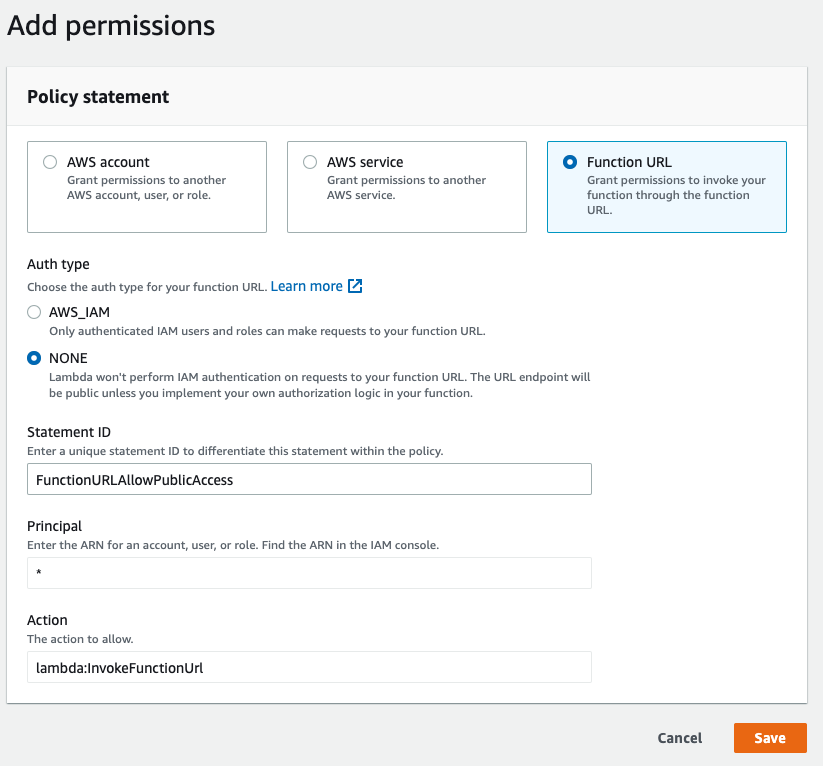
It’s easy to put that permission back in. Click on Add permissions. Select Function URL. Leave the defaults (Auth type: NONE, Statement ID: FunctionURLAllowPublicAccess, Principal: *, Action: lambda:InvokeFunctionUrl) and click Save.

Add permission

And if you click on the URL, you should see the “Hello from Lambda!” message again.

Auth type: AWS_IAM

Now let’s consider a scenario where we don’t want our API publicly available. For example, we may choose to grant access to a specific user. This might be useful for testing a beta version internally before making it public.

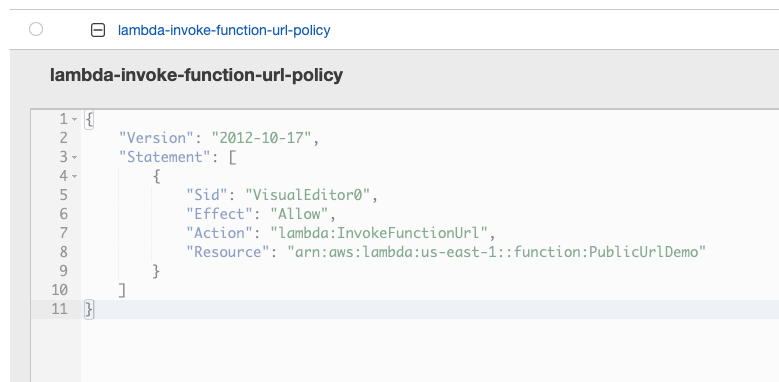
In this example, I’ve created a new policy with lambda:InvokeFunctionUrl permission on our demo Lambda function:

Invoke Lambda IAM policy

Policy document:

{
  "Version": "2012-10-17",
  "Statement": [
    {
      "Sid": "VisualEditor0",
      "Effect": "Allow",
      "Action": "lambda:InvokeFunctionUrl",
      "Resource": "arn:aws:lambda:us-east-1::function:PublicUrlDemo"
    }
  ]
}

Then, I created a user with this policy attached:

Invoke Lambda IAM user summary page

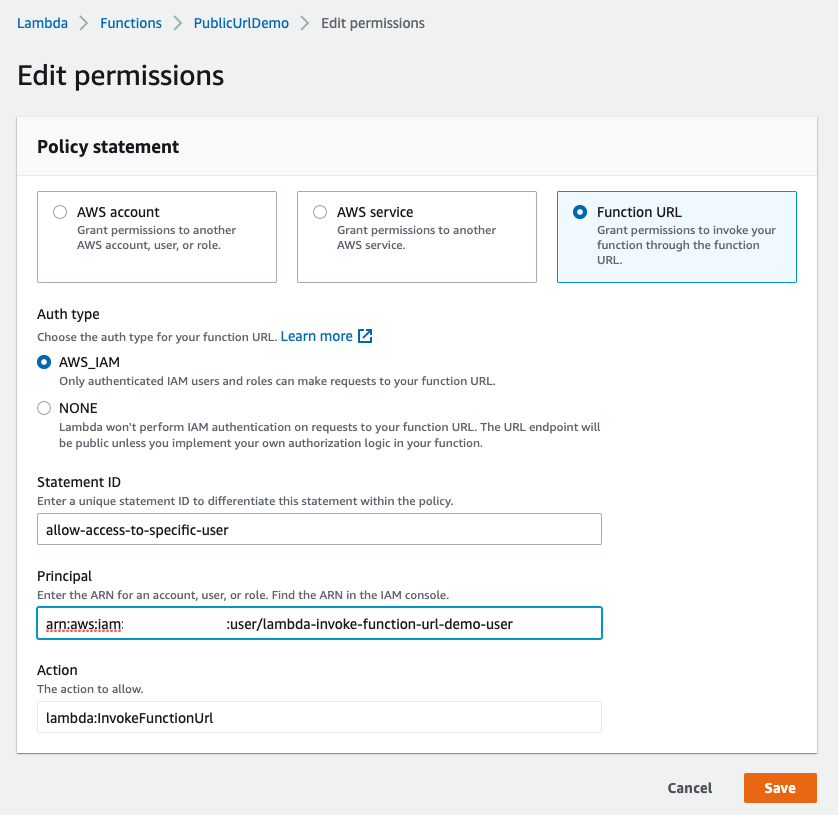
Finally, I went back to the Lambda function permissions and updated auth type allowing access only to this user:

Updated auth type settings

Even though we changed the auth type to AWS_IAM in permissions, we still need to ensure the auth type is set to AWS_IAM in Function URL settings. If there is a mismatch, the console will give us a warning:

Auth type mismatch warning

If we click on the URL again, we get a Forbidden error.

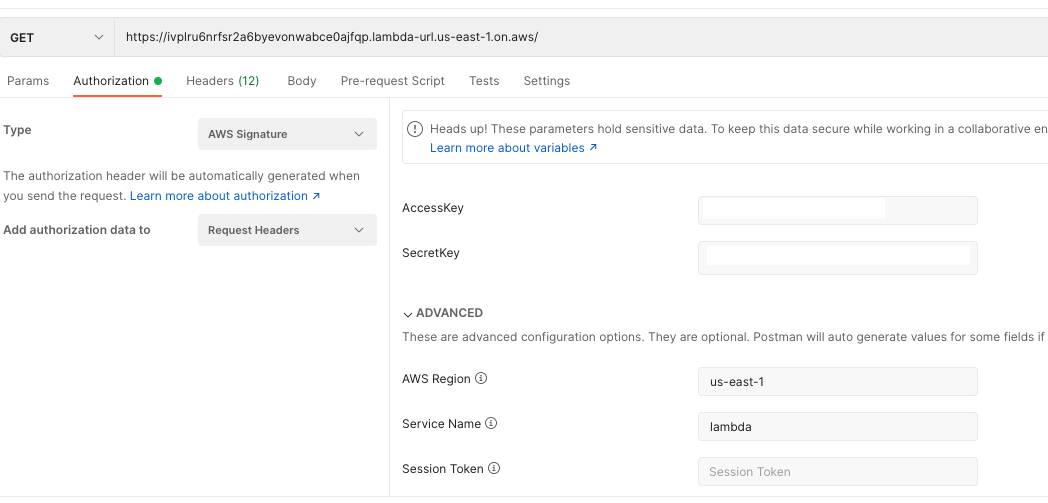
To make it work, we need to sign the request with our new IAM credentials (as in the access key and secret key we noted down when we created the user). In this example, I used Postman to enter the credentials and sign the message:

Signed request

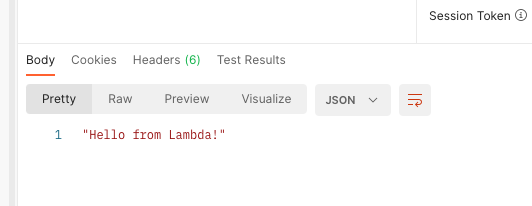
and we can get our response successfully:

Signed request output

Pricing

In terms of pricing, there is no extra charge for using function URLs. The cost of Lambda executions is calculated the same way whether or not they were invoked from a browser over the public Internet or a CLI inside your company network. The details of pricing can be found here

The duration is calculated as per the below rule:

Duration is calculated from the time your code begins executing until it returns or otherwise terminates, rounded up to the nearest 1 ms*

This means if you implement authentication and receive unauthenticated calls, you don’t pay for those calls, which might be helpful to be charged for DDoS attacks.

HTTP Methods

When you click on the function URL link on AWS Management Console, you send a GET request to the endpoint. I also used the GET verb in the example above. Actually, the endpoint supports all HTTP verbs.

For example, if you run the curl example below and send a DELETE request, you still get the same “Hello from Lambda” response with an HTTP 200 status code.

curl --location --request GET 'https://{ REPLACE WITH YOUR APIs SUBDOMAIN }.lambda-url.us-east-1.on.aws/' \
--header 'Accept: application/json' \
--header 'Content-Type: application/json' \
--data-raw ''

I don’t think I would need to support multiple methods in my Lambda function, but it is possible to take different actions based on the HTTP method. The following NodeJS Lambda example demonstrates that:

exports.handler = async (event) => {
    let httpMethod = event.requestContext.http.method;
    console.log('event:', event);
    let responseMessage = '';
    switch (httpMethod) {
      case 'GET': responseMessage = 'GETting something'; break;
      case 'DELETE': responseMessage = 'DELETEing something'; break;
      default: responseMessage = 'doing something else';
    }
    
    const response = {
        statusCode: 200,
        body: JSON.stringify(responseMessage),
    };
    return response;
};

Paths and Query Parameters

Similar to supporting different HTTP methods, we can also access the path and query parameters and do something with them if required.

For example, I modified the code to handle this type of scenario:

Query string example:

exports.handler = async (event) => {
    let requestPath = event.rawPath;
    let requestQueryString = event.rawQueryString;
    let responseData = {
        path: requestPath,
        queryString: requestQueryString
    };
    const response = {
        statusCode: 200,
        body: JSON.stringify(responseData),
    };
    return response;
};

Command to run:

curl --location --request GET 'https://{ REPLACE WITH YOUR APIs SUBDOMAIN }.lambda-url.{ REPLACE WITH YOUR REGION }.on.aws/customer/search?name=john' \
--header 'Accept: application/json' \
--header 'Content-Type: application/json' \
--data-raw ''

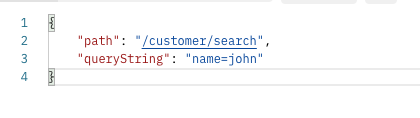
Output:

Query string response

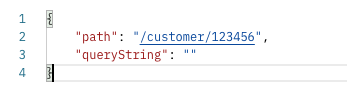
URL path example to get the details of the customer with id 123456:

Command to run:

curl --location --request GET 'https://{ REPLACE WITH YOUR APIs SUBDOMAIN }.lambda-url.{ REPLACE WITH YOUR REGION }.on.aws/customer/123456' \
--header 'Accept: application/json' \
--header 'Content-Type: application/json' \
--data-raw ''

Output:

URL path response

Lambda Function URLs vs Amazon API Gateway

In the introduction section, I mentioned that we used Amazon API Gateway for public APIs before the function URLs feature. So even though the feature helps a lot for specific use cases, I think it’s worth comparing both to have more realistic expectations.

Amazon API Gateway features

  • Authentication and authorization
  • Request throttling
  • Usage plans and quotas
  • API Keys
  • AWS WAF integration
  • Web socket support
  • CORS support
  • Built-in custom domain support

Function URLs

  • AWS_IAM authentication
  • CORS support

So we have lots of missing stuff in function URLs. The question is, do we need all of them for all our APIs? The chances are that a single public endpoint is good enough for many use-cases, and it costs a lot less.

Using Function URLs with Aliases

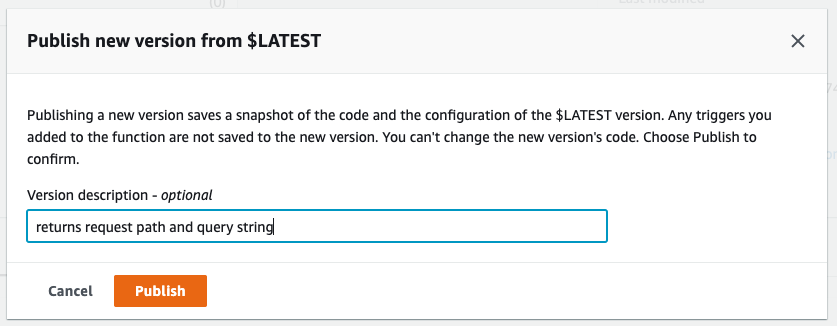
We can also have different URLs for different aliases. To demonstrate this feature, I will publish the code above that returns the path and query string as a new version:

Switch to the Versions tab and click Publish new version.

In the dialog box, give a meaningful description and click Publish

Create new version

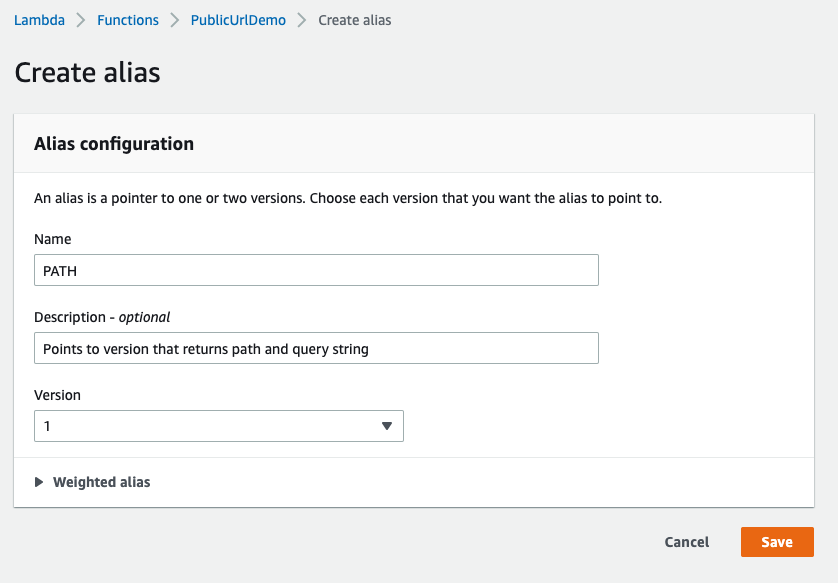
Then switch to the Aliases tab, create an alias, and click Save.

Create new alias

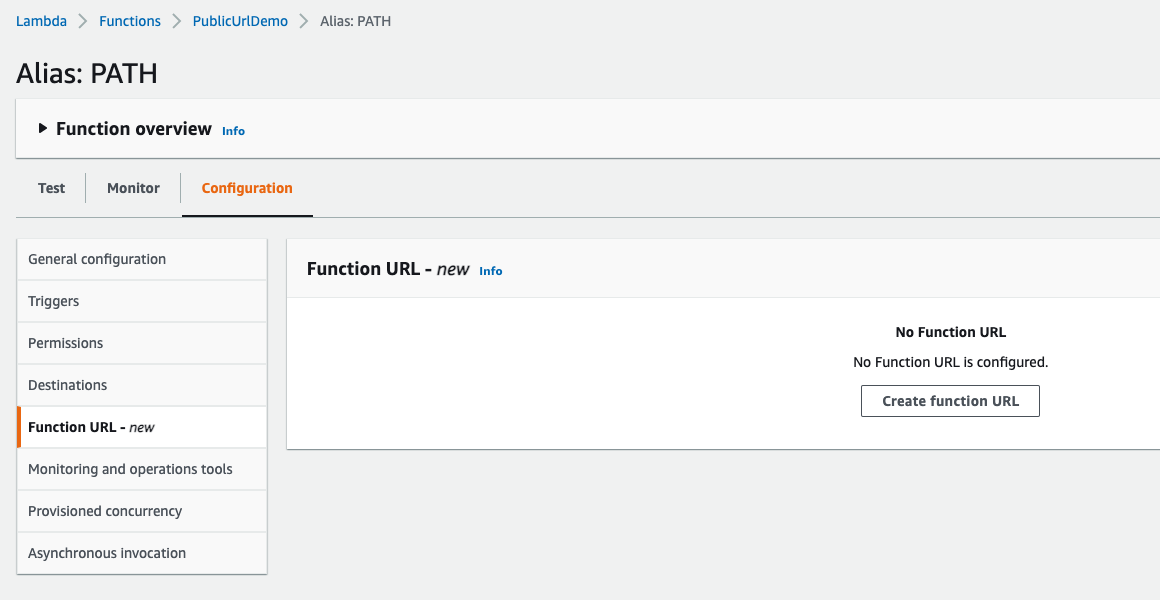
Create new URL for alias

Now you can create a new function URL for this alias. While inside the new alias, click on Create function URL button and follow the same steps you did with the main function (with NONE as authentication type).

If you go to the alias function URL section now, you should be able to see the new URL, which is entirely different from the main function URL (which points to the $LATEST version automatically):

New URL for alias

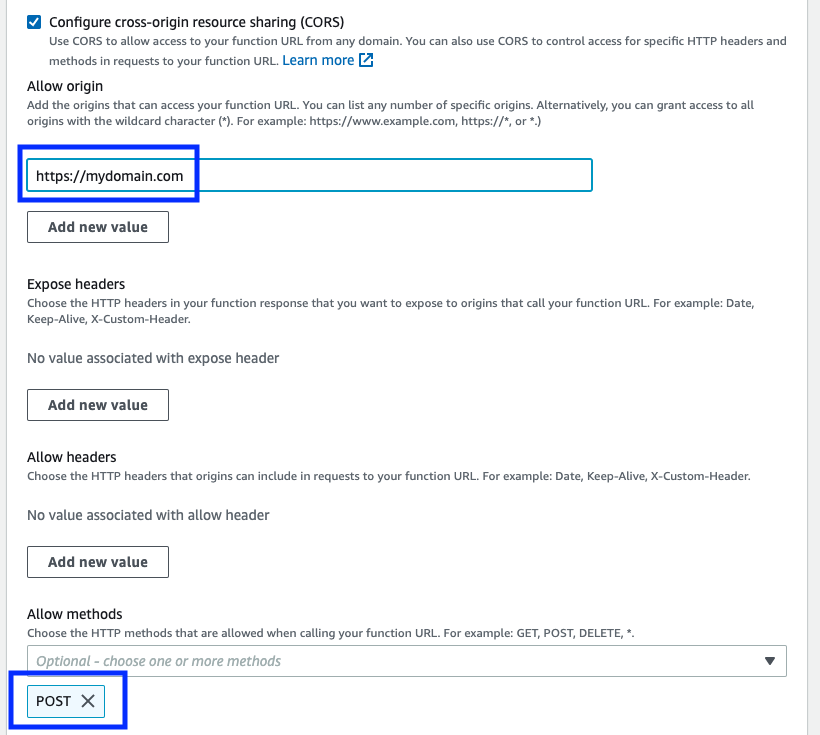
CORS

You can also enable CORS to restrict where your API can be consumed. For example, you can set your domain where your frontend lives and only accept POST requests:

CORS settings

Part 3: Clean Up

If you followed the steps of this post, you might want to clean up the resources you created. You can do so by following the steps below:

  • Delete the Lambda function (PublicUrlDemo)
  • Delete IAM policy (lambda-invoke-function-url-policy)
  • Delete IAM user (lambda-invoke-function-url-demo-user)

Conclusion

I needed a simple API to carry out a simple task on multiple occasions. My go-to service was always Lambda, but the Lambda function could only be called from within AWS services or command line using authenticated users was a deal-breaker in most scenarios. Now that we have the ability to develop APIs that can be invoked from anywhere is a significant improvement on the server overall.

Resources