-->

awssecurity iam, best_practices

When you create a new AWS account you are the root user who has unlimited access to everything. Using such a powerful user as root on a day-to-day basis is not such a good idea because if it gets compromised you may not have a way to override and/or undo the changes done by the hacker.

Using IAM user instead of root account

Instead, suggested best practice is to create an admin-level IAM account and use it for normal operations. At first I was hesitant to adopt this practice. I didn’t see the point and thought attaching AdministratorAccess policy awould make the use as powerful as root. But there’s a whole list of things that even the most powerful IAM user cannot do. Here’s the list: AWS Tasks That Require AWS Account Root User Credentials

So as you can see root user has important privileges such as closing the account and changing billing information. Even if your account gets compromised and some mailicous person gains access using an IAM account, you can still log in as root and take necessary action.

In a nutshell, based on AWS documentation the following practices are recommended:

  • Use the root user only to create your first IAM user
  • Create an IAM user for yourself as well, give that user administrative permissions, and use that IAM user for all your work.

In addition to Eric Hammond suggests in his blog to delete the root account password as well and use Forgot Password option to create a new one when needed. I keep my passwords in a password manager so if that application is compromised, the hacker can reset my password as well so I don’t follow this practice but it might come in handy if you have to write your password down somewhere.

Templated IAM user creation

It’s a good practice to create an IAM user right after you create your AWS account. It’s even a better practice to automate this process. To achieve this I created a CloudFormation template. The YAML template below does the following:

  • Creates an IAM group named administrators
  • Creates a user named admin
  • Attaches AdministratorAccess policy to the group
  • Forces the user to change their password first time they log in (by attaching IAMUserChangePassword policy to the user)
Resources:
  AdministratorsGroup:
    Type: AWS::IAM::Group
    Properties:
      GroupName: "administrators"
      ManagedPolicyArns:
        - arn:aws:iam::aws:policy/AdministratorAccess
      Path: /

  AdminUser:
    Type: AWS::IAM::User
    Properties: 
      Groups:
        - !Ref AdministratorsGroup
      LoginProfile:
        Password: "CHANGE_THIS"
        PasswordResetRequired: true
      ManagedPolicyArns:
        - arn:aws:iam::aws:policy/IAMUserChangePassword
      Path: /
      UserName: "admin"


Resources

awsdevops cloudformation

If you have a habit creating your AWS resources manually, things can get very messy very quickly. At some point you realize that you have no idea if a resource is still in use and just to be safe you leave it alone.

I found myself in this situation and decided to take advantage Infrastructure as Code paradigm using AWS CloudFormation. To start simple I decided to migrate my automated CV response application to a CloudFormation stack. Going forward this is a much efficient way to write blog posts too. Instead of writing step by step instructions I can simply post the CloudFormation stack in JSON or YAML.

Infrastructure of Code in a nutshell

Basically this approach allows you to define, manage and provision all the resources that define your system.

Advantages:

  • Changes can be source-controlled
  • Entire provisioning process can be automated
  • entire infrastructure can be easily recreated in a different account.
  • Resources can easily be identified. Tags can be used to identify which stack the resources belong to.
  • Resources can easily be clean up. Deleting a stack will delete all the resource it created.

Basic Terminology

  • Stack: All the resources used to create an infrastructure.
  • StackSet: A StackSet is a container for AWS CloudFormation stacks that lets you provision stacks across AWS accounts and regions by using a single AWS CloudFormation template.
  • Design template: This is the file YAML or JSON format that defines all the resources that will be created AWS

Where to start…

Even though you get familiar with the concepts finding where tostart can be intimidating sometimes. When it comes to CloudFormation, there are a lot of sample templates that you can start and build upon.

So here’s an easy way to get started:

Step 1: Save the following snippet to a local file such as cloudformation.sample.yaml:

Resources:
  Ec2Instance:
    Type: AWS::EC2::Instance
    Properties:
      InstanceType: t2.micro
      ImageId: ami-0aff88ed576e63e90

In the example above I’m using a stock AWS Linux AMI in London region.

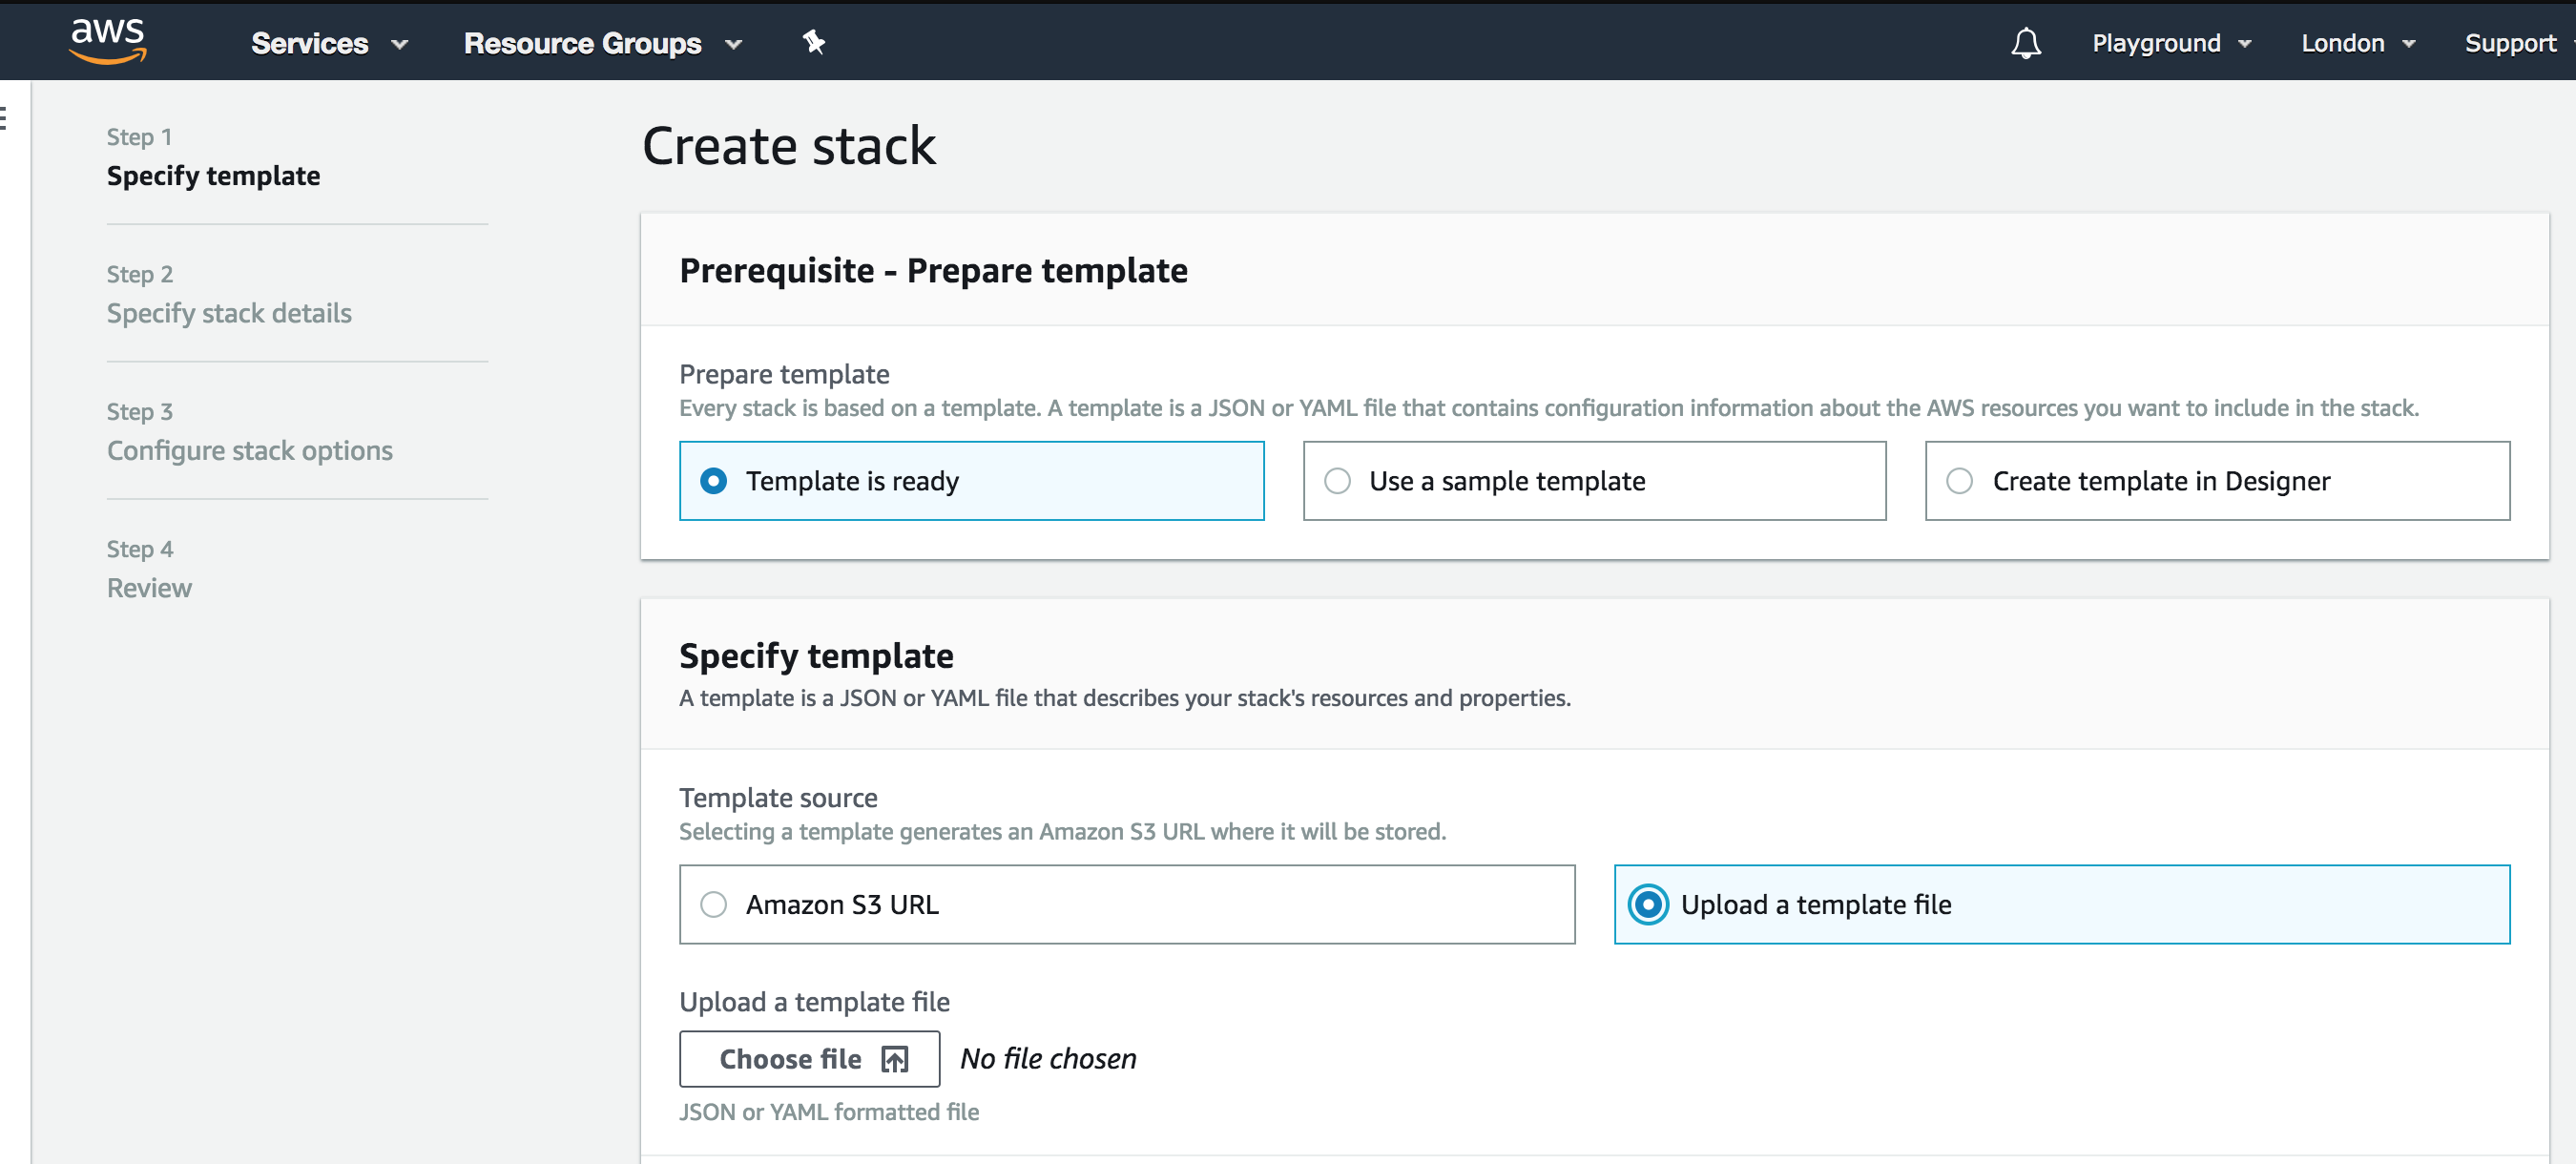
Step 2: Go to Stack and click Create Stack (Make sure you’re in EU London region otherwise AWS won’t be able to find the AMI specified in our template)

Step 3: In specify template section, select Upload a template file

Step 4: Clock Choose file to locate your file and upload your template.

Step 5: Click next and specify a stack name something like FirstStackForEC2 and click Next

Step 6: Click Next on Configure Stack Options view and in the final review step of the wizard click Create Stack.

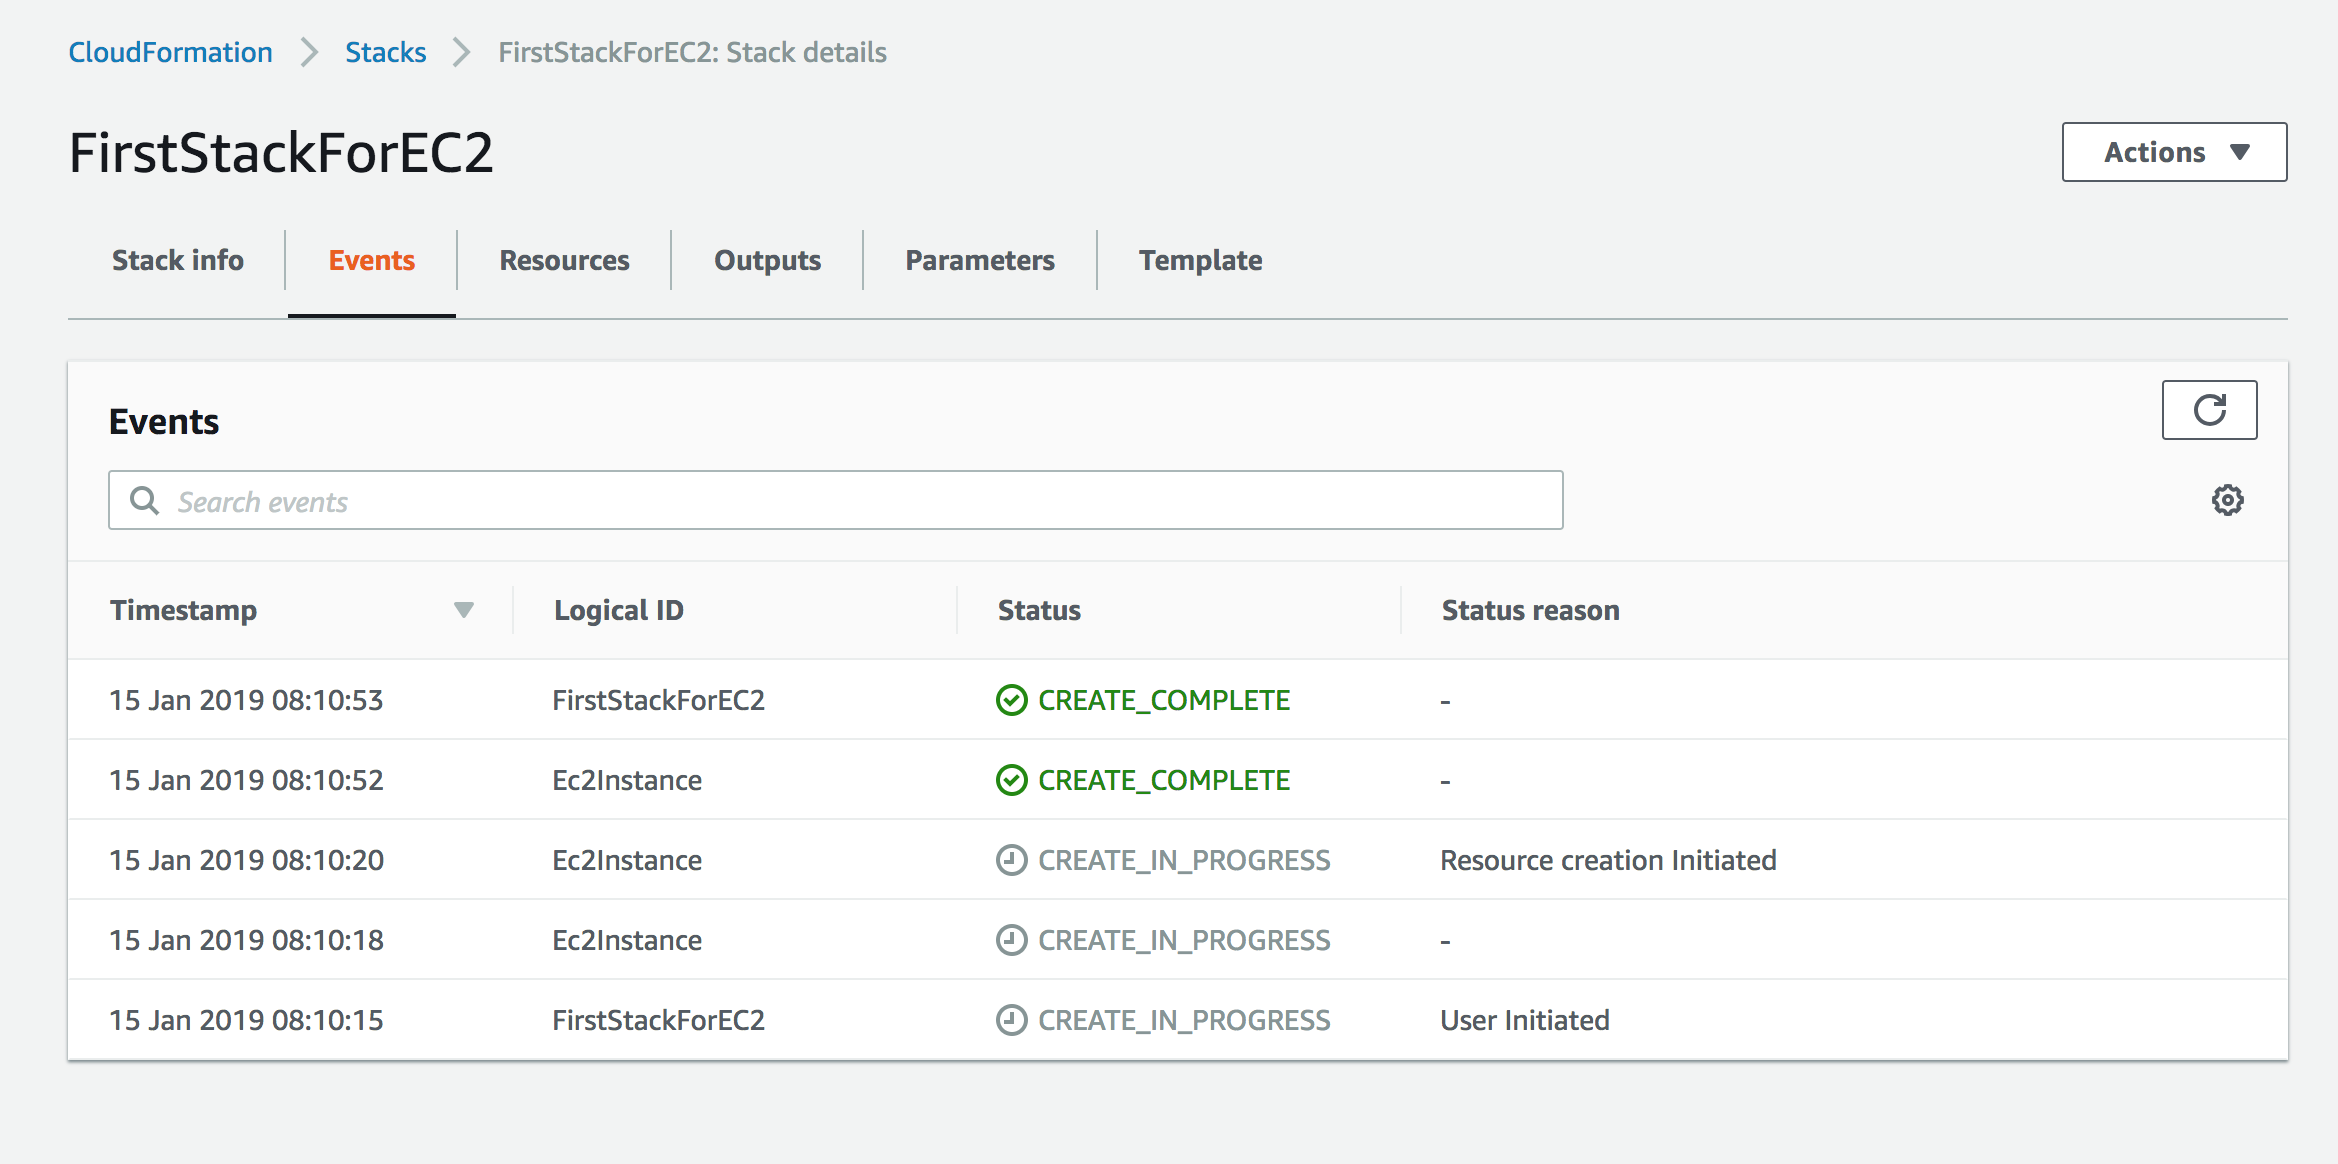
At this point you can observe the progress of your stack being created.

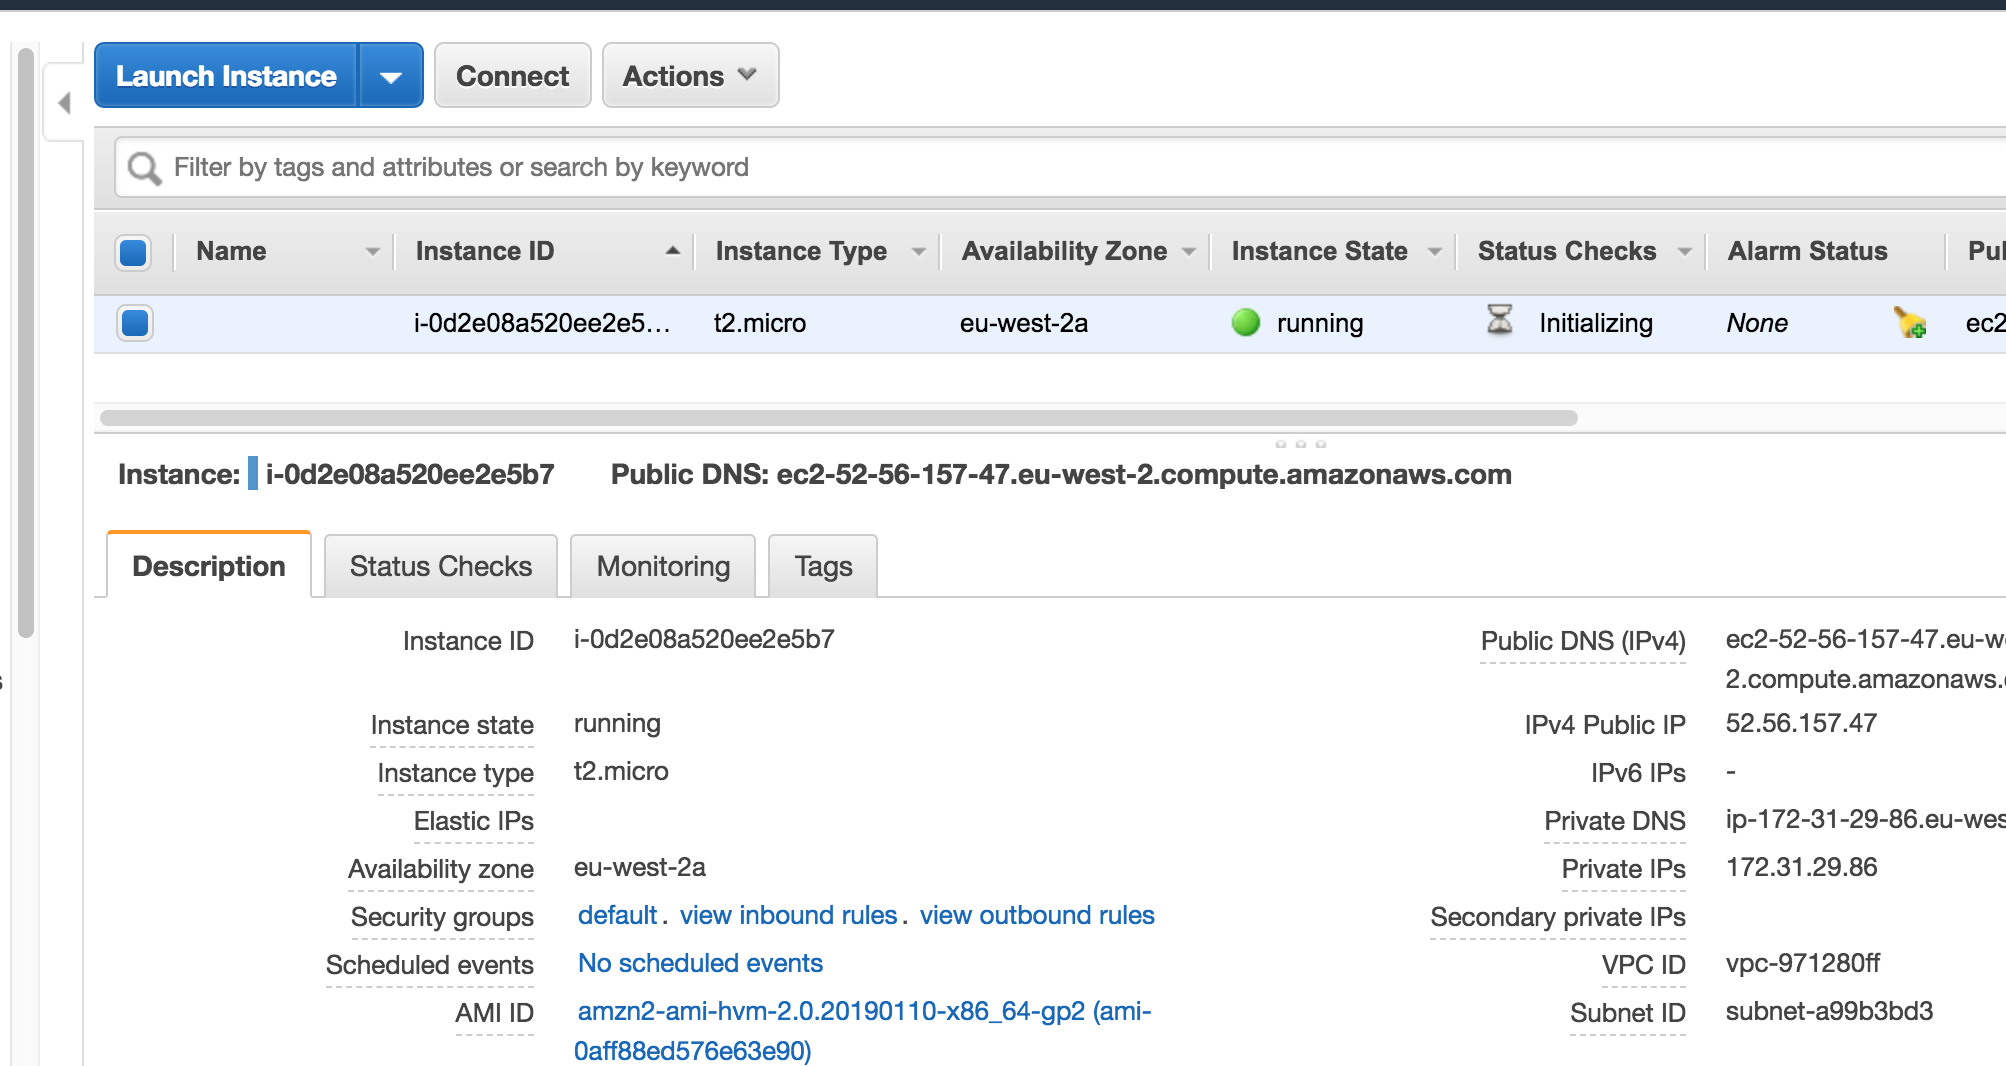
Now if you go to EC2 service in the same region you should be able to see the new instance:

If you delete the stack, it will in turn delete everything it created which is the EC2 instance in this example.

Launch Stack URLs

I always like the launch stack buttons that I see every now and then. I think there’s something magical about clicking a button and watching an entire infrastructure being created right before your eyes!

Basically clicking the Launch Stack URL opens the wizard we just used with the fields populated with the values in the template.

Step 1: Upload the template to S3 and make it publicly accessible.

Step 2: Use the following naming convention and replace the values:

https://console.aws.amazon.com/cloudformation/home?region=region#/stacks/new?stackName=stack_name&templateURL=template_location

In this example I uploaded the Launch Stack button image to my GitHub repository so that I can link to it.

Resources

awsdevops cloudwatch, custom_metric

I had an issue recently with an EC2 instance running out of disk space. Unfortunately free disk space is not a metric that comes out of the box with AWS CloudWatch. This post is about implementing a custom metric and getting notifications via AWs CloudWatch based on that metric.

Steps to monitor disk space with CloudWatch

Step 1: Download sample config file

AWS provides a sample JSON file at this location: https://s3.amazonaws.com/ec2-downloads-windows/CloudWatchConfig/AWS.EC2.Windows.CloudWatch.json

Download a copy of this file.

Step 2: Set IsEnabled to true

By default it comes disabled so set the value as shown below:

"IsEnabled": true

Step 3: Add the custom metric for disk usage

Add the custom metric to monitor disk space:

{
    "Id": "PerformanceCounterDisk",
    "FullName": "AWS.EC2.Windows.CloudWatch.PerformanceCounterComponent.PerformanceCounterInputComponent,AWS.EC2.Windows.CloudWatch",
    "Parameters": {
        "CategoryName": "LogicalDisk",
        "CounterName": "% Free Space",
        "InstanceName": "C:",
        "MetricName": "FreeDiskPercentage",
        "Unit": "Percent",
        "DimensionName": "InstanceId",
        "DimensionValue": "{instance_id}"
    }
}

Step 4: Add the new metric to flows

After defining the metric we need to add it to the flows so that it can be sent to CloudWatch. To achieve this update the flows section as shown below:

"Flows": {
    "Flows": 
    [
        "(ApplicationEventLog,SystemEventLog),CloudWatchLogs",
        "(PerformanceCounter,PerformanceCounterDisk),CloudWatch"
    ]
}

Step 5: Add IAM role to server

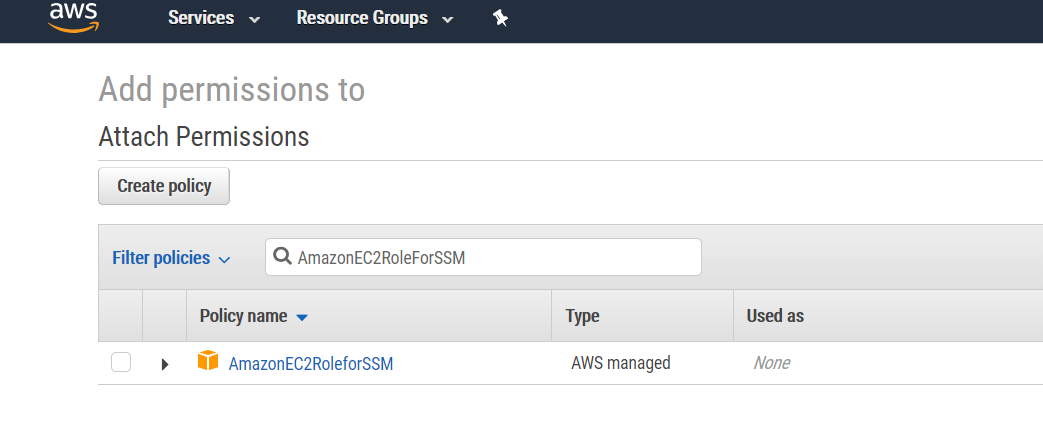
It’s a good practice to manage permissions of EC2 instances via IAM roles assigned to the machine. To enable sending logs to CloudWatch add AmazonEC2RoleForSSM policy to the machine’s role

Without this role SSM agent service gets an access denied error.

Step 6: Restart Amazon SSM Agent service

Either by using Windows Services Manager or running the following command:

Restart-Service AmazonSSMAgent

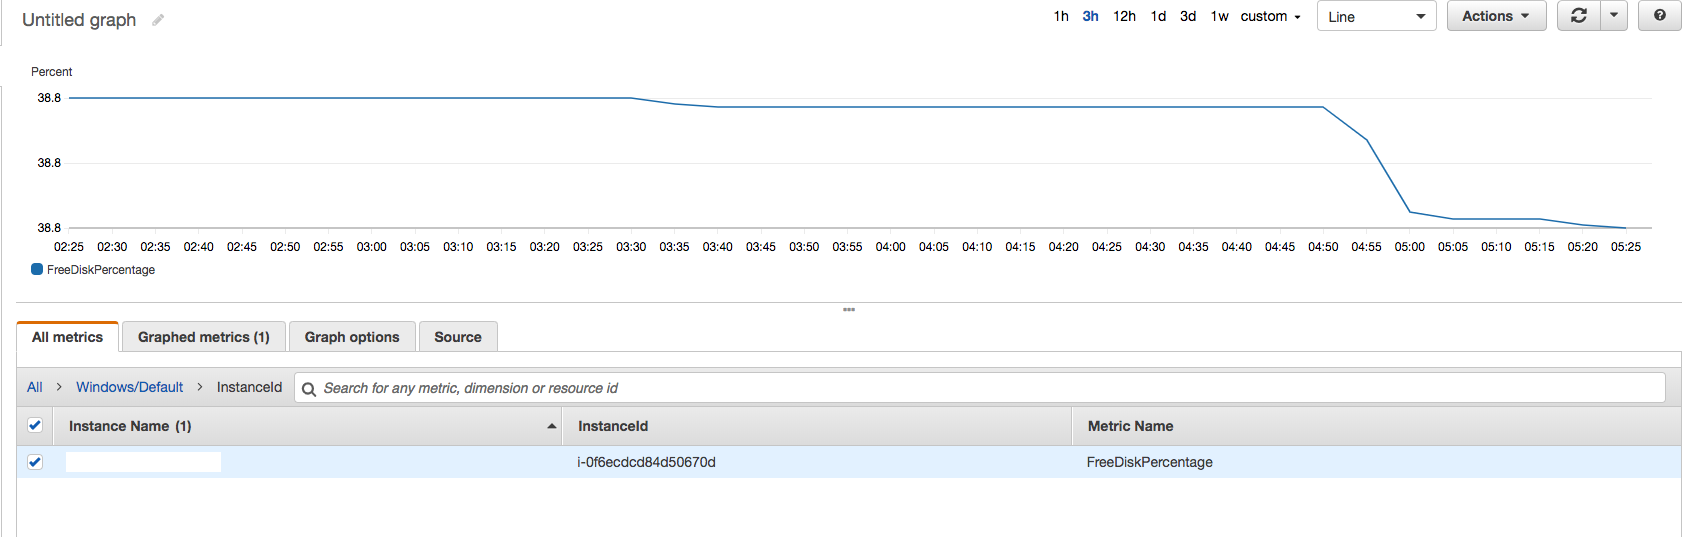
Once this is all done wait a few minutes and check CloudWatch metrics. Under All -> Windows/Default you should be able to see new metric under InstanceId group (as that’s what we are using to group the logs). And when you click the metric you should be able to see a nice time-based graph of free disk space on the server:

Notes

  • It’s useful to know where SSM Agent’s logs are stored. They can be found in this path:

    %PROGRAMDATA%\Amazon\SSM\Logs\

  • The service reports every 5 minutes. The PollInterval in the JSON file is in seconds and is different than service report interval.

Resources