-->

hobby raspberry_pi, dymo, label_printer, print_server

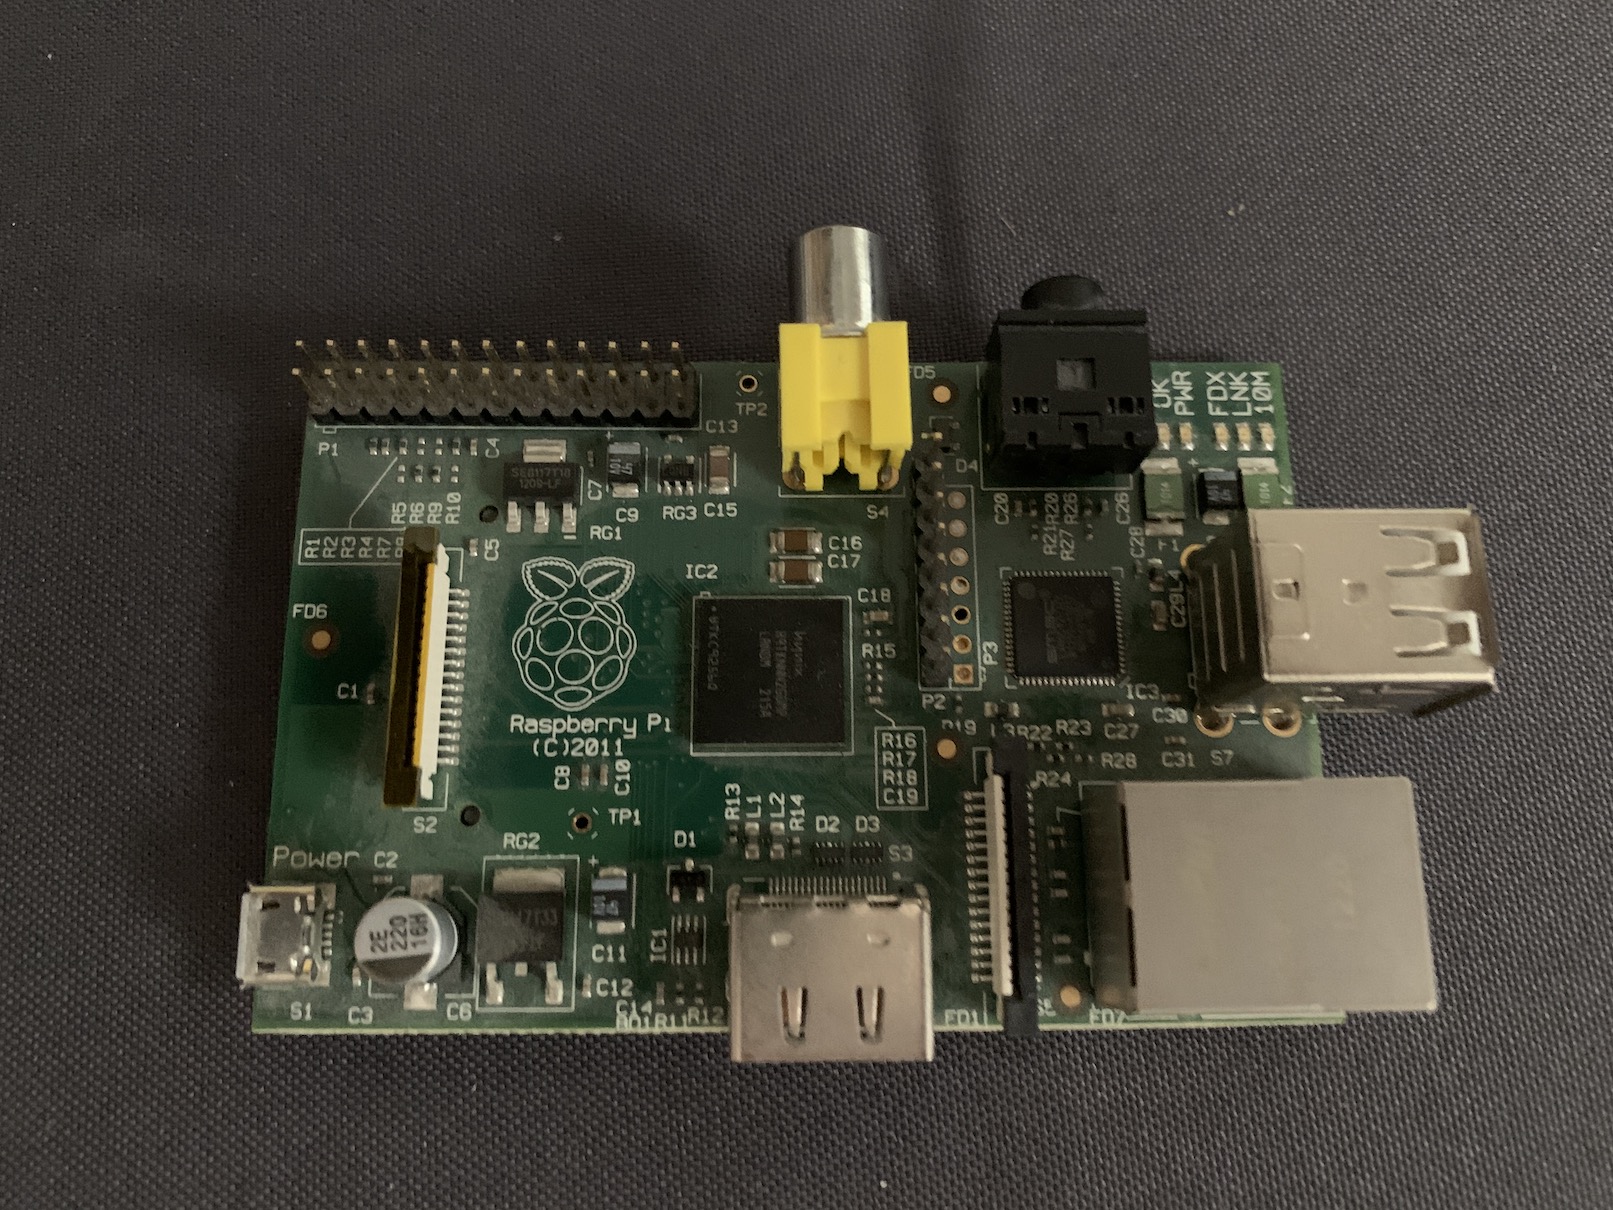
Raspberry Pi is a low-powered computer, making it great for always-on jobs such as running a print server. In this tutorial, we will add a Dymo LabelWriter 450 printer to a Raspberry Pi and use it as a server on the local network.

Step 1: Ensure the CUPS server is installed on the Raspberry Pi. If it’s not installed, run the following command:

sudo apt install cups

Step 2: Connect to the admin page. By default, you cannot access the admin page over the network. To change this, SSH into the Pi and edit cupsd.conf:

sudo nano /etc/cups/cupsd.conf

a. Update Listen line to

Listen 0.0.0.0:631

b. Update the restrictions to look like this:

# Restrict access to the admin pages...
<Location /admin>
  Order allow,deny
  Allow all
</Location>

# Restrict access to configuration files...
<Location /admin/conf>
  AuthType Default
  Require user @SYSTEM
  Order allow,deny
</Location>

c. Restart the service

sudo service cups restart

Now to go http://{IP OF THE PI}:631/admin

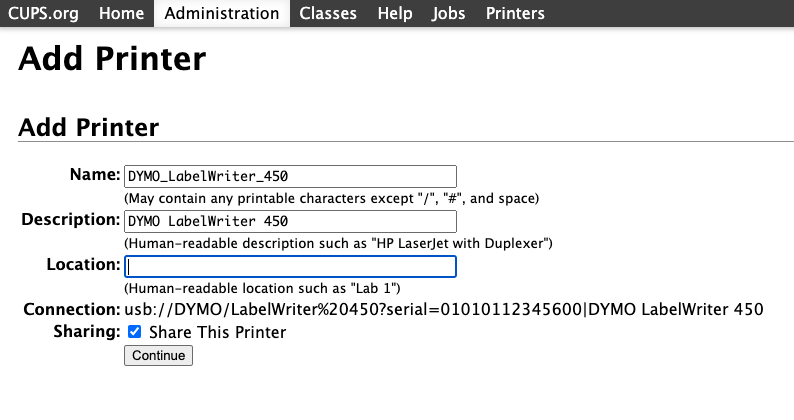
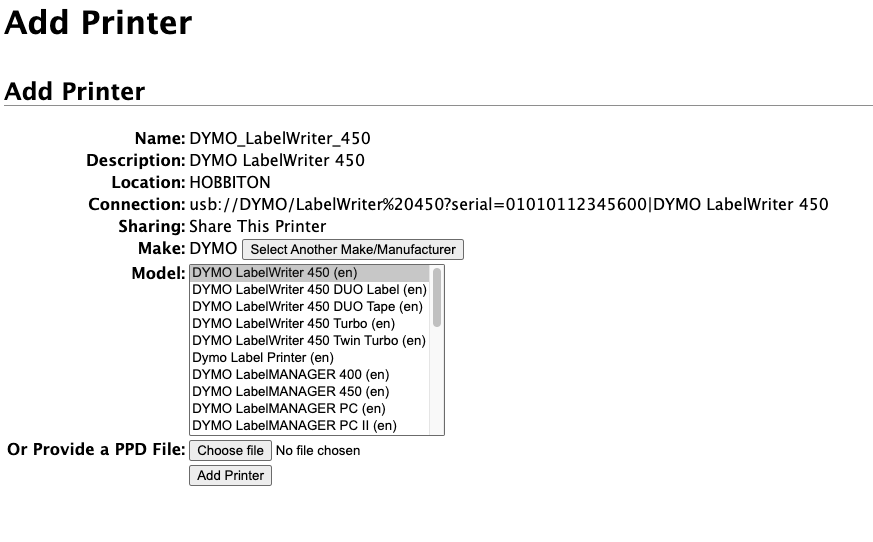
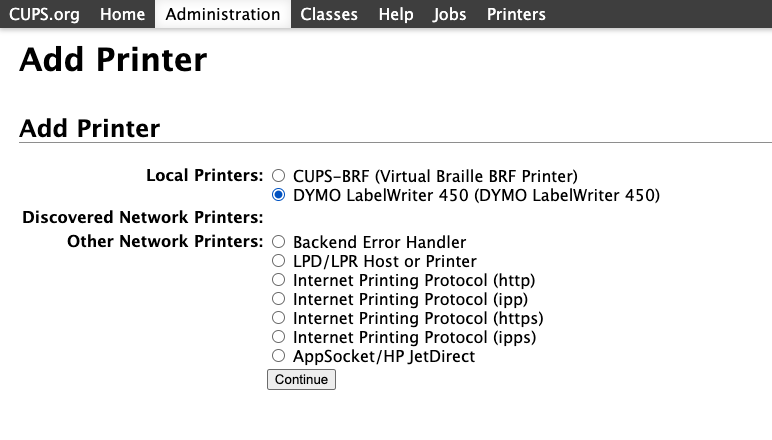
Step 3: Click Add Printer

Select DYMO LabelWriter 450 from your local printers list

Step 4: Update the name if you like, set a location and check the Share This Printer option.

Step 5: Review the settings and click Add Printer again.

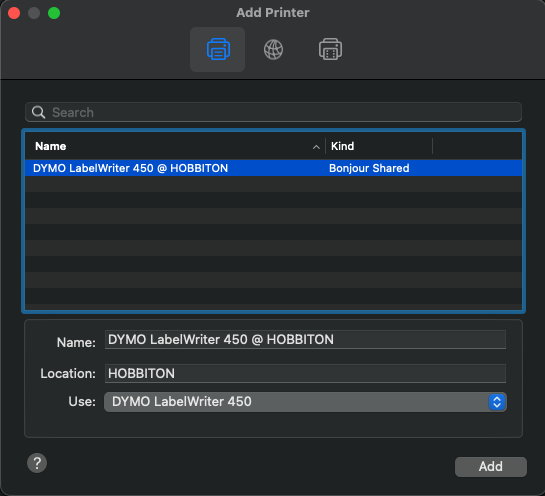
Step 6: Add the printer to your computer’s printer utility.

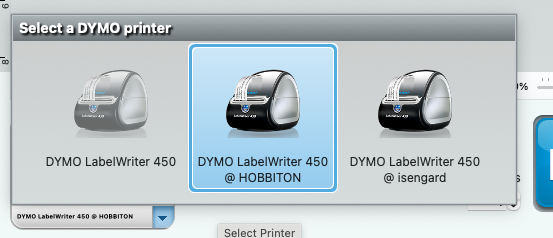
Step 7: Open the DYMO Label Utility, and you should see your printer in the printer list.

Step 8: Print!

That’s it! Now you can have your printer available all the time over the network.

hobby kodi

If you followed the previous post and started using Kodi, you might be wondering what else you can do with it other than sharing videos over the network. Kodi has great community support and offers many add-ons. One of those add-ons is for YouTube. The setup process can be tricky for some users, so I’d recommend reviewing the pros & cons at the end of the article. Also, skim through the steps involved before you start to have a good idea of what you are getting into.

Let’s get started with the installation.

Part 1: Install YouTube Add-On on Kodi

Step 1: Select Add-ons on the left menu.
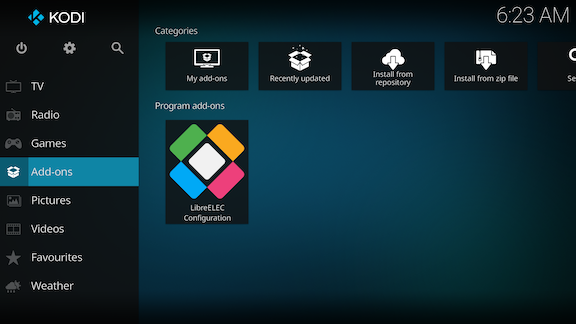
Kodi add-ons screen

Step 2: Click the Enter add-on browser button in the middle of the screen.
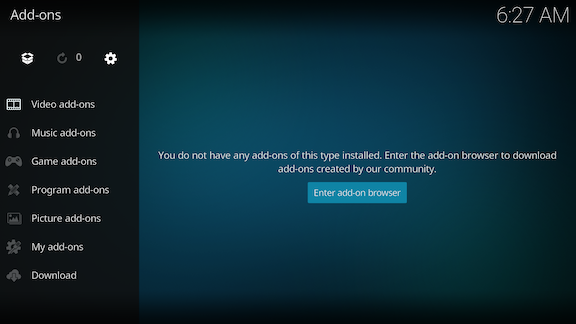
Add-ons showing the menu

Step 3: Scroll down and click on the YouTube add-on.
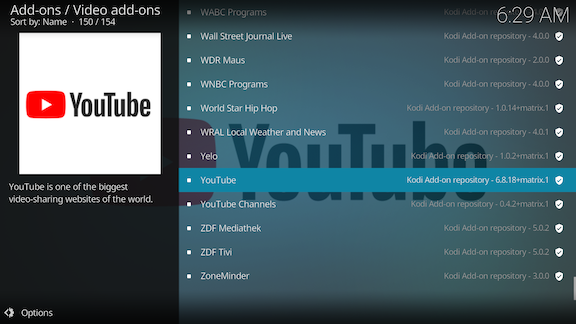
Video add-ons with YouTube selected

Step 4: Click the Install button at the bottom right of the screen.
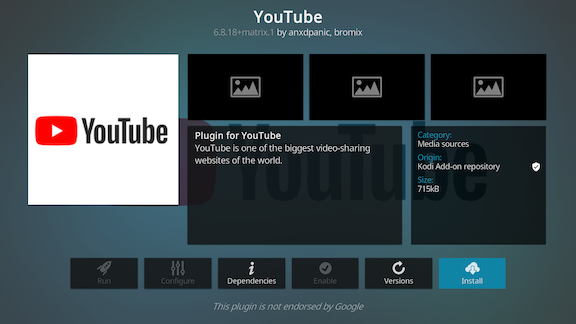
YouTube add-on properties with Install button highlighted

Step 5: If prompted to install additional add-ons such as InputStream Helper, click OK.
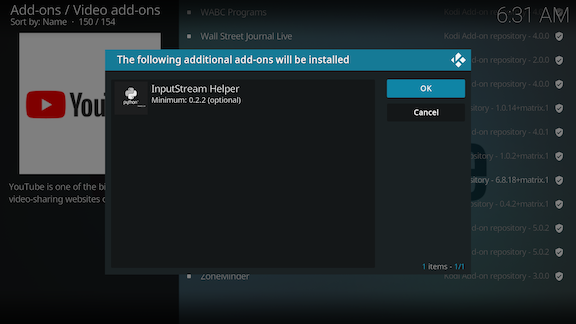
Dialog box asking to install additional add-ons

Step 6: Wait for the installation to complete.
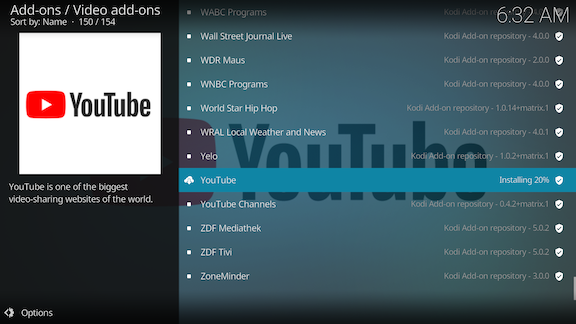
YouTube installation in progress

Step 7: When prompted to Execute setup-wizard, select Yes.
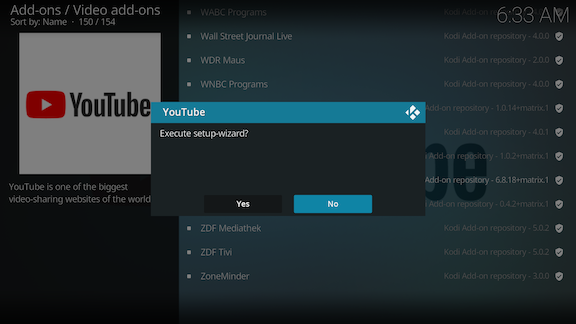
Dialog box asking to execute setup wizard

  • Select your language and region
  • Decide if you want to perform geolocation. This is used in My Location settings.

Step 8: You should see a checkmark next to the YouTube add-on indicating that it has been successfully installed.
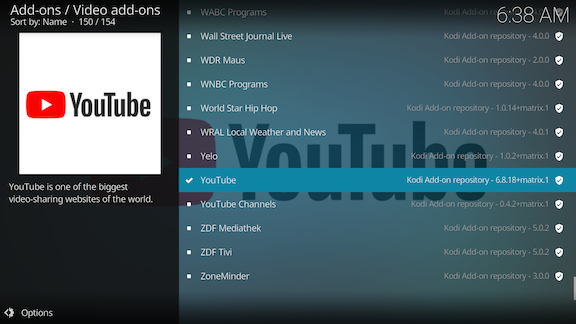
YouTube installation complete

Step 9: Test your installation by clicking on Add-ons on the left menu and YouTube add-on. You should see a home screen like this:
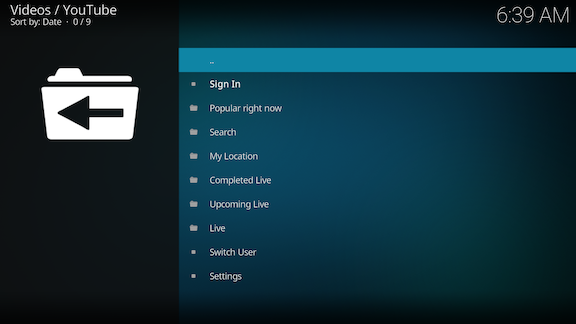
YouTube add-on main screen

Now that you have the YouTube add-on running on your Kodi let’s set up your Google account to generate API keys.

Part 2: Create YouTube API Keys

YouTube add-on requires you to enter your own API keys. This way, all the API calls the add-on makes will be made with your keys.

Step 1: Sign in to Google Cloud Platform with your Google account (If this is your first time, agree to the Terms and Conditions and continue).
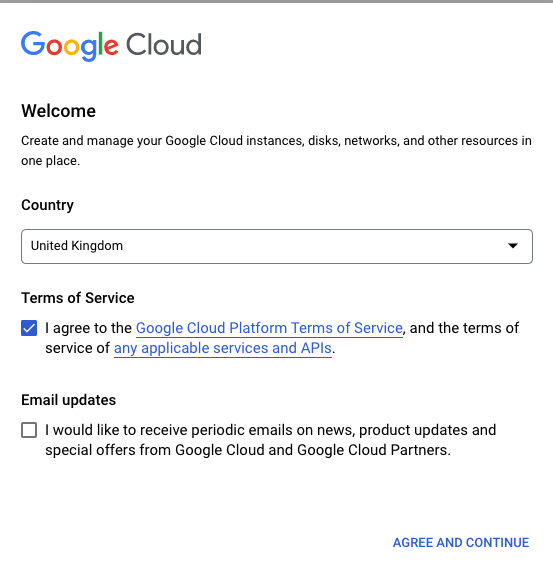
Google Cloud Terms of Service agreement screen

Step 2: Click the Create Project button at the top right:
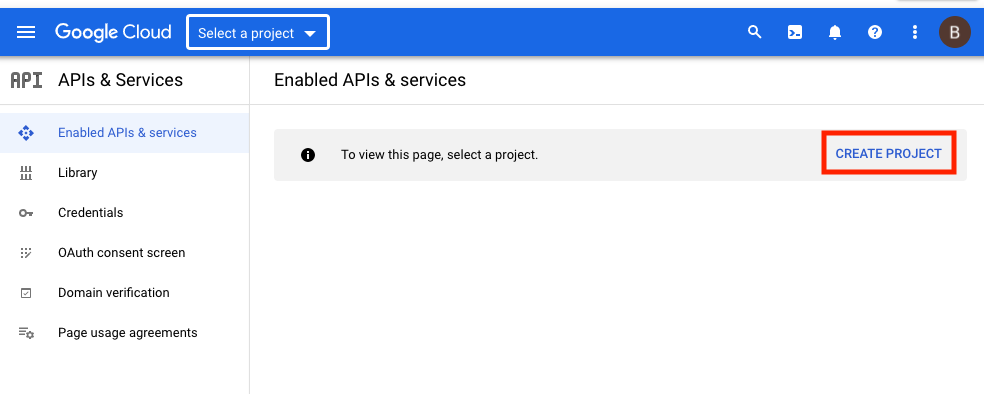
Create Project in Google Cloud

Step 3: Give your project a descriptive name and click Create.
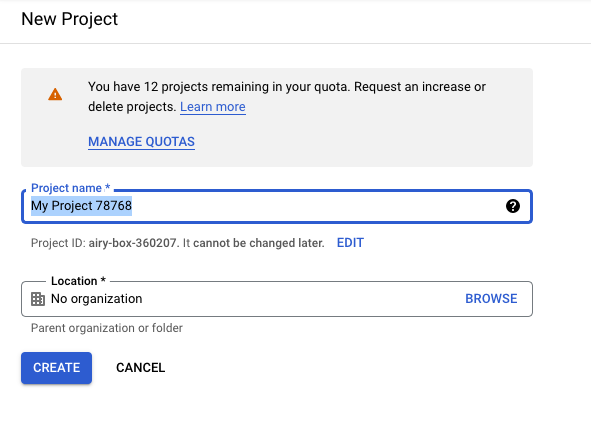
Enter a Project Name

Step 4: Click APIs & ServicesLibrary on the left menu

Step 5: Search YouTube Data API in the API Library and select the first item in the auto-complete (youtube data api v3 in this example)
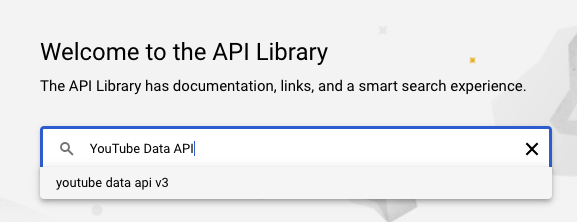
Search YouTube Data API

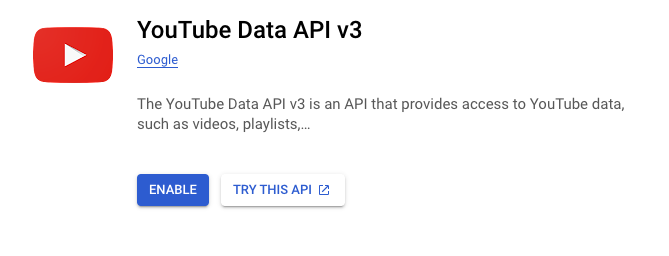
Step 6: Click on YouTube Data API v3 again
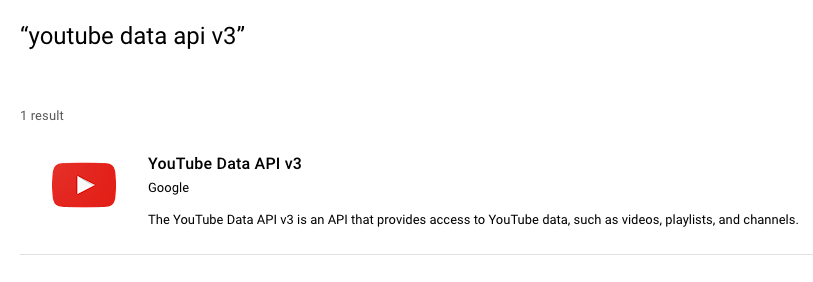
Select YouTube Data API v3

Step 7: Click the Enable button

Enable YouTube API

Step 8: Click Credentials on the left menu

Step 9: Click Create Credentials and select API key
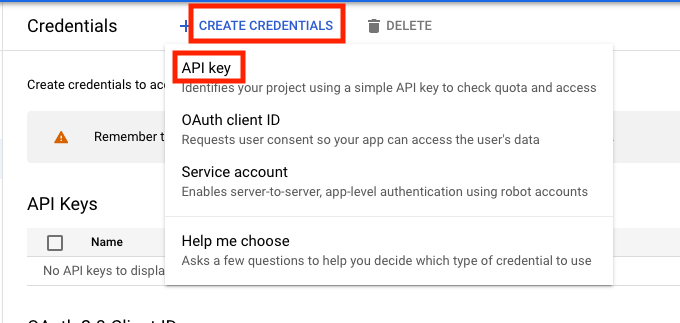
Create API key

Step 10: Note down your API key and click the Edit API key button.
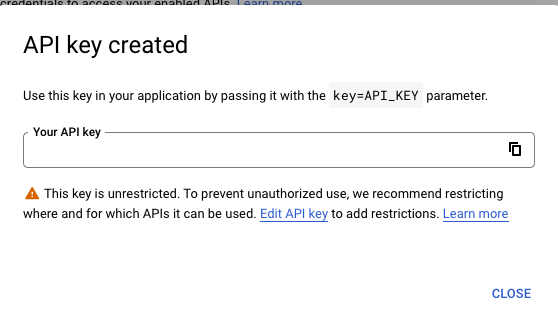
Write down API key

Step 11: As per the warning above, the key is unrestricted by default. Click on Restrict key option, select YouTube Data API v3 and click Save
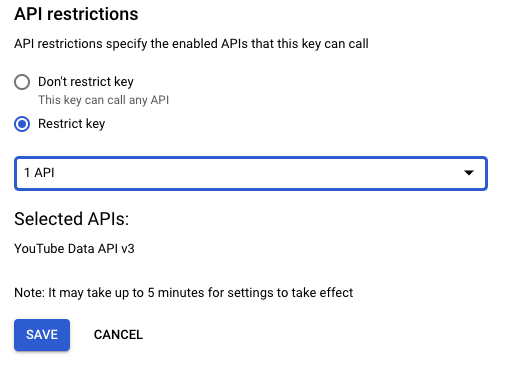
Restrict API usage yo YouTube

Step 12: Click OAuth consent screen on the left menu

Step 13: Select External and click Create.
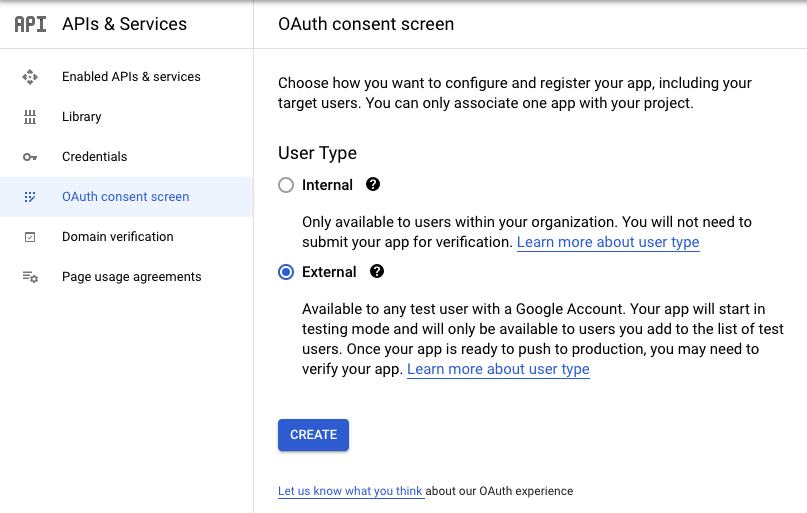
OAuth consent screen

Step 14: Give a descriptive name to the app, such as Kodi YouTube AddOn and select your email as the User support email.
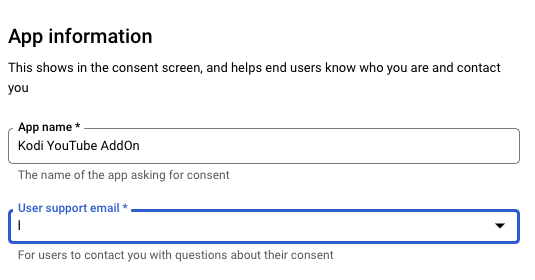
App name

Then scroll down to the bottom and enter your email address again as Developer contact information, and click Save and Continue.
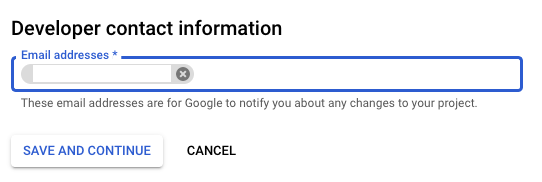
Developer contact information

Step 14: Click Save and Continue on the Scopes and Test users pages and click the Back to dashboard button on the Summary page.

Step 15: Click Credentials again and Create Credentials. This time select OAuth client ID from the menu.
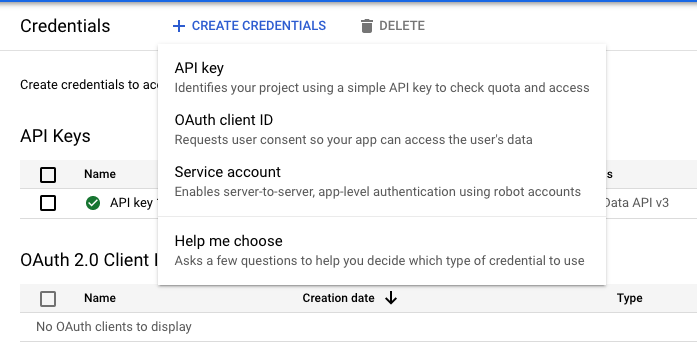
Create OAuth Client ID

Step 16: Select TVs and Limited Input Devices from the list. give it a name (such as your Kodi instance name) and click Create.
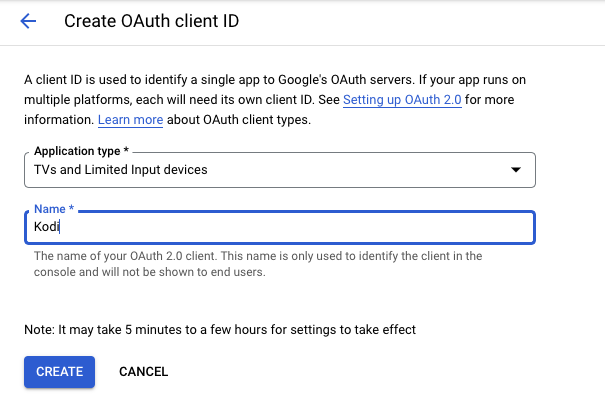
Select application type and name

Step 17: Note down your client ID and client secret. Then, click OK.
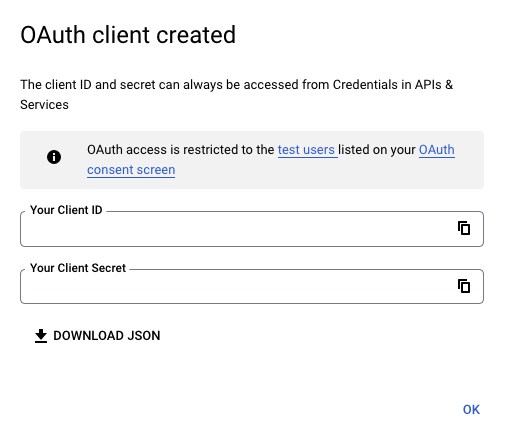
Write down OAuth client ID and secret

The next step is to enter the API key and the OAuth credentials in your YouTube Add-On. Since the add-on is running on your Raspberry Pi, entering these long random values is not easy. The easiest way to do that is to enter it by using the HTTP server. In the next part, you will configure your add-on and set up your user.

Part 3: Configure YouTube Add-On

Step 1: Enable the API configuration page by turning it on Settings → API
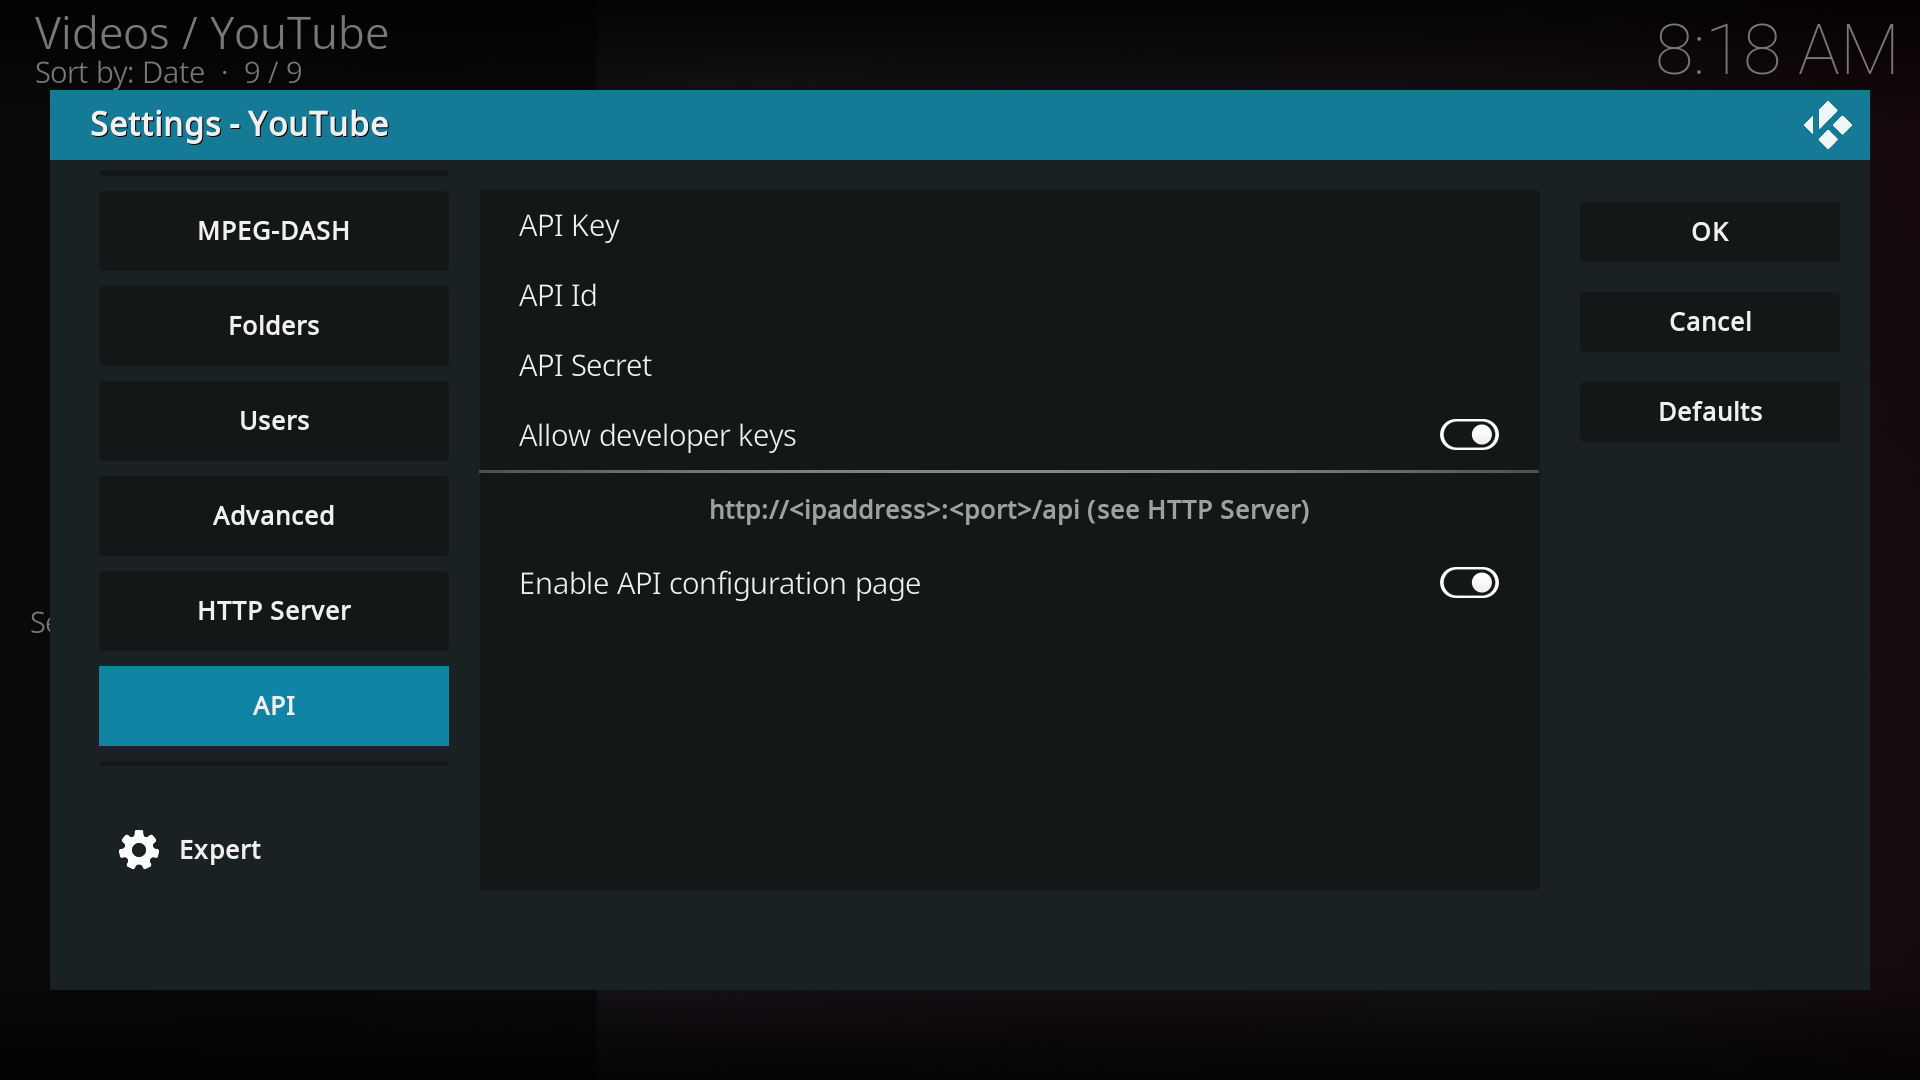
Enable API configuration page

Step 2: Then, click HTTP server and note the port it’s running on.
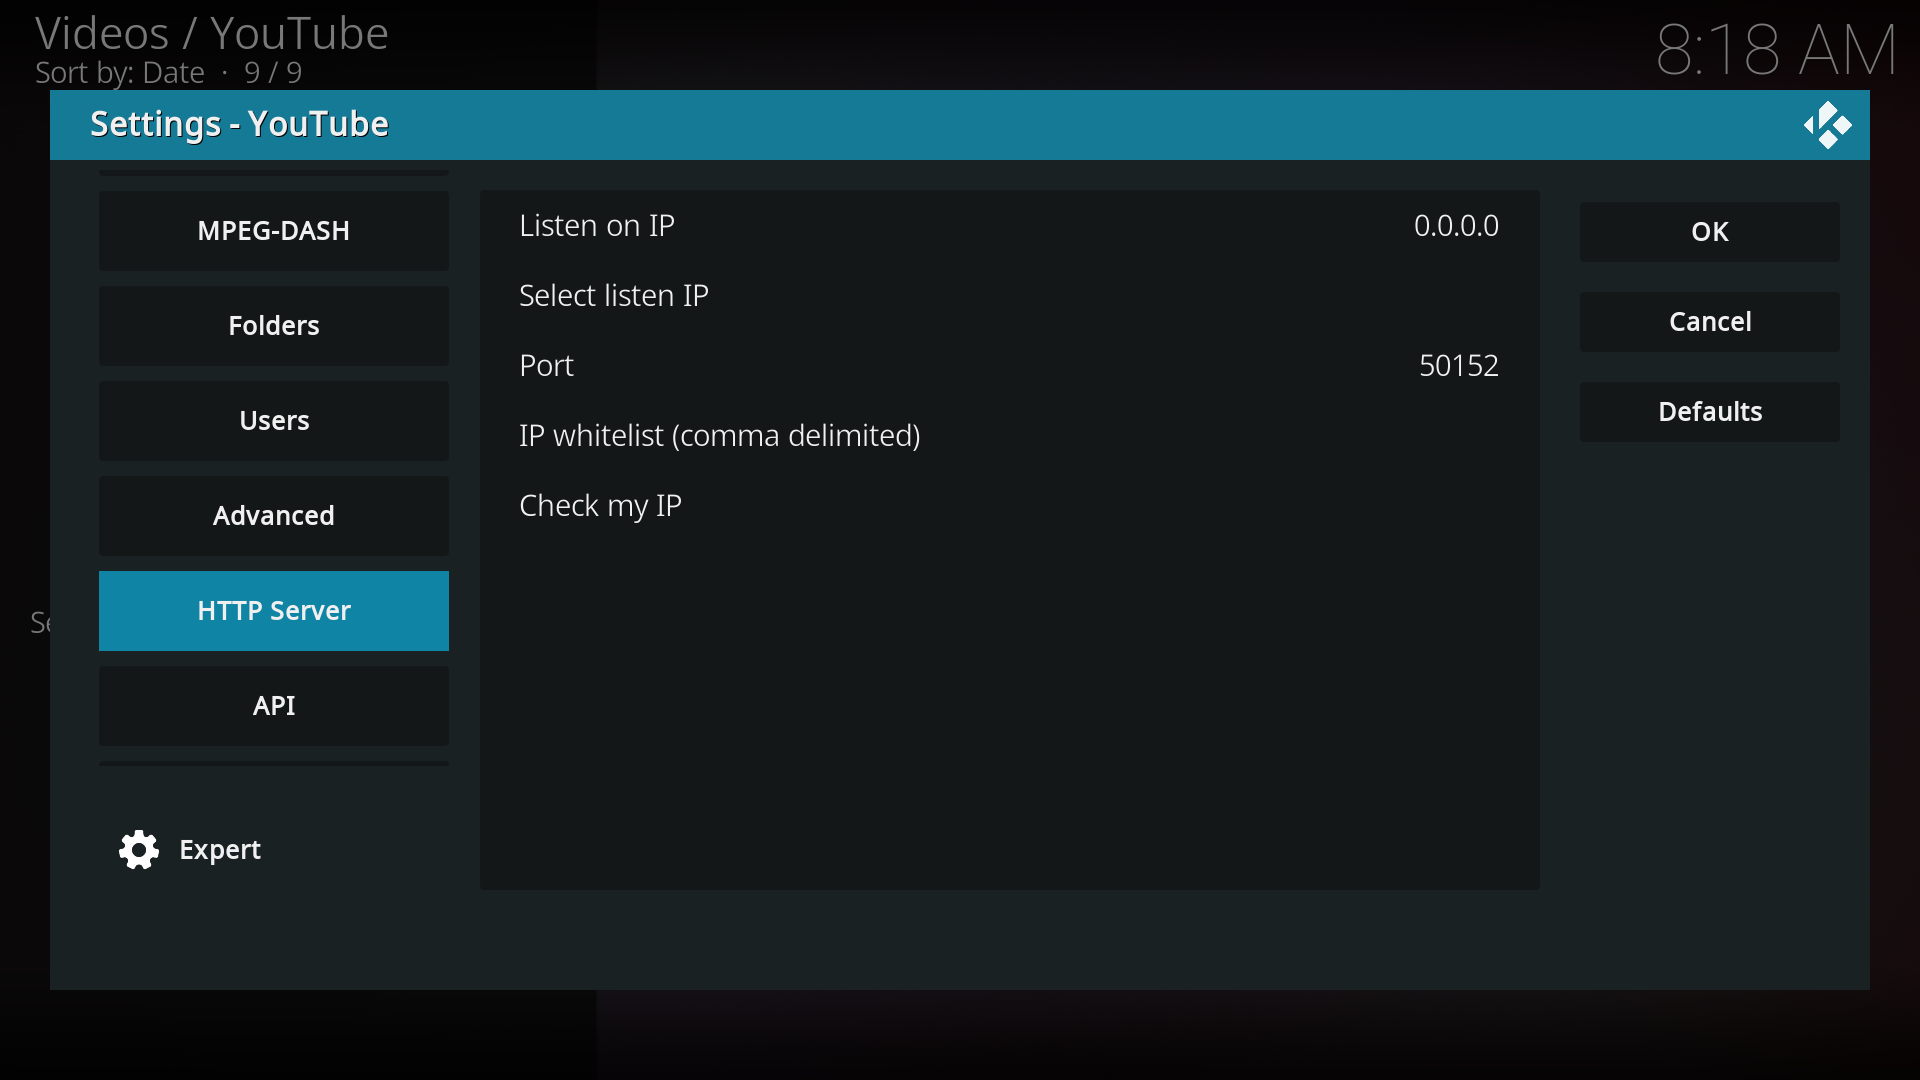
HTTP server settings

Step 3: On your computer, go to the URL: http://{Kodi IP}:{HTTP Server Port}/api

You should see a page like this:
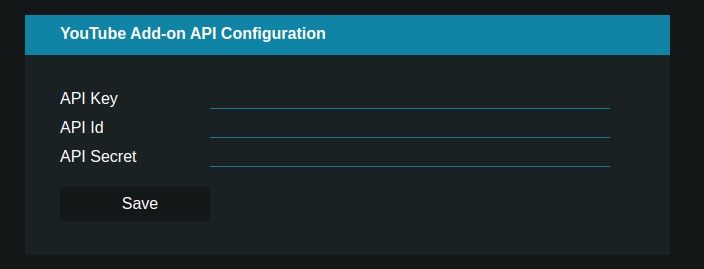
API key page

Enter your API key, client ID (as API Id) and client secret (as API secret). Then, click Save.
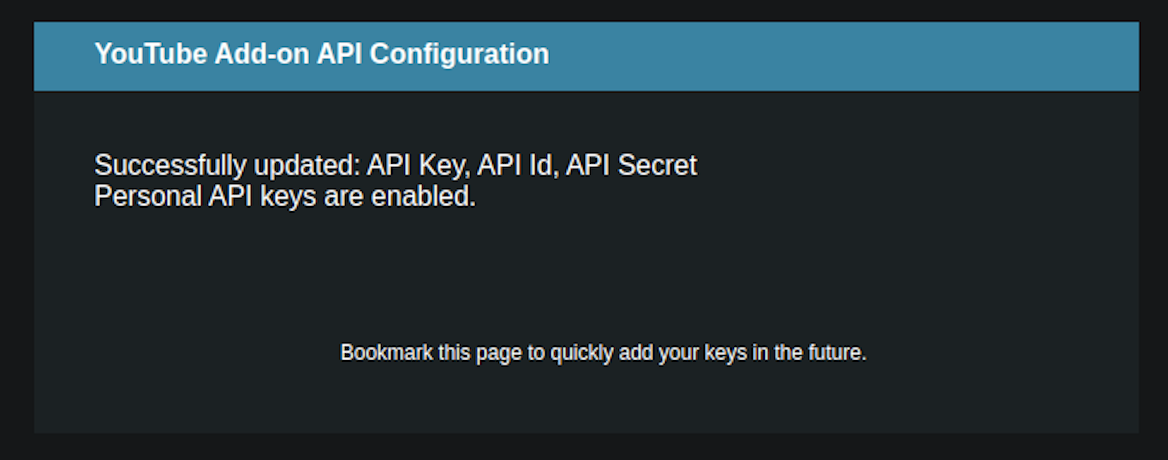
Success message

Make sure to turn off the Enable API configuration page after you’ve entered your credentials.

Step 4: Now, go back to your Kodi instance and open the add-on. Click Sign In.
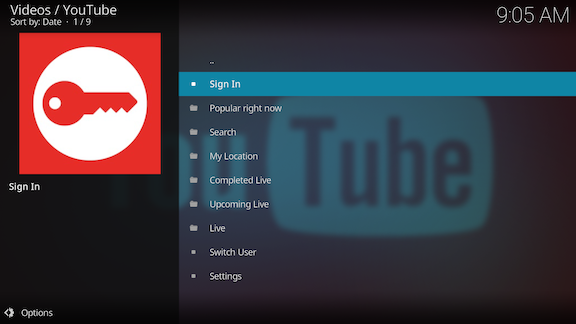
Kodi main screen

Step 5: As the message says, you must sign in twice. Click OK to dismiss the message.
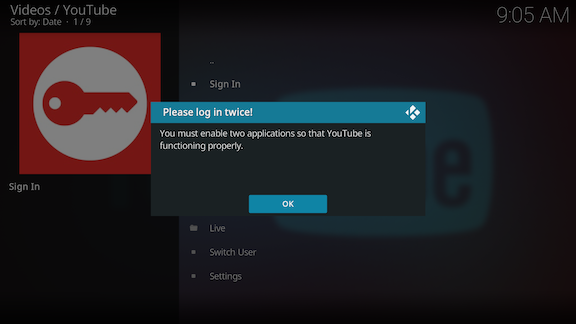
Log in twice message

Step 6: You should see a code on your Kodi screen.
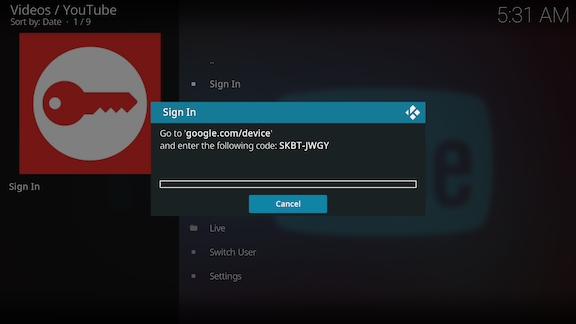
Authorization code

Go to google.com/device and enter the code on your computer.
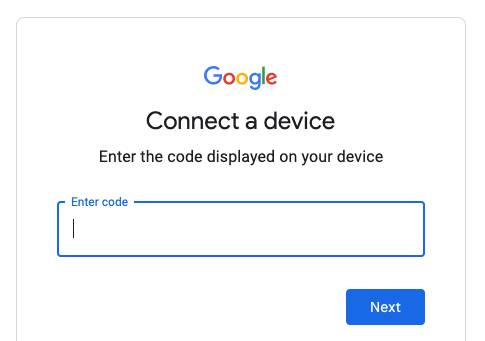
Connect a device screen

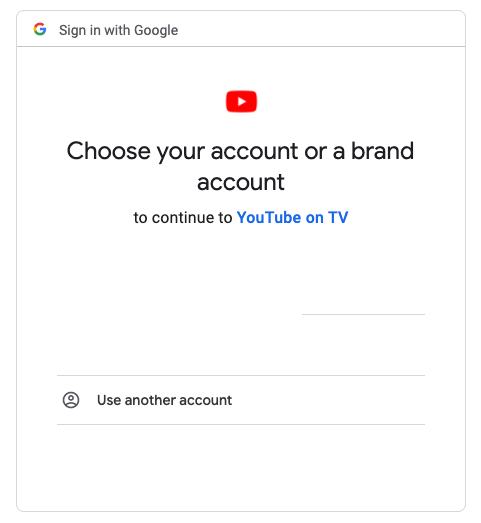
Step 7: Select the account to use

Select account to use

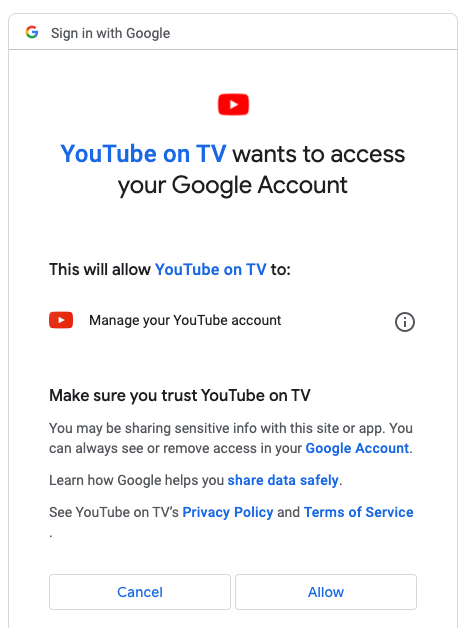
Step 8: Click Allow

Allow access

Step 9: You should see a successful connection message
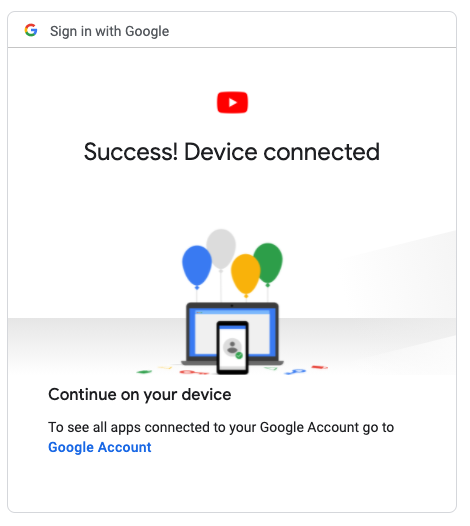
Successful connection message

Step 10: You should see a new code on your Kodi screen. Repeat steps 6 - 9 to authorize the app again. If all goes well, you should now see more items in the YouTube menu, such as My Subscriptions. You can now browse your videos, channels etc. 🎉
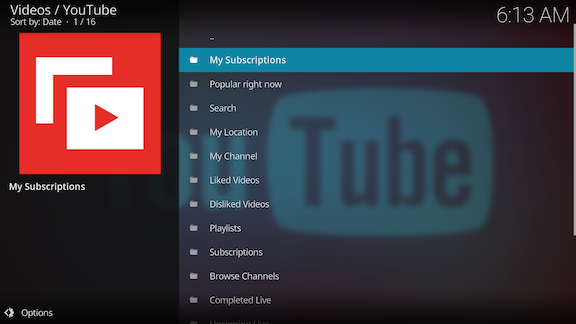
Kodi main screen with logged in user

Troubleshooting Second Authorization: 403 Access Denied Error

If you got an error during the 2nd authorization that looks like this
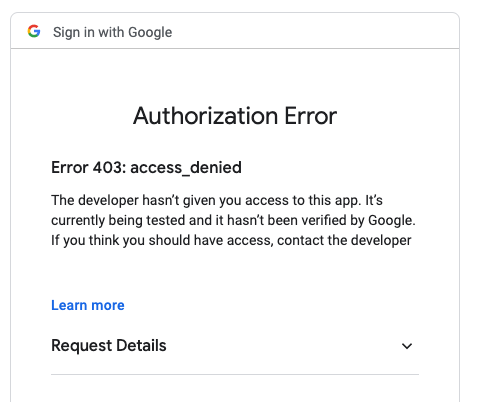
403 access denied error

Then, you have to follow the steps below:

Step 1: Click APIs & ServicesOAuth Consent Screen. Your app should be in Testing status.
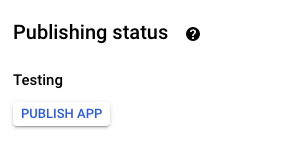
Publishing status showing Testing

Step 2: Click Publish App and confirm when asked to Push to Production
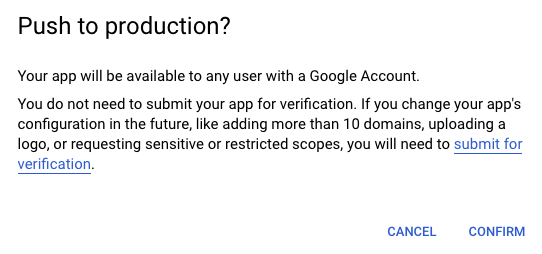
Confirmation to push to production

Step 3: Go to google.com/device and enter the code again.

Step 4: You will see a warning message saying Google hasn’t verified this app. Click the Advanced link.
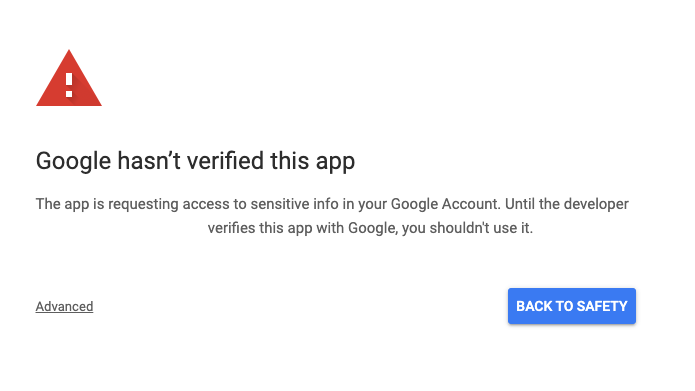
"Google hasn't verified this app" warning

Step 5: Click Go to {YOUR APP NAME} (unsafe) link
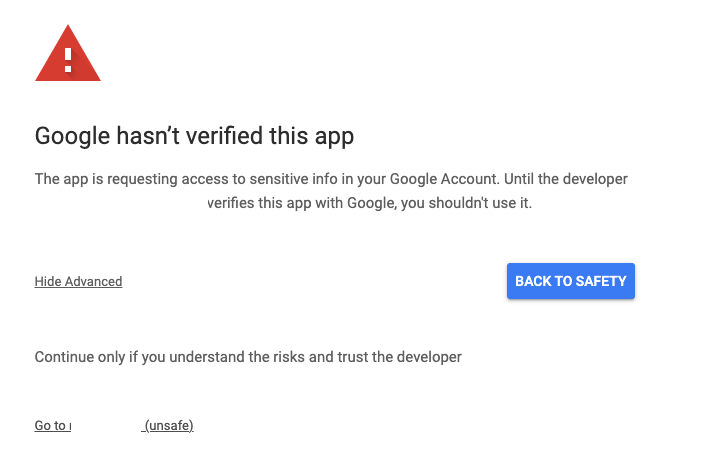
Go to app link showing

You should now see on your Kodi screen that you are logged in and see My Subscriptions in the menu.

Part 4: Usage and Review

Congratulations on completing a lengthy setup. See below a list of pros and cons based on the setup and initial usage experience:

Pros & Cons

✅ Pros

❌ Cons

  • Setup is cumbersome
  • User experience could be better

Even though the user experience feels a bit different initially, I hope it will grow on me.

👍 Multiple Users

You can create multiple users and easily switch between the users. You can create a new user by clicking Settings → Users → Add a user. Adding a new user involves Steps 4 - 10 of Part 3.
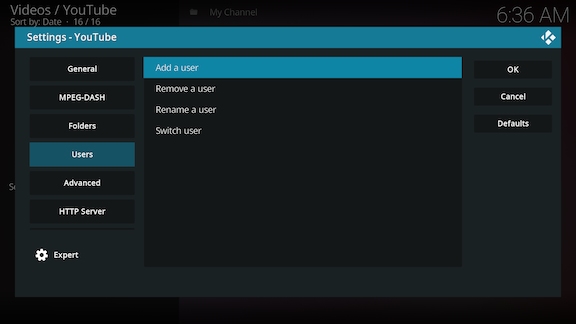
Add a user screen

Then, you can easily switch between accounts by using the Switch User option.
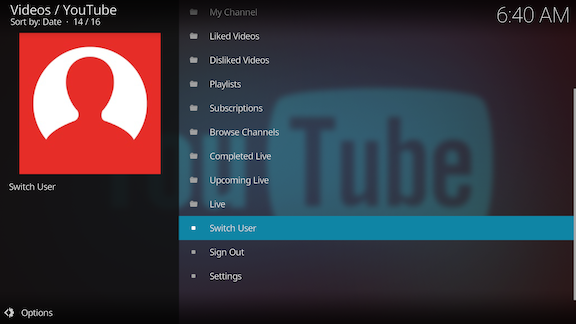
Switch user menu

Even though you sign in to a different YouTube account, it still uses the same API key to fetch your content, so you won’t have to generate new keys.

Conclusion

Setting up a home lab requires some work and maintenance, but in the end, it’s rewarding as well. In this tutorial, you learned how to install the YouTube add-on on Kodi and how to configure Google API to access your YouTube account. I hope you enjoyed it. See you in the next post.

hobby raspberry_pi, kodi

I’ve been using Raspberry Pis since their first release for various purposes (I still have all of them, and they still work with the latest OS even after a decade).

Image of an old Raspberry Pi Model B manufactured in 2011

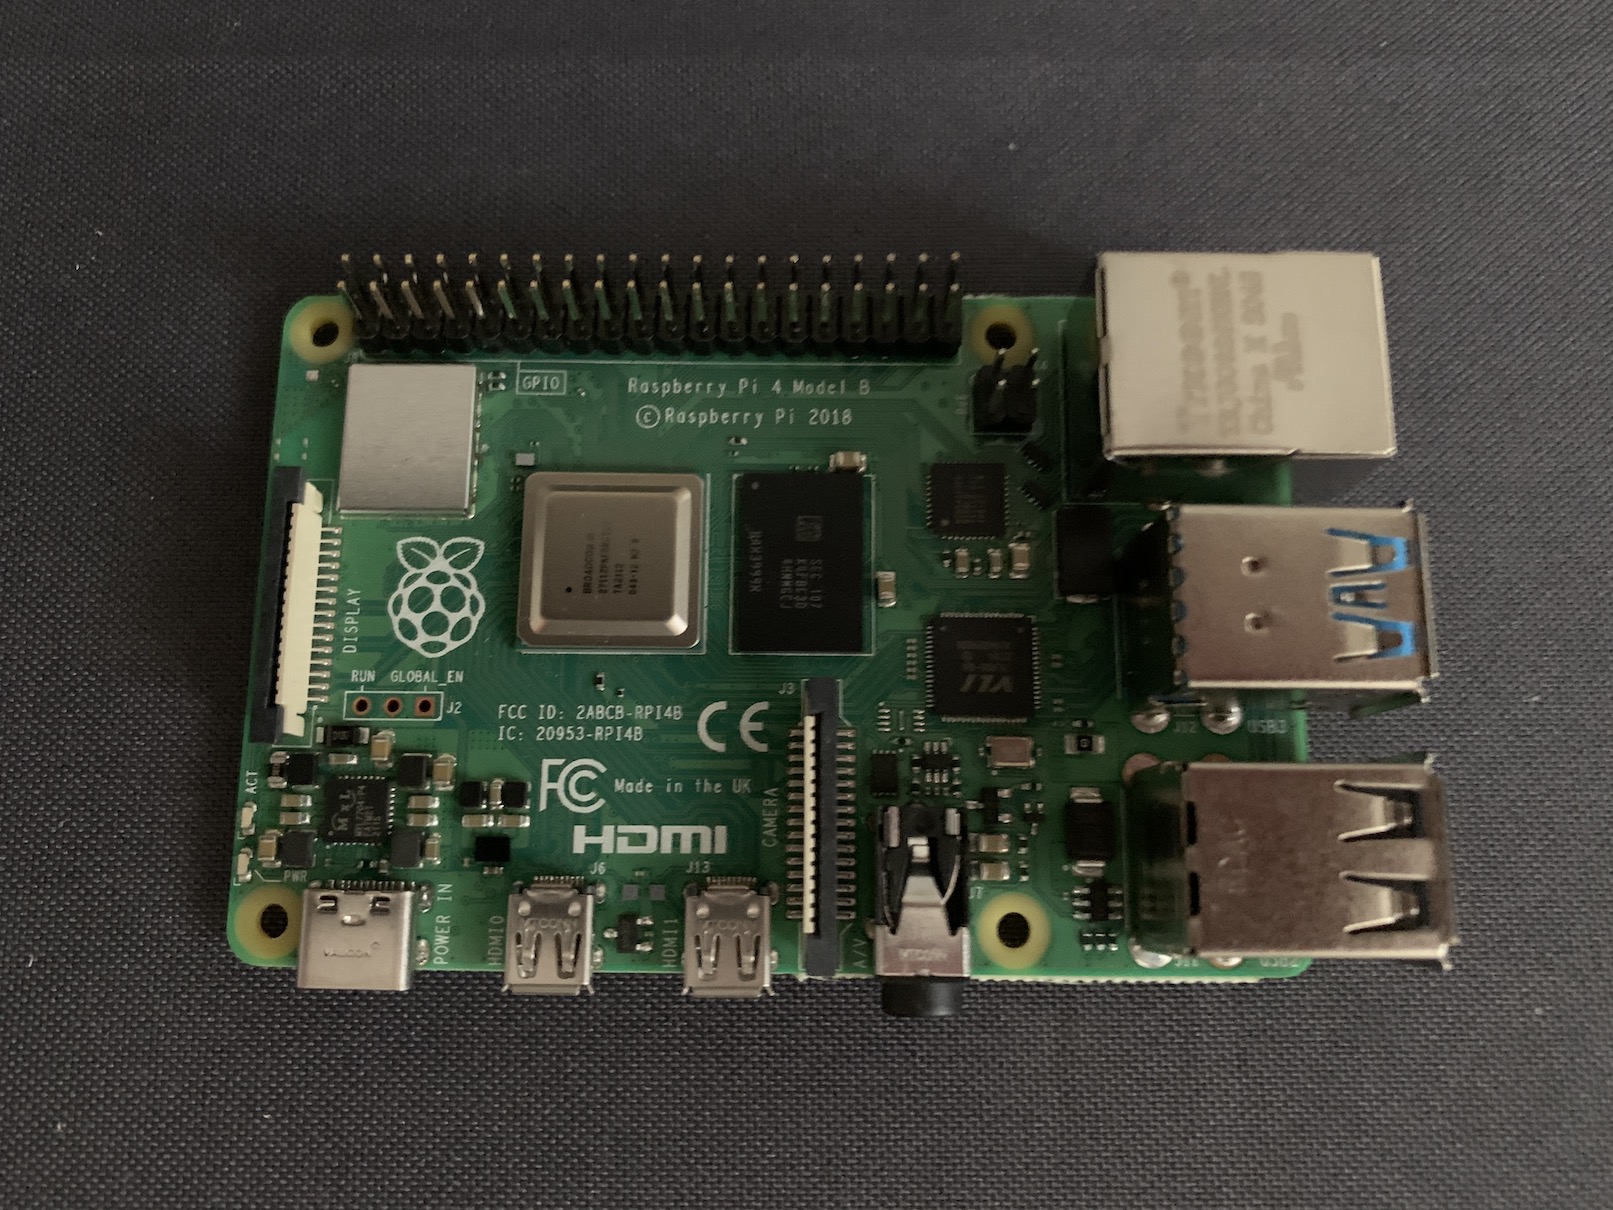
Since 2014, I’ve been using them as a home entertainment system. In this project, I’m using a Raspberry Pi 4 Model B 4 GB and LibreELEC as the operating system, and this post is all about showing how to set up your own home entertainment system with this hardware and software.

Image of a Raspberry Pi 4 Model B manufactured in 2018

Hardware Requirements

  • Raspberry Pi 4 (2GB should work, but 4GB+ recommended)
  • microSD card (4GB and above)
  • HDMI cable (HDMI to Micro HDMI or a regular HDMI cable and a Micro HDMI to HDMI Adapter) CableTV or monitor (with a built-in speaker or an audio port to connect to an external speaker)
  • Raspberry Pi USB-C power adapter
  • Remote control or keyboard/mouse
  • (Optional) Raspberry Pi case with cooling
  • (Optional) Ethernet cable

Software Requirements

Installation

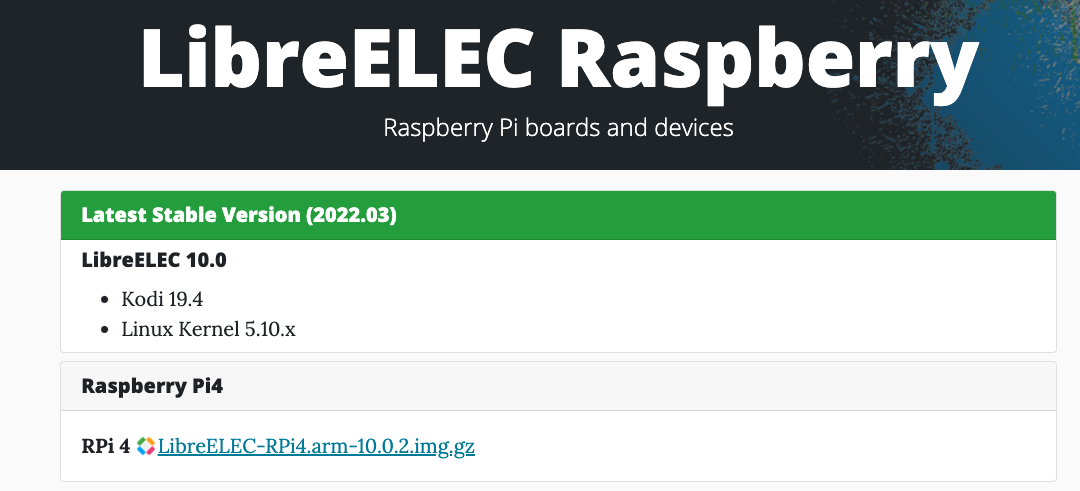
Step 1: Download the latest LibreELEC release for Raspberry Pi

Go to the LibreELEC Raspberry Pi page and download the latest release

LibreELEC RAspberry Pi download page

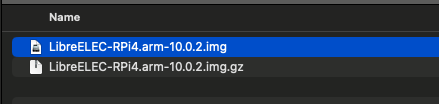
Step 2: Extract the compressed archive

The downloaded file is a compressed archive. Extract the img file inside this by double-clicking on macOS. On Windows, you will need an external tool such as 7-zip.

LibreELEC downloaded .img.gz file and the extracted .img file

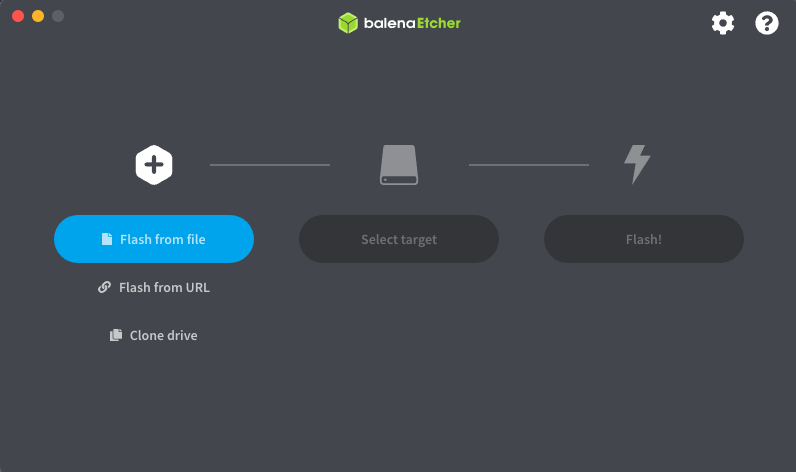
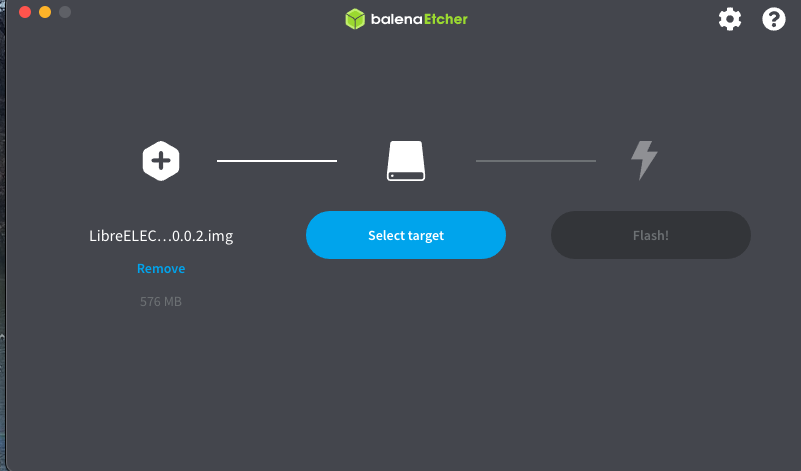
Step 3: Run balenaEtcher

balenaEtcher opening screen showing flashing options (file, URL, clone drive)

Click Flash from file

Navigate to the LibreELEC image and click Open.

balenaEtcher showing the Select target button highlighted

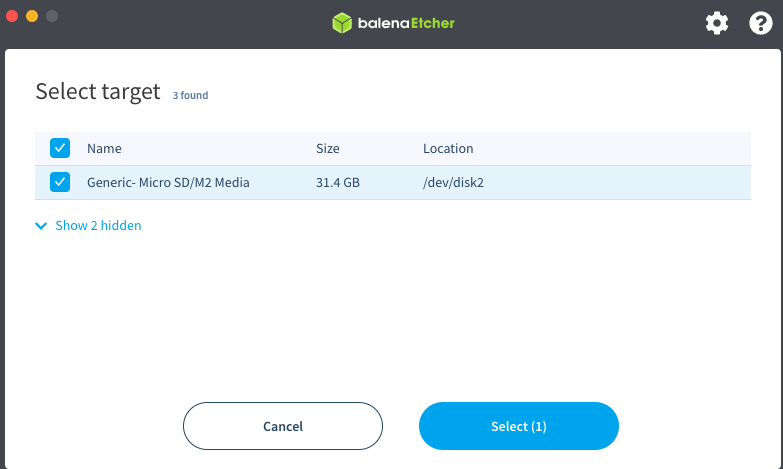
Click Select target, select your microSD card and click the Select button.

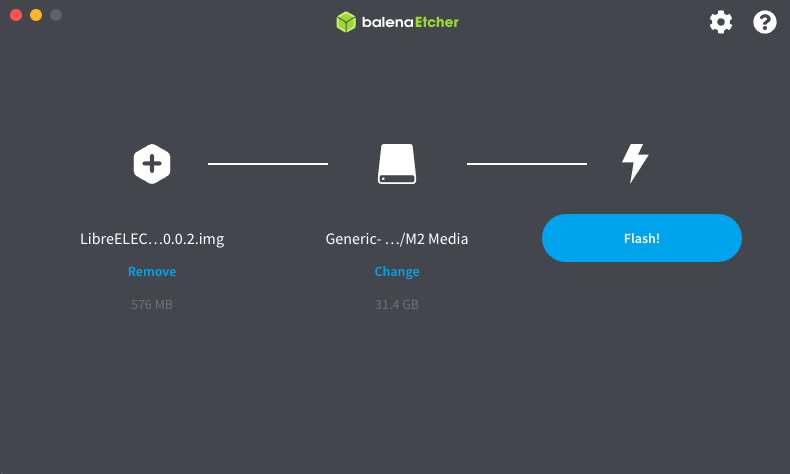
balenaEtcher showing the target selected

Finally, click the Flash! button.

balenaEtcher showing the Flash! button highlighted

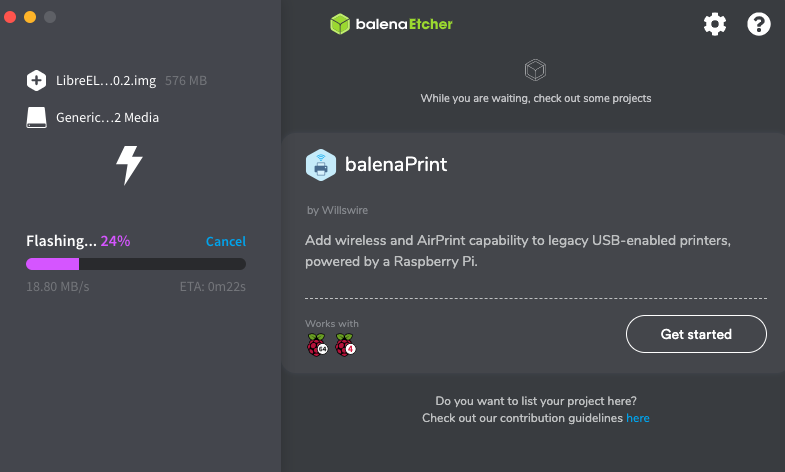
The flashing process shouldn’t take too long (it depends on the size of the card and your computer performance)

balenaEtcher showing the flashing progress

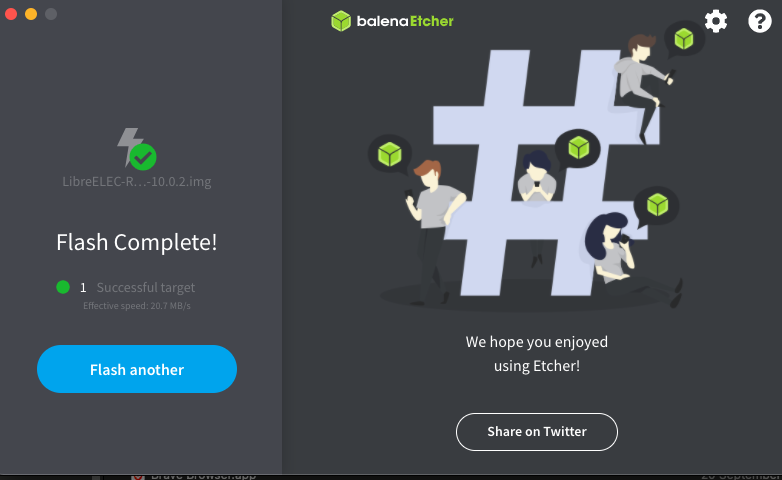
Wait until you see the successful completion

balenaEtcher showing Flash Complete! message

Now you can remove the microSD card from your computer.

Step 4: Insert everything into Raspberry Pi and power it on.

Make sure you’ve plugged in

  • microSD card
  • HDMI cable
  • Remote control or keyboard

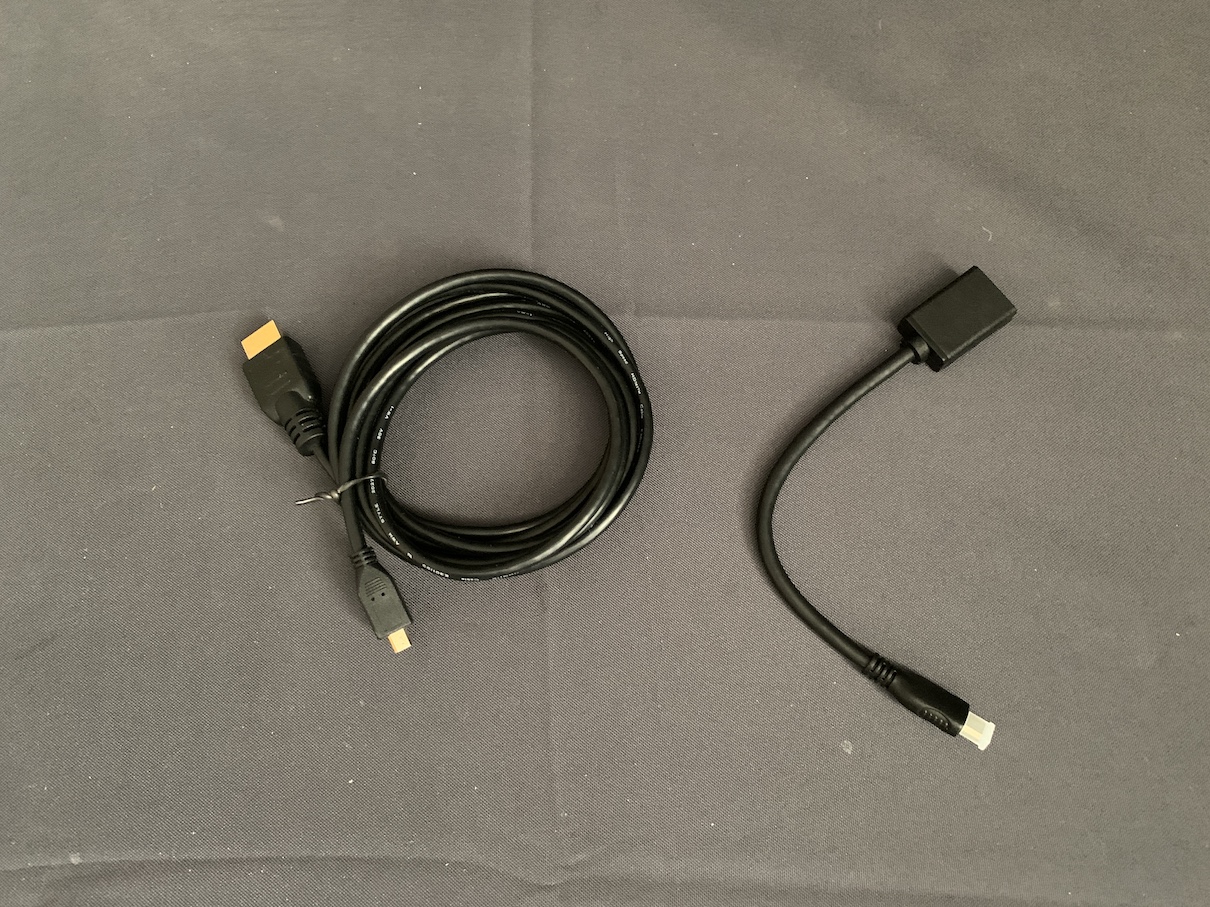
As listed on the hardware requirements, you should have a Micro HDMI to HDMI cable or an adapter:

On the left, HDMI to Micro HDMI cable. On the right, HDMI to Micro HDMI adapter.

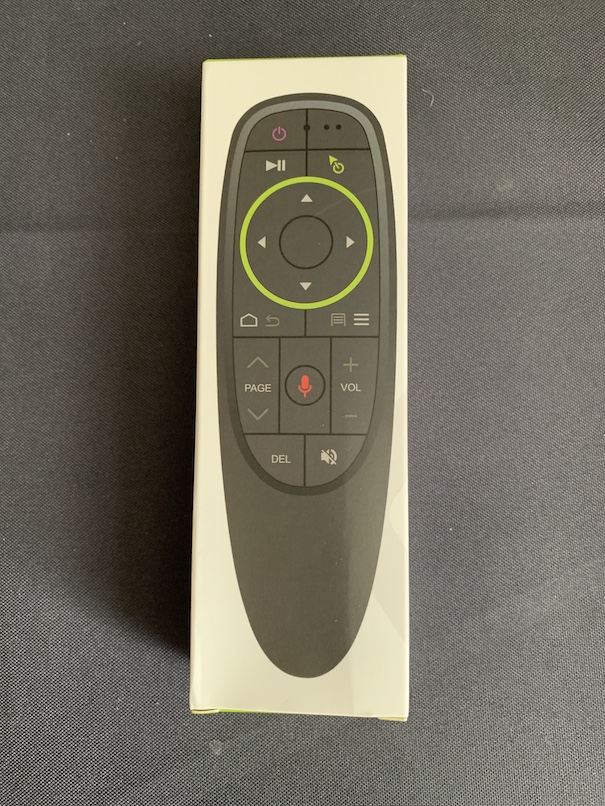
I use a DroiX remote control:

DroiX remote control in its box

Step 5: Configure Kodi

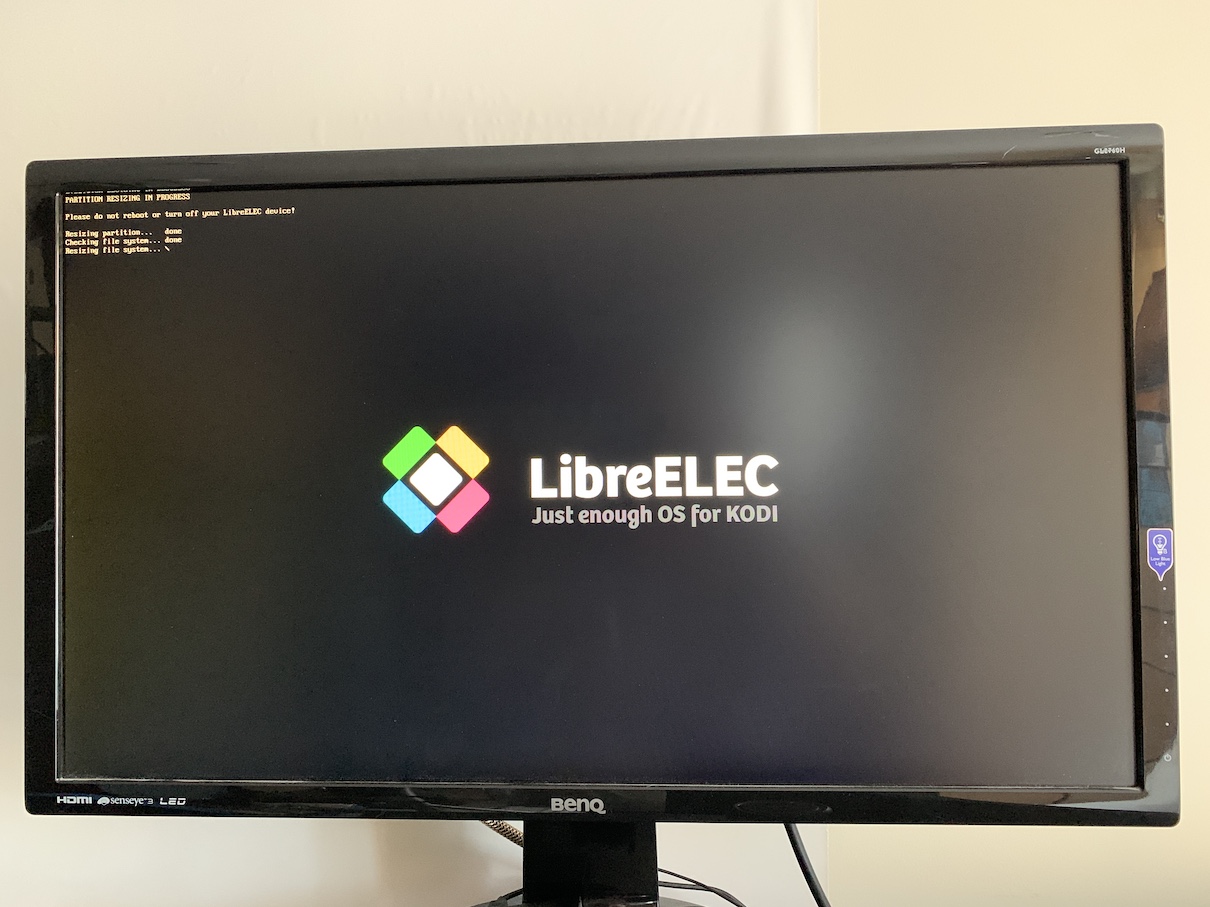
You should now see LibreELEC booting and resizing the SD card.

LibreELEC boot screen - resizing the SD card

Wait until it reboots and comes back to the configuration screen.

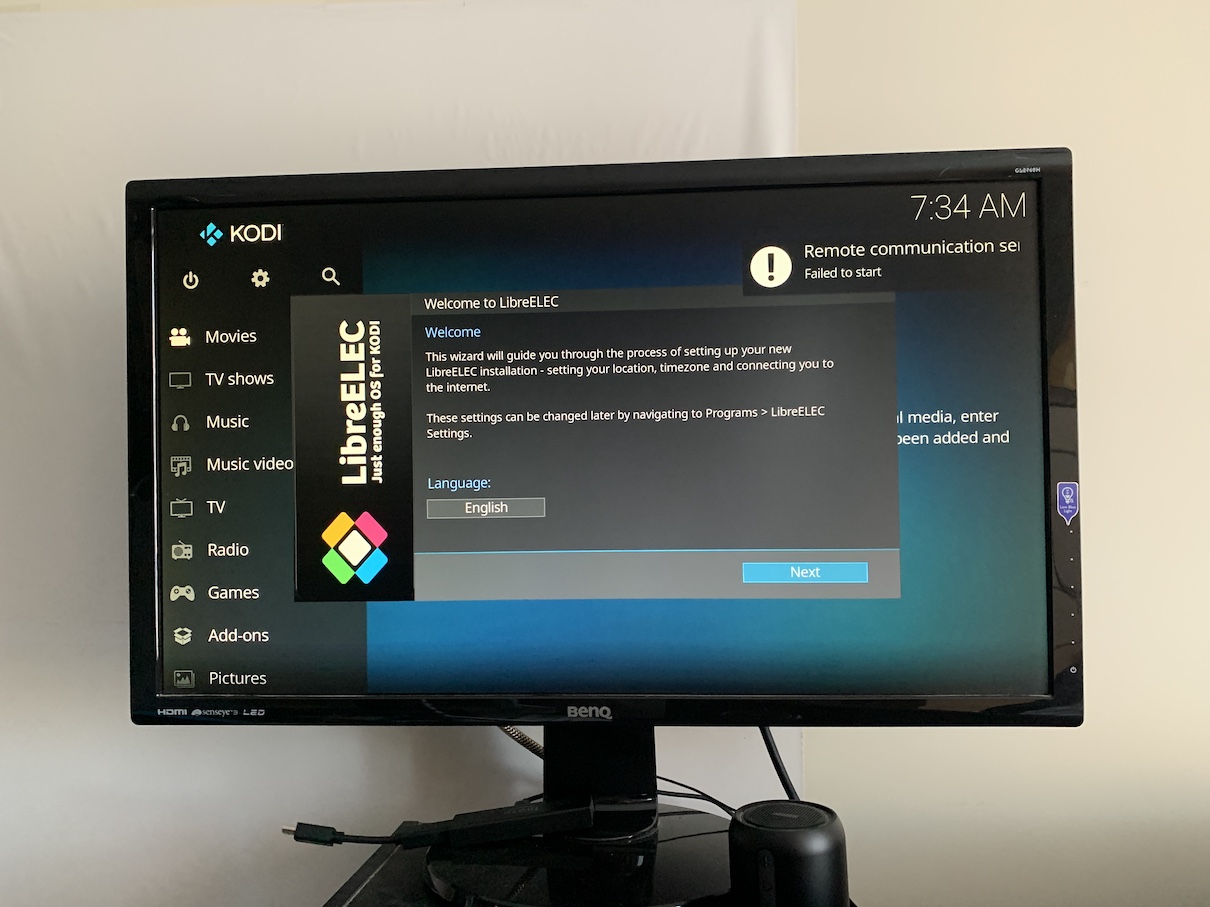
LibreELEC welcome screen asking to select the language

A remote control is great for day-to-day use with Kodi, but for the initial setup, I’d recommend having a keyboard plugged in for faster typing.

Select your language and click Next.

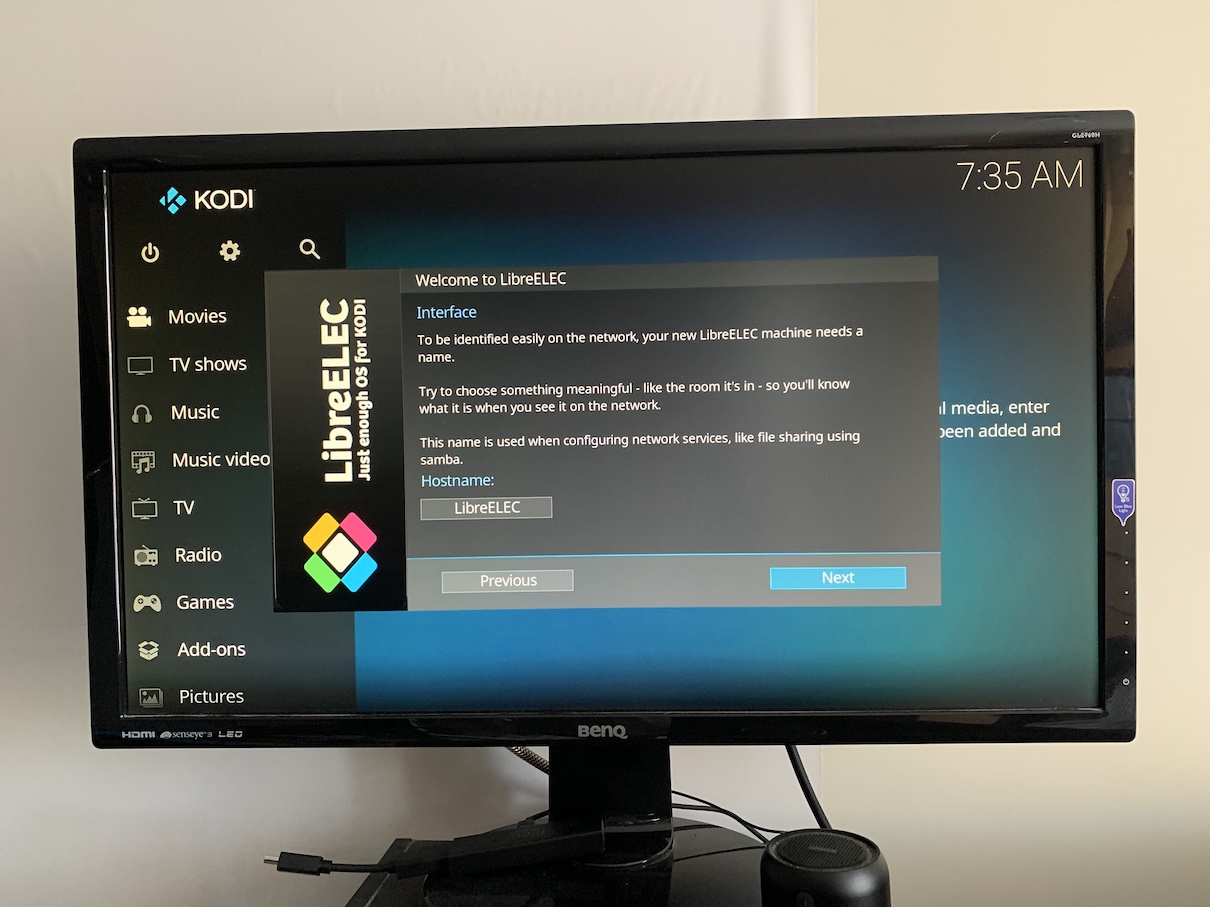
On the next screen, focus on the hostname and press enter.

LibreELEC showing the default hostname

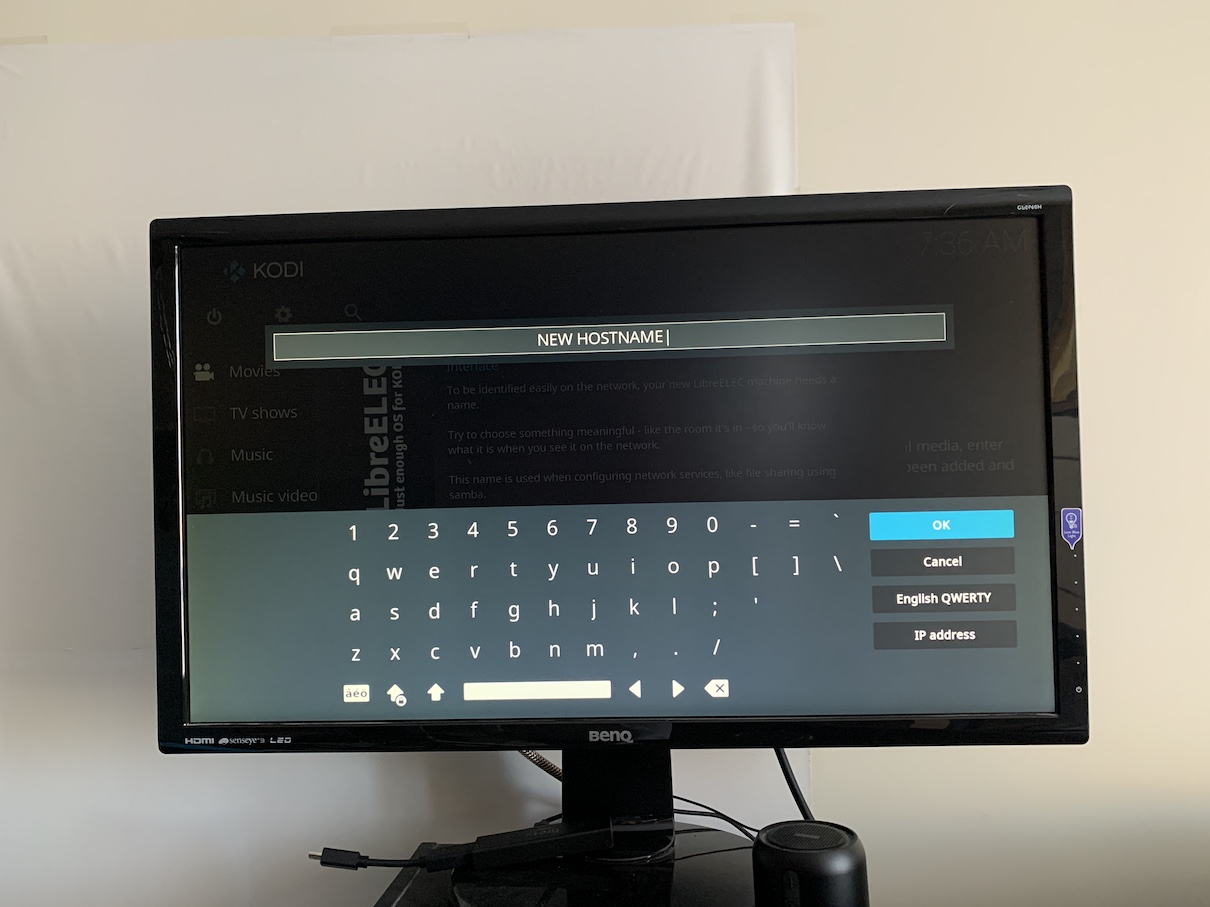
Give it a unique name so you can later identify it in your network.

Input screen for the new hostname

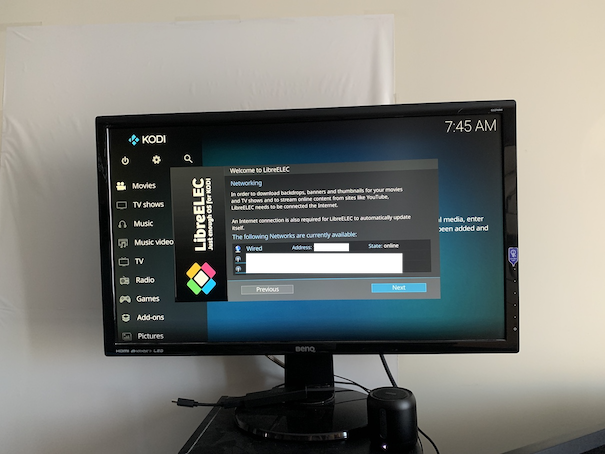
Select your network. I used a wired network for simplicity and performance. If you are using WiFi, select your network and enter your passphrase.

LibreELEC showing the selected and available networks

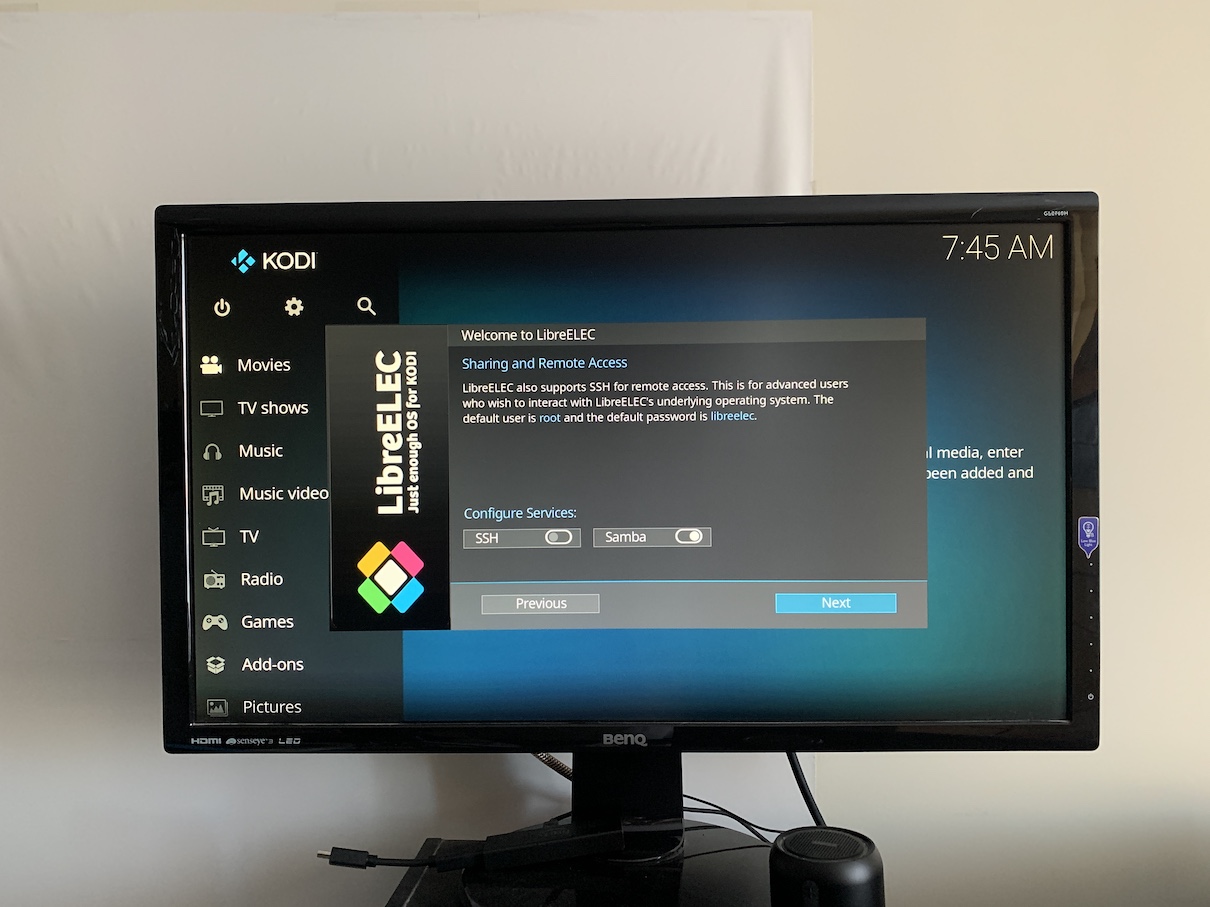
Accept the default for SSH and Samba settings. They are not needed to consume shared content. It’s a good practice to keep these settings off if you are not going to use them for security purposes.

LibreELEC showing SSH and Samba configuration screen

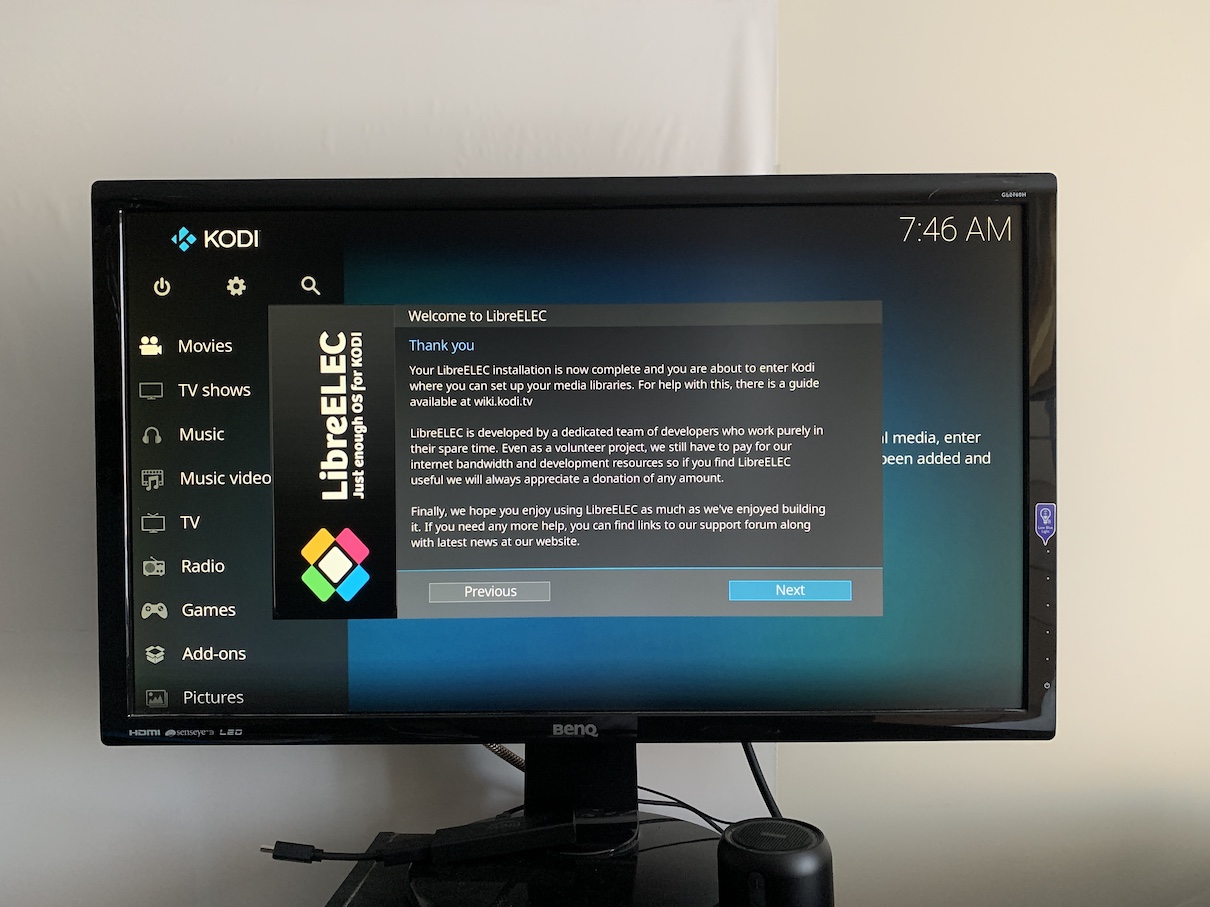
You should see the message for completion

LibreELEC showing the setup completion screen

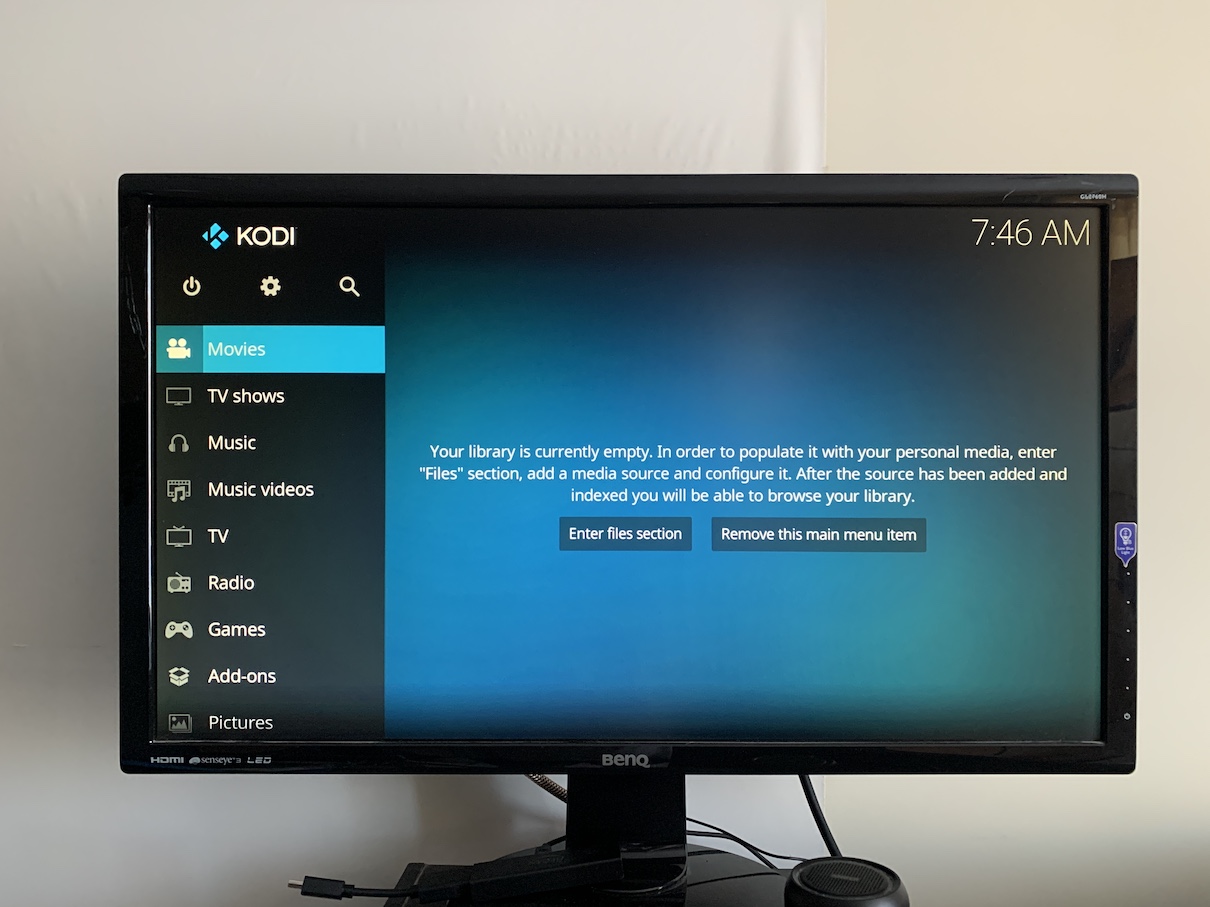
Click the Next button to close the window, and now you have a working Kodi on your Raspberry Pi 4.

Kodi default screen

Conclusion

In this article, you learned how to install Kodi on Raspberry Pi 4.

You can now test your installation by plugging in a USB with some media on it. Also, you might want to backup your microSD card to an image file. This way, if your microSD card gets corrupted, you can flash your image to a new one and carry on without having to install it from scratch.

You will most likely want to access some shared content by a NAS or a file server over the network. There will be more articles about Kodi and its use as a media centre and home entertainment system. Stay tuned and enjoy your Kodi! See you at the next one!