-->

hobby fitness, self_hosting, wger, health, nutrition, tracker

If you are into fitness and looking into a fitness tracker that you can self-host, you will like wger. It handles workout, nutrition and weight tracking. In fact, you might still be interested in using it even if you don’t care about the FLOSS aspect of it because it comes with a free web application that you can sign up for free and use all its features.

Feature Review

To try it out yourself, first go to wger.de and click Register.
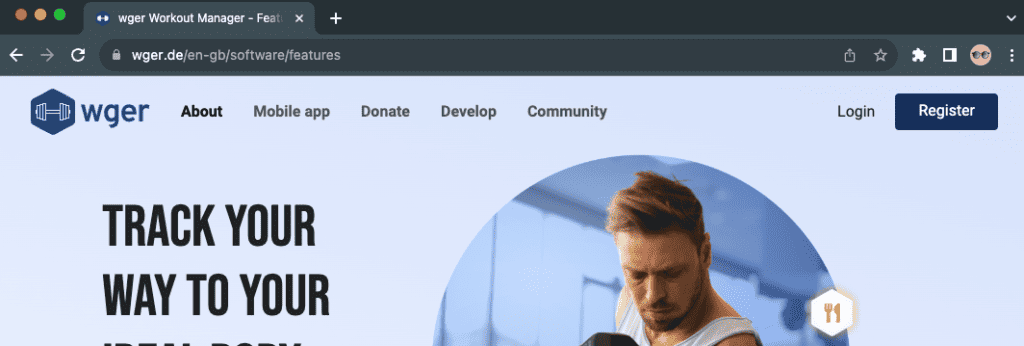
wger main page showing the Register button on the top right

Choose your username and password. Then click Register.

You can enter an email address too but it’s optional.
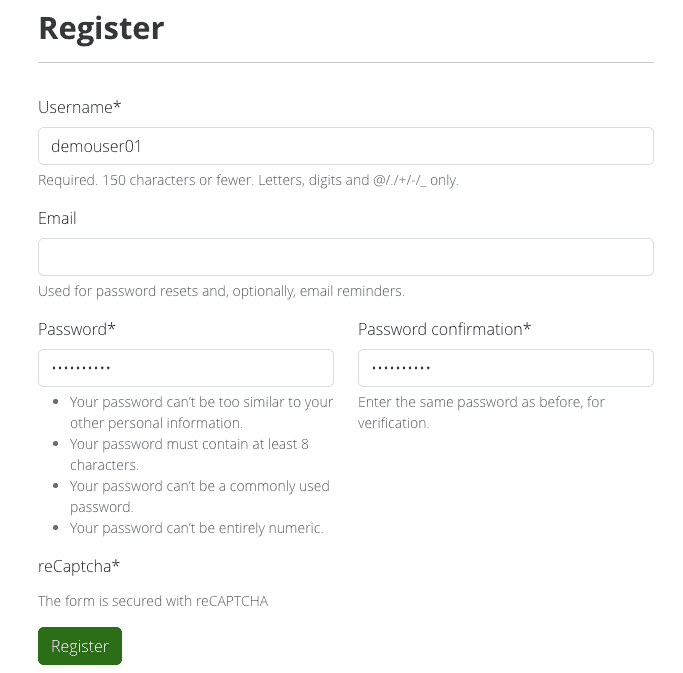
Register form showing username, email and password fields.

As soon as you register, you should be redirected to your dashboard.
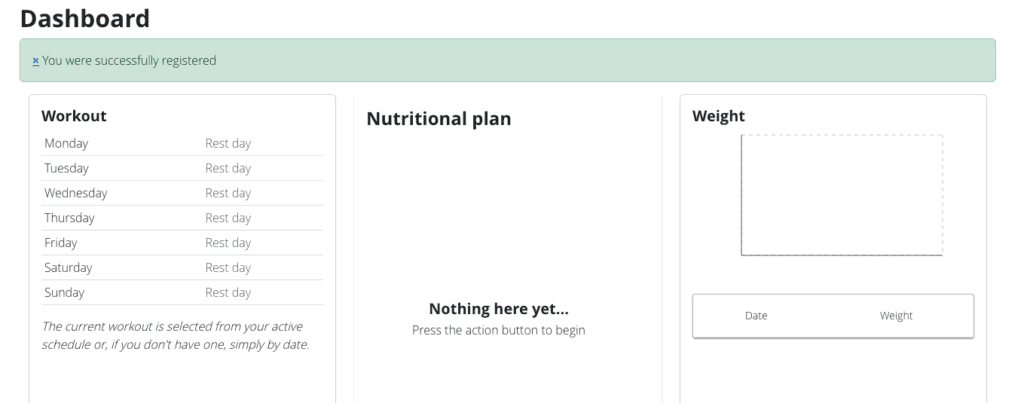
wger dashboard showing workouts, nutritional plan and weight, without any data, after the registration.

If you entered your email address, you should also receive an email to confirm your address. Click on the link in the email to verify your email address.

Here you can start creating your workouts by clicking the button labeled “No workouts found. Add one now.”

You can create workout days and assign it to several days of the week which eliminates duplicating the same program for different days.
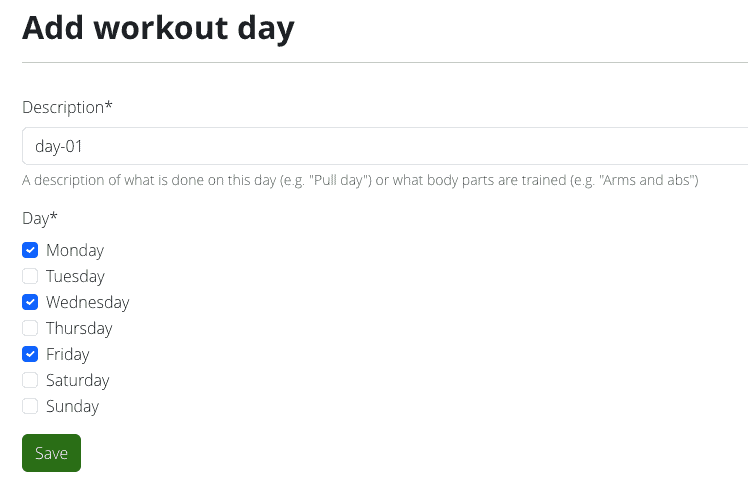
Add workout day page showing the description field and days of the week.

After you give a meaningful name to your workout day, you can add workouts by pressing the + button
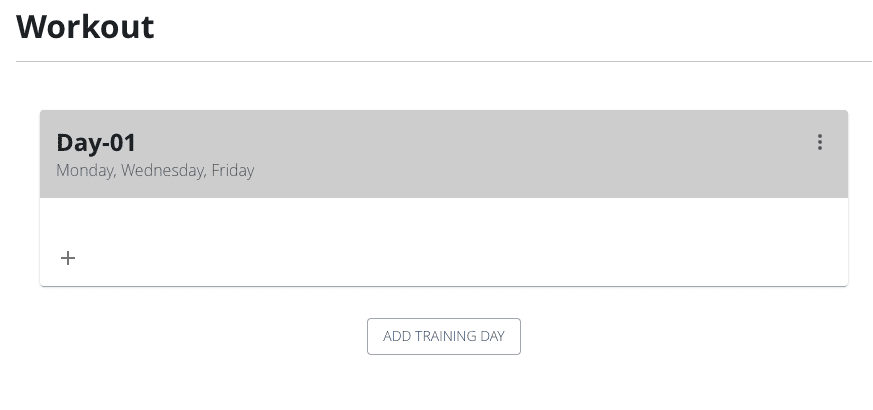
Workout page showing the exercises added to the workout day which is currently empty

Just start typing the name of the exercise you want to add and it should search its database of exercises to suggest you the matching ones.
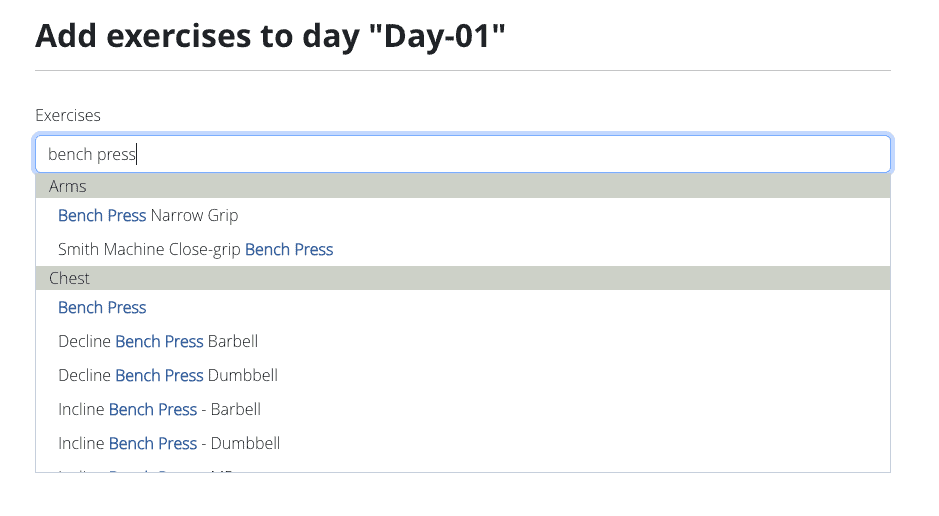
Add exercises page showing a keyword entered and auto-complete suggesting matching exercises.

It also groups the exercises by the muscle group to give you better guidance.

Then you can enter your target reps and weights:
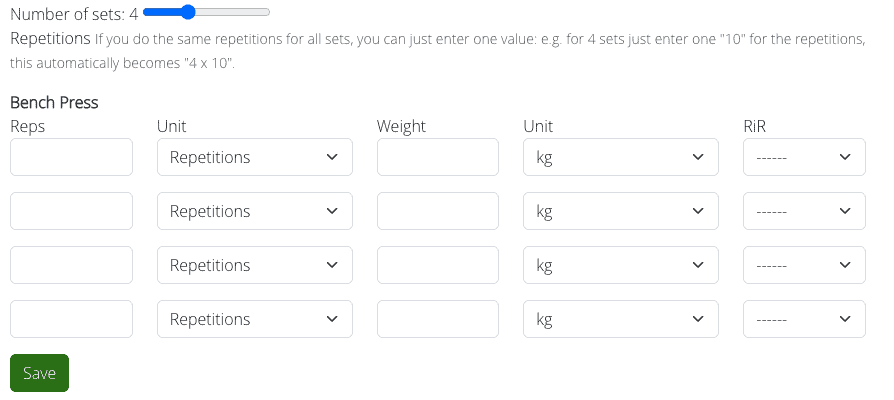
Exercise settings showing reps, weight, unit and RiR for each set

RiR means Reps in Reserve which means how many more reps could you do before failure. For example, if you finish your set and feel like you could do 2 more reps without losing form, then your RiR is 2. This metric helps you to adjust the weight and reps in your training.  

Once you’ve added your workouts, it should look like this:
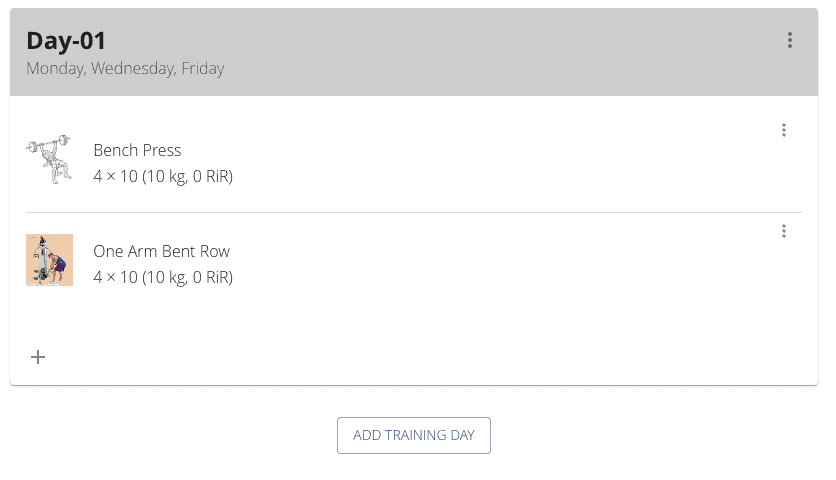
Exercise day showing all the exercises added to the day

You can add multiple training days. It will automatically remove the days you already selected to avoid creating overlapping training days:
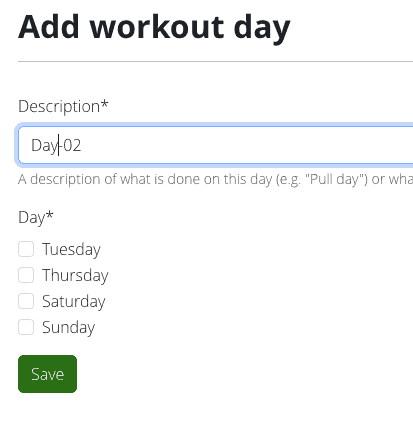
Add workout day page shows the description field and the remaining days of the week.

After you’ve created your workout days, which are essentially your workout templates, you can record the actual exercise logs by clicking the Add new log button on the dashboard.
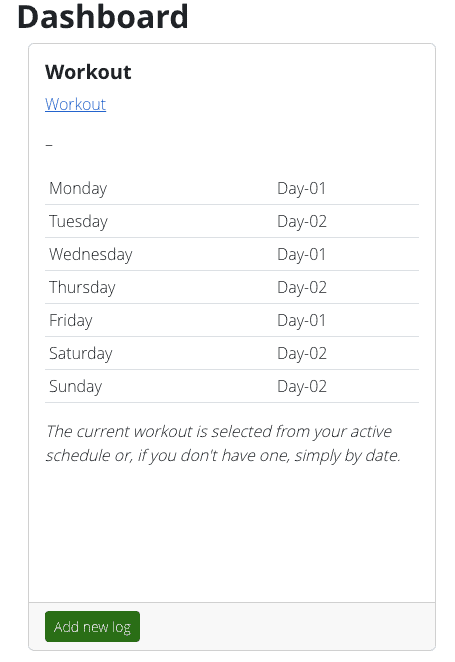
Dashboard showing the workout days and Add new log button under the table.

First you need to select the exercise day to add the logs to:
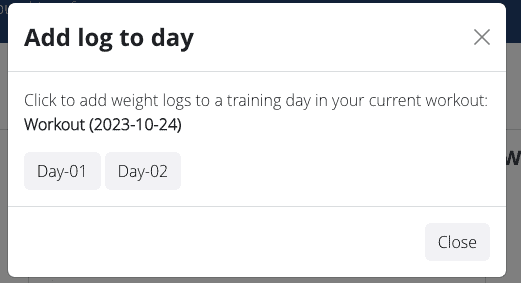
Add log to day dialog showing the list of exercise days to choose from.

After choosing the day, you are shown a page with all the sets and reps for your exercises. You can even record start and end times and your personal notes for the session.
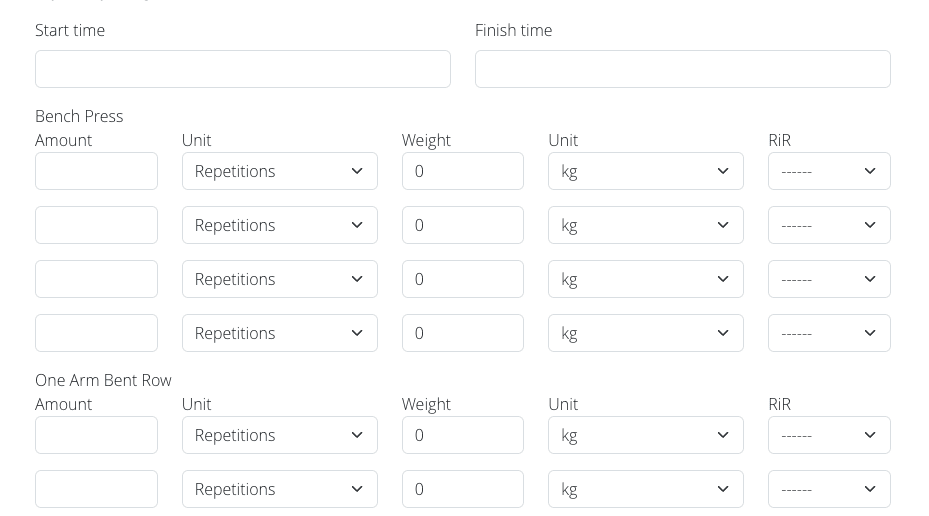
Add new logs page showing the details of all the exercises in the day to add logs to.

Over time, after you’ve added multiple logs, you can view your progress per exercise as it displays the weights in a chart:
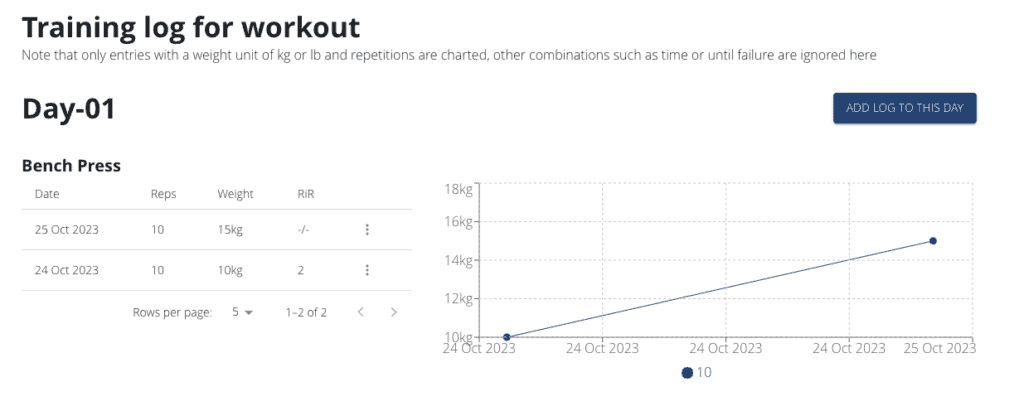
Training logs showing the exercise details and a chart for lifted weights.

Hopefully, I managed to pique your interest with its features. wger also has features for nutrition planning and weight tracking, which this article will not explore.

You can also add your measurements and pictures of yourself to track your progress visually. I think this is where self-hosting becomes more important. I, personally, wouldn’t upload such personal information to an online website. I would however use it more securely in my own local network. If you are also interested in self-hosting this software, proceed to the next section to see the self-hosting options.

Self-hosting wger

The recommended way to install wger on your system is using Docker.

To achieve this, first clone the wger Docker GitHub repo:

git clone https://github.com/wger-project/docker.git

Then start all services by running:

docker compose up -d

Then go to http://localhost and you should see the same landing page as the hosted version.

You can change the port by adding an override file and adding your port:

services:
  nginx:
    ports:
      - "8080:80"

You can also download all the images, videos, exercises etc by running the following commands:

docker compose exec web python3 manage.py sync-exercises
docker compose exec web python3 manage.py download-exercise-images
docker compose exec web python3 manage.py download-exercise-videos
docker compose exec web wger load-online-fixtures

Downloading videos takes a long time though, so if you’re not interested in viewing them I’d recommend skipping that bit.

The last important part is to back up your data which is stored in the PostgreSQL database.

Run the following commands to stop all the services to ensure the data is unchanged during the backup process:

docker compose stop web nginx cache
docker compose exec db pg_dumpall --clean --username wger > backup.sql
docker compose start

To restore it, run the following commands:

docker compose down
docker volume remove docker_postgres-data
docker compose up db -d
cat backup.sql | docker compose exec -T db psql --username wger --dbname wger
docker compose up -d

Conclusion

wger is quite a complicated software and it’s completely open-source and free. You can own your data and make sure it’s not sold to anyone. You can add sensitive personal information such as your body measurements and even pictures of yourself.

As it can get quite sensitive based on the data you upload, it’s important to have it installed in the security of your own network. You can decide who can have access to your data. It’s also always fun and educational working with other complex codebases as it’s a good chance to learn a lot of new things that you haven’t even heard before.

For these reasons, I’d encourage everyone to give wger a try and run it in your own environment. Happy workouts!
Resources

hobby self_hosting, raspberry_pi, calibre

Most of the time, there are a lot of options when it comes to open source and self-hosted software. Hosting an eBook library is no exception. I’ve been a Calibre user for many years, so in this post, I’m going to stick to what I know and talk about Calibre. In future posts, I might review other similar software.

What is Calibre?

Let’s start with the basics. Calibre is an open-source, cross-platform ebook management software. It’s been around for more than 15 years. It’s rich in features; it supports almost all formats and can perform converting to other formats. It’s still very actively developed, and I think it’s a one-stop shop at the moment for eBook management.

Notes on Compatability

Installing Calibre on Raspberry Pi, which is an ARM based computer, as opposed to installing it on a standard Intel based Mac/PC, comes with some complications. If you look at Download for Linux page on the official Calibre website, you can see this info:

calibre has a binary install that includes private versions of all its dependencies. It runs on 32-bit and 64-bit Intel compatible machines. 

Then, your best bet to install on Raspberry Pi is either use package manager or Docker.

The same download page also says:

Please do not use your distribution provided calibre package, as those are often buggy/outdated. Instead use the Binary install described below.

So, Docker then? There are lots of Calibre Docker images. The most reliable one I came across, in terms of popularity and maintenance, is linuxserver.io’s image but it only supports arm64 and it didn’t work for me as my Pi is 32-bit. If you’re using a 64-bit Raspberry Pi, this may be good option for you.

Implemented Architecture

You can think of Calibre as comprised of two components:

  • Content server
  • Front end

To keep things simple, you can install Calibre on your computer and run the built-in content server. The downside is that the computer needs to be on all the time if you are going to browse your library via your mobile device.

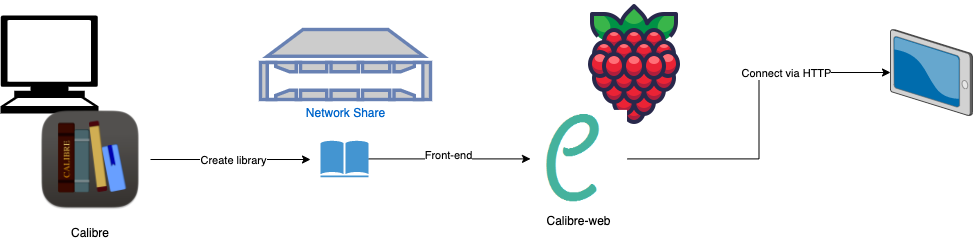
There are many ways of getting the same results. In my setup, I chose this approach:

Implementation architecture

Calibre-web is the front-end I’m using as it ships as a Docker image and runs on 32-bit Raspberry Pi. The look & feel of the GUI is much better than the built-in one in my opinion.

The problem with Calibre-web is that it only operates on existing Calibre databases. You still need some Calibre running somewhere to create the initial database at least.

Create a Network Share

The first step is to have a shared place to put the library. In Raspberry Pi, this requires installing Samba and updating its configuration.

The following settings may be too broad/open for your network. Make sure to harden the security as you see fit.

Step 1: Update your Raspberry Pi and install Samba:

sudo apt-get update && sudo apt-get upgrade
sudo apt-get install samba samba-common-bin

Step 2: Create a shared folder:

sudo mkdir -m 1777 /share

Step 3: Update Samba configuration

Run

sudo nano /etc/samba/smb.conf

and add the following lines to the end

[calibre]
Comment = Calibre shared folder
Path = /share
Browseable = yes
Writeable = Yes
only guest = no
create mask = 0777
directory mask = 0777
Public = yes
Guest ok = yes

Step 4: Set Samba password

sudo smbpasswd -a pi

Step 5: Reboot

sudo reboot now

Now you can point to that share in your computer where you will install Calibre.

Install Calibre

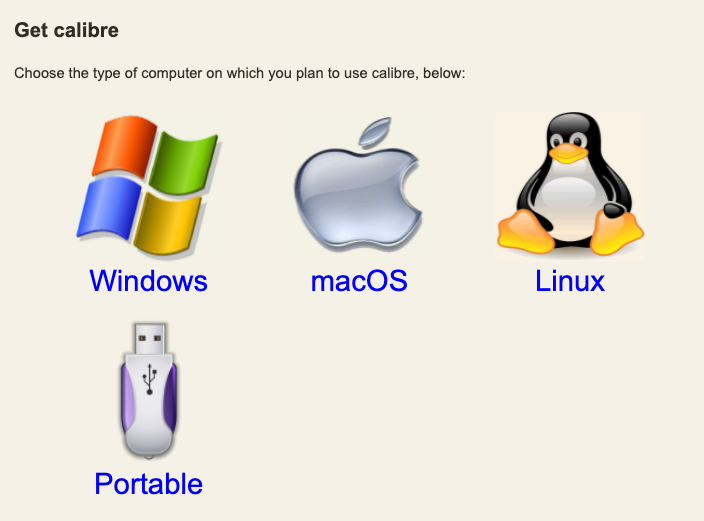
Installing Calibre is rather straightforward. Go to the download page and pick the installer for your operating system.

Calibre download page

Create Calibre Database

Create an empty folder under the shared folder (magazines/library in this example)

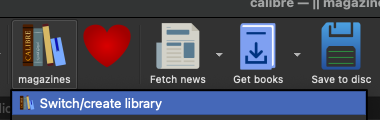
Open Calibre. Click the Calibre icon and select Switch/create new library.

Switch/create library button

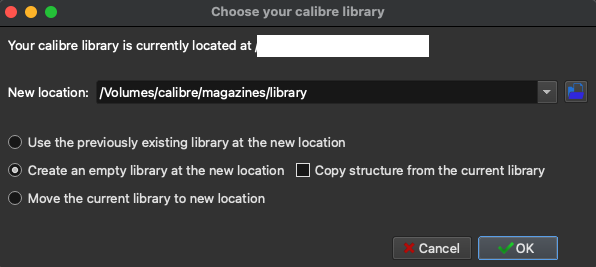
Enter the path to the shared library and select the Create an empty library at the new location option.

Choose library dialogue

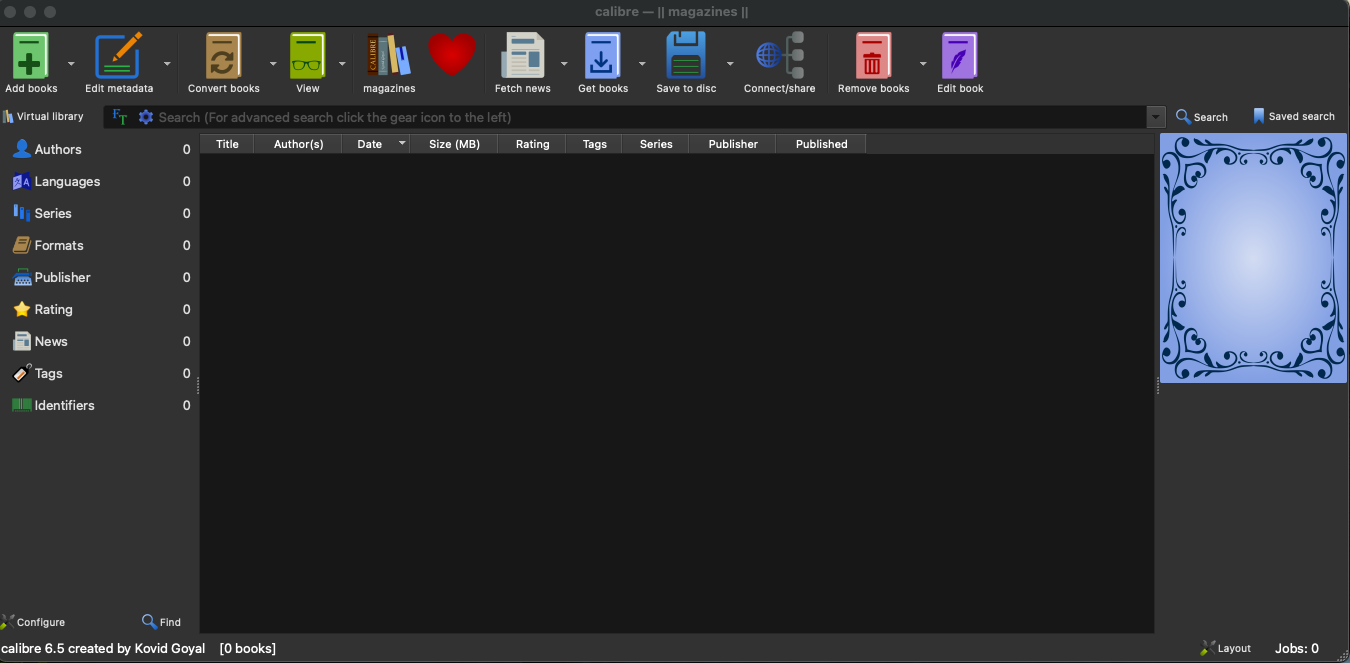
You should now see an empty library in the application.

Empty Calibre library

Add your books/magazines to your database. You can simply drag&drop on onto the GUI. In this example, I’m going to use Phrack Magazine, which is freely available.

It comes in simple text files, so I combined them into a single text and converted them into PDF using the built-in macOS application Text Editor. You can use any PDF in your case.

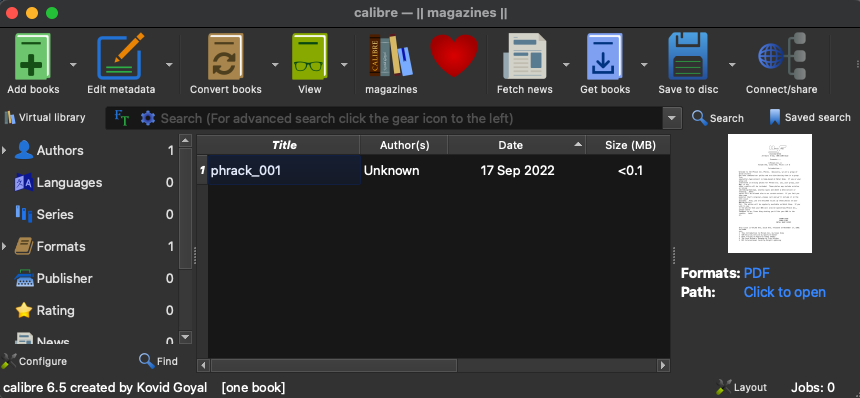
Either click Add books and browser your files or simply drag&drop and you should get the same result:

Calibre showing uploaded PDF

Install Calibre-Web

Now it’s time to install the always-on content server that will point to the shared.

Create a folder named config under the shared library (/calibre/magazines).

Then, run the following command to pull the latest calibre-web Docker image and start a container (update the shared volumes and timezone to match your system):

docker run -d --name=calibre-web-demo -e PUID=1000 -e PGID=1000 -e TZ=Europe/London -p 8083:8083 -v /share/magazines/config:/config -v /share/magazines/library:/books --restart unless-stopped linuxserver/calibre-web

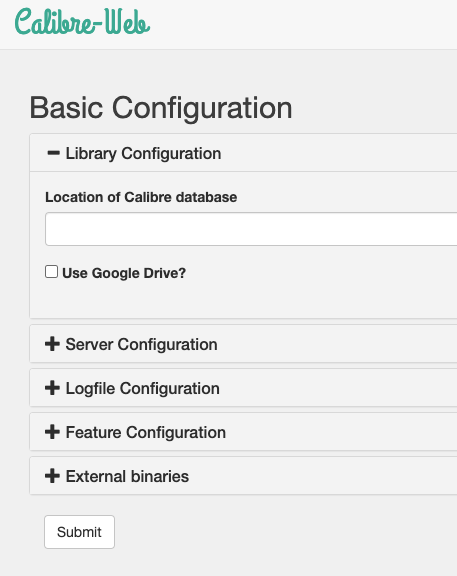
Now in your browser, go to http://{Your Raspberry Pi’s IP Address}:8083, and you should see the calibre-web configuration screen:

Calibre-web configuration screen

The only configuration you have to make here is to point to the Calibre database, which is mapped to /books. So all you have to do is enter /books in the Location of Calibre database field.

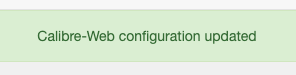
Click Submit, and you should see a successful update message:

Configuration updated confirmation

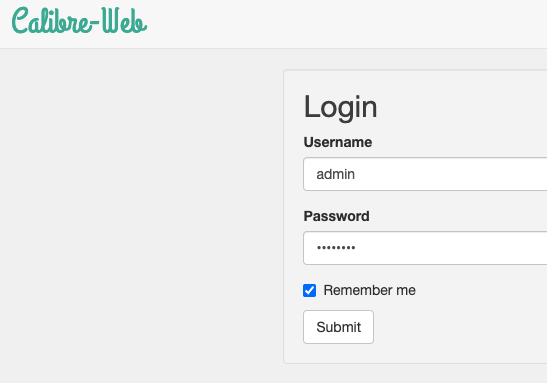
Click Login and use the default credentials: admin/admin123.

Calibre-web login page

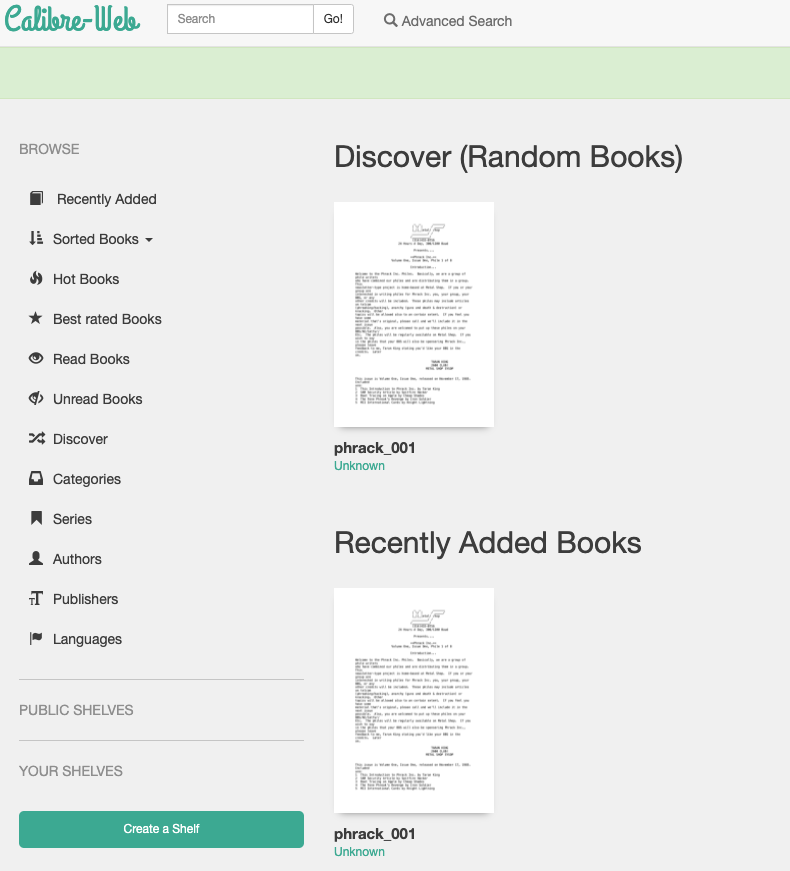
You should now see the PDF you uploaded earlier:

Calibre-web front page

Now you can use the Calibre application on your computer, upload/convert the books as you please and consume them over standard HTTP on your tablet or phone.

Conclusion

This setup may be overly complicated, and I might want to revise it in the future, but for the time being, it does the job.

hobby music, self_hosting, navidrome, substreamer

Even though streaming services provide great convenience to their users, there is still value in owning your music. At the very least, you have full control over your own music. You can have unlimited downloads, devices etc., free of extra charge once you’ve set up your system. In this post, we will look into building a music server with Navidrome using Raspberry Pi.

Installation

As a fan of Docker and containers, I first checked if they support Docker and happily found out that they do. They also have a multi-architecture image, so it runs on Raspberry Pi too.

To install it on your Pi, run the following commands:

cd {root of your music server}
mkdir navidrome
cd navidrome
mkdir music
mkdir data

I like to set up slowly with full control over how things are going so instead of pointing to an existing folder with music in it. So I prefer to create an empty one and slowly migrate whatever I want to. You can choose a different approach.

In the Navidrome folder, create a new file by running

touch docker-compose.yaml

and edit the file by running

nano docker-compose.yaml

and paste the following code:

version: "3"
services:
  navidrome:
    image: deluan/navidrome:latest
    user: 1000:1000 
    ports:
      - "4533:4533"
    restart: unless-stopped
    environment:
      ND_SCANSCHEDULE: 1h
      ND_LOGLEVEL: info  
    volumes:
      - "/path/to/data:/data"
      - "/path/to/your/music/folder:/music:ro"

Replace /path/to/data and /path/to/your/music/folder with /{Your music server root}/navidrome/data and /{Your music server root}/navidrome/music, respectively.

Then start the service:

docker-compose up

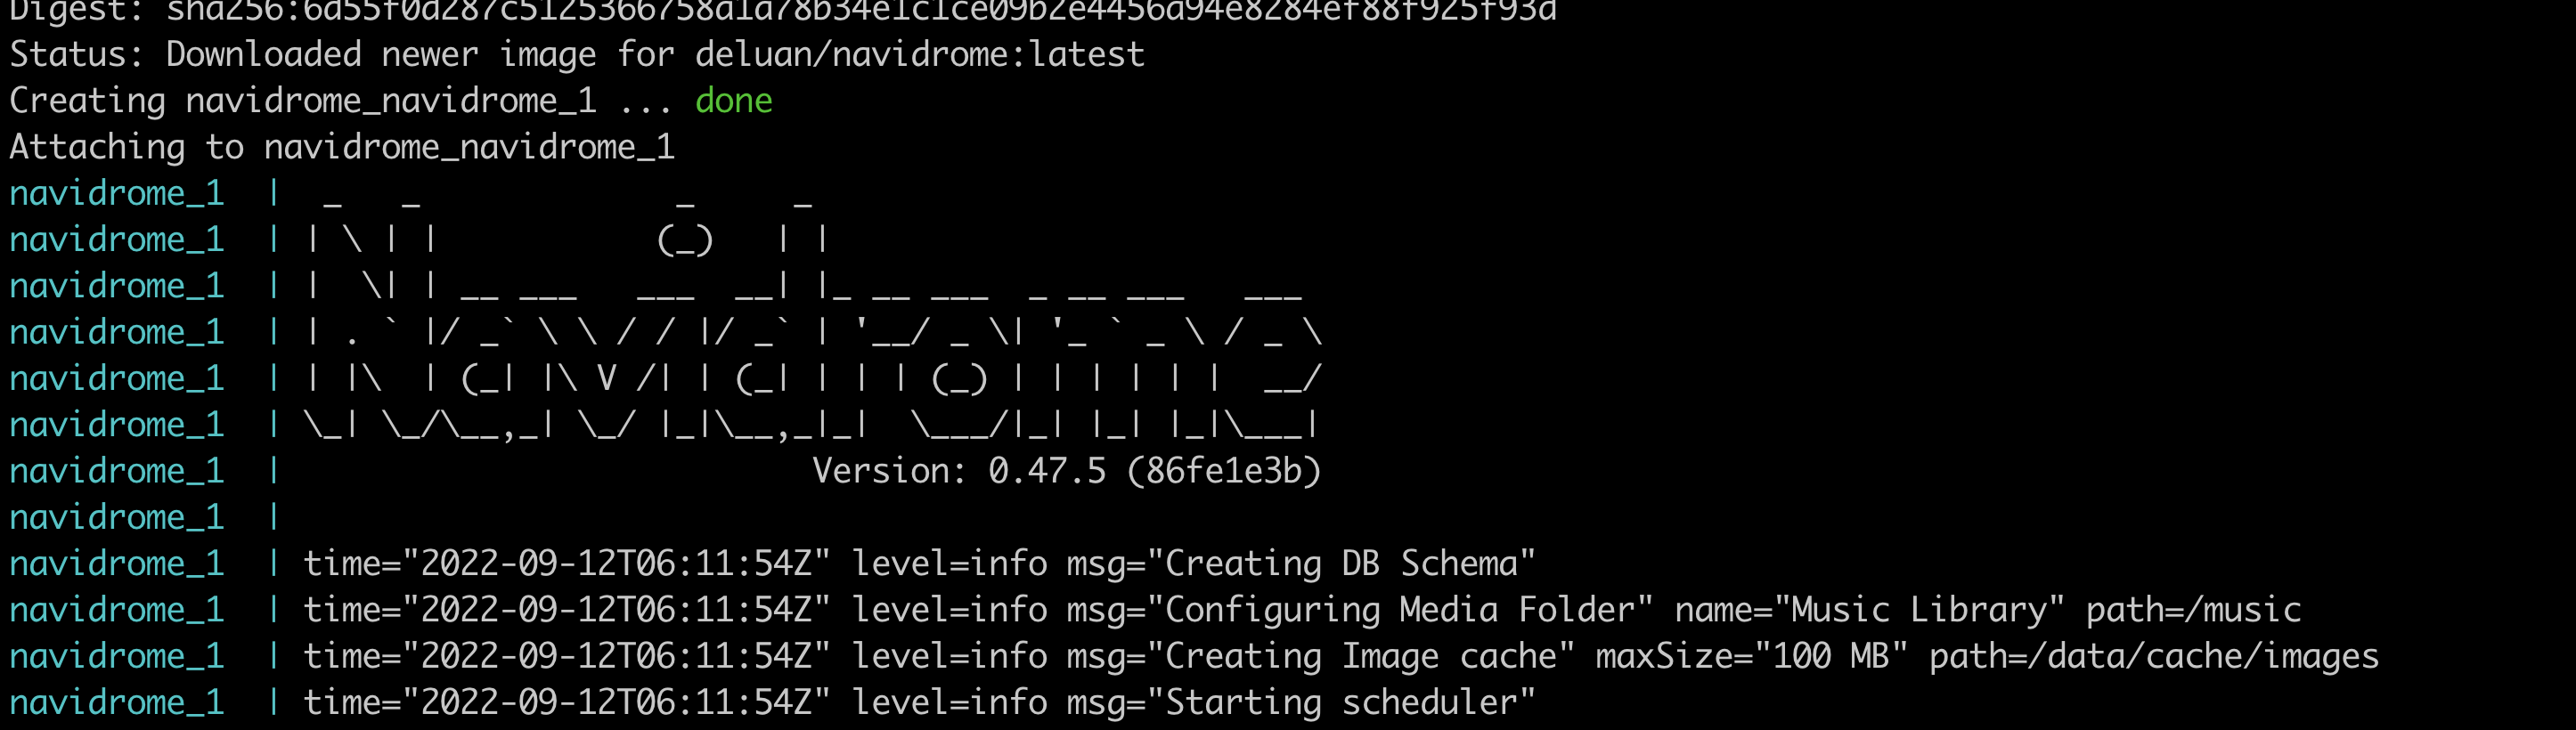
Since this is the first time you’re running the service, I’d recommend not running with the -d flag so that you can see the detailed logs on your terminal easily:

navidrome startup logs in the terminal

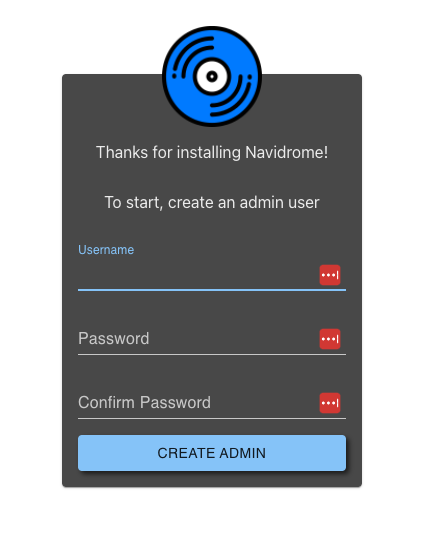
As specified in the docker-compose file, the default port is 4533. Now visit http://{IP address of your Raspberry Pi}:4533, and you should see something like this:

Navidrome default admin creation screen

Pick a username and a strong password and click Create Admin.

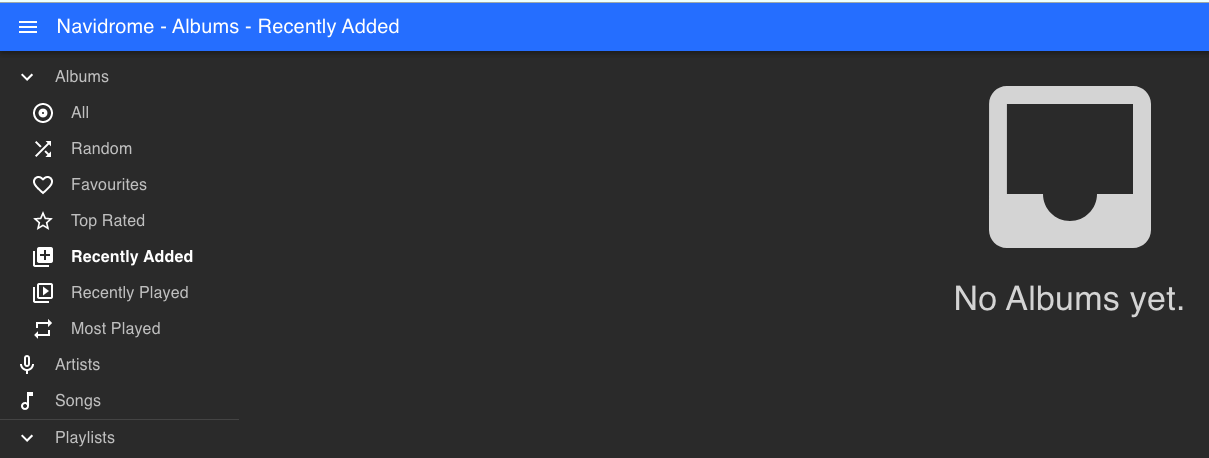
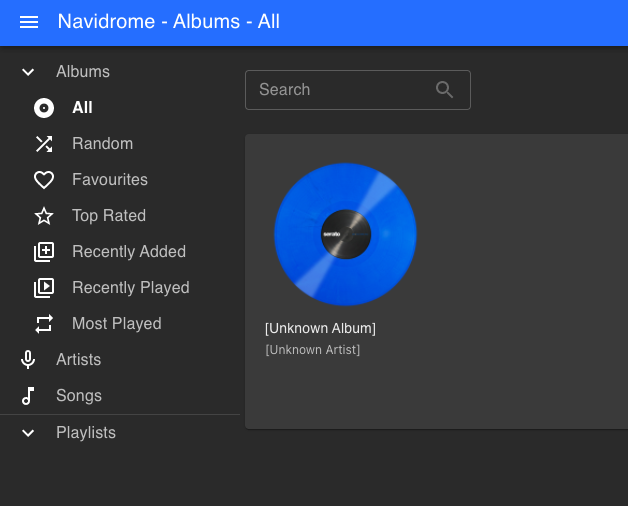
You should now see your dashboard:

Navidrome dashboard

It’s best to see another user who is not an admin just to consume the music.

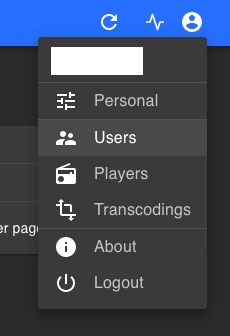
Click on your profile account at the top right and select Users.

Admin menu showing users selected

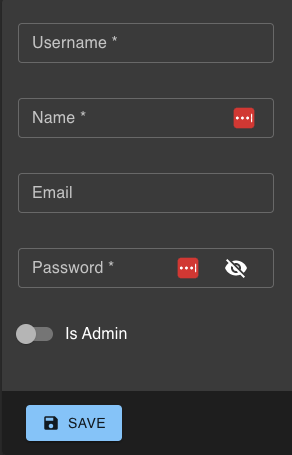
Create a new user by clicking the Create button. Leave Is Admin checkbox unchecked.

New user creation screen

Uploading Music

Now you need some music to test your server. There is a lot of free content on the Internet. For this article, I picked Pixabay and downloaded this song.

Drag this song and drop it into your music folder.

Since Navidrome runs scheduled scans, it’s not going to pick this song up immediately. Stop the service by running Ctrl + C. Then run it again by running the previous command.

You should now see that Navidrome discovered the new song in your archive:

Dashboard showing new song

Set Up Client

Client-side depends on your devices, so it’s a crowded space. It’s hard to recommend an app for everyone, but I can recommend my choice on iOS: Substreamer.

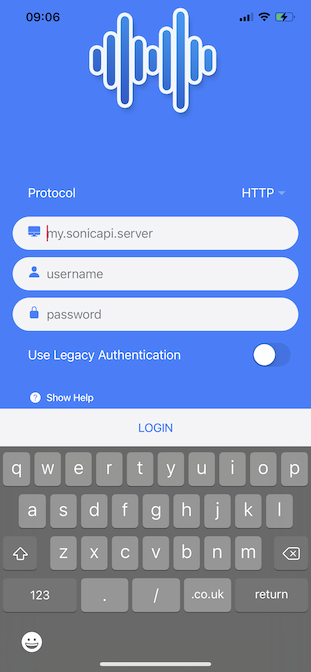
Substreamer is a free iOS app, and it’s very straightforward to use. Install it from the Apple App Store and run it. You see a login screen that looks like this:

Substreamer login page

Enter your server URL as {IP}:4533. Then use the user account credentials you created.

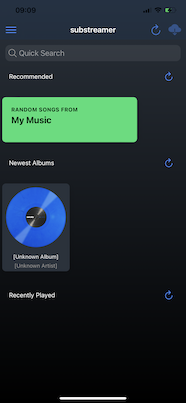
You should now see the song you uploaded earlier:

Substreamer overview screen showing the song

If you click on the song, you can see more details, play it and download it to make it available offline.

Now that everything is running smoothly, stop the server by pressing Ctrl + C and run it as a background service by running:

docker-compose up -d

Conclusion

I hope this article has been useful to you in getting your own music server started. If you already have music, you can now migrate it to your server or start finding the music you like so that you can have access online (in your local network) or offline by downloading it to your device.