Working with AWS S3 and file hashes
Hashing is the operation of creating a unique, fixed-length string from any piece of data. The output is called a “hash” or “message digest”. It is a one-way operation meaning that you can obtain the original message by reverse-engineering the digest even if you knew the hashing algorithm used to create it. I love using hashes as they can provide great value in maintaining the security and integrity of our data.
Calculating file hashes using PowerShell
The cmdlet to use in PowerShell is Get-FileHash.
Usage is very straightforward. You provide it with the path and the hashing algorithm you want to use:
Get-FileHash
   [-Path] <String[]>
   [[-Algorithm] <String>]
   [<CommonParameters>]
As you can see above, the Path parameter is a string array, so you can use it to calculate multiple hashes.
How to use file hashes with AWS S3
To verify the file’s integrity during upload, we can use the Content-MD5 HTTP header. This header is not specific to AWS, but it fits perfectly when uploading files, especially if they are big media files.
You must convert the Content-MD5 value to Base64 before sending it in the request.
Preparing the lab environment
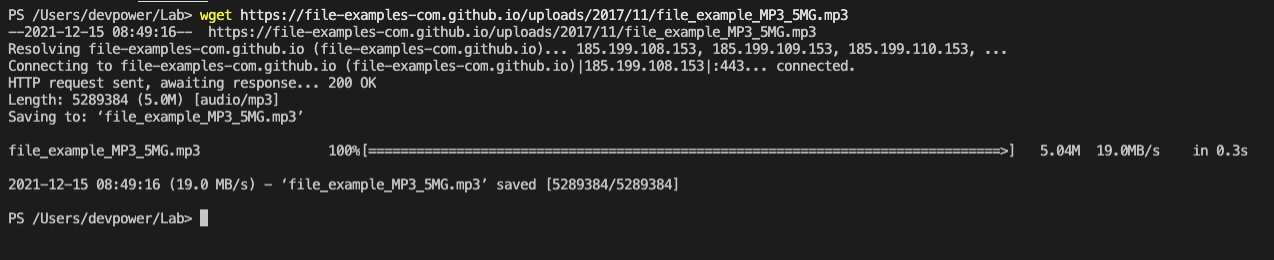
Downloading a sample file
The file I worked with is a sample that’s publicly available here:
So I first fetched the file to my local lab:
wget https://file-examples.com/storage/fee788409562ada83b58ed5/2017/11/file_example_MP3_5MG.mp3
The URL of the sample files keep changing, so don’t try the script above directly. Instead, get the link first, then run the command with your link.
Generate MD5 hash
To get the MD5 hash, I ran the following command:
Get-FileHash -Path ./file_example_MP3_5MG.mp3 -Algorithm MD5
and the output is:

Create target bucket
Creating a new S3 bucket is simple as follows:
New-S3Bucket -BucketName "filehash-workout"
Send the file with hash
Fortunately for us, AWS provides an easy way to use MD5 hashes when uploading the file with Write-S3Object. It automatically calculates the hash value for us:
Write-S3Object -BucketName "filehash-workout" -File ./file_example_MP3_5MG.mp3
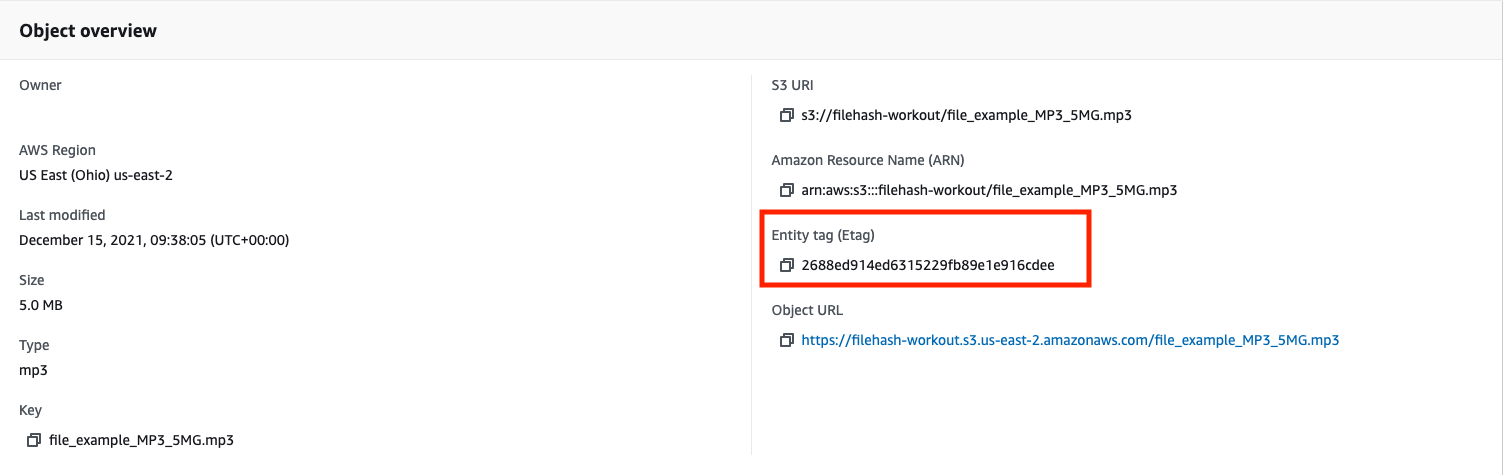
The MD5 value is stored as an Etag value. You can see it on AWS Management Console:
Check the file hash
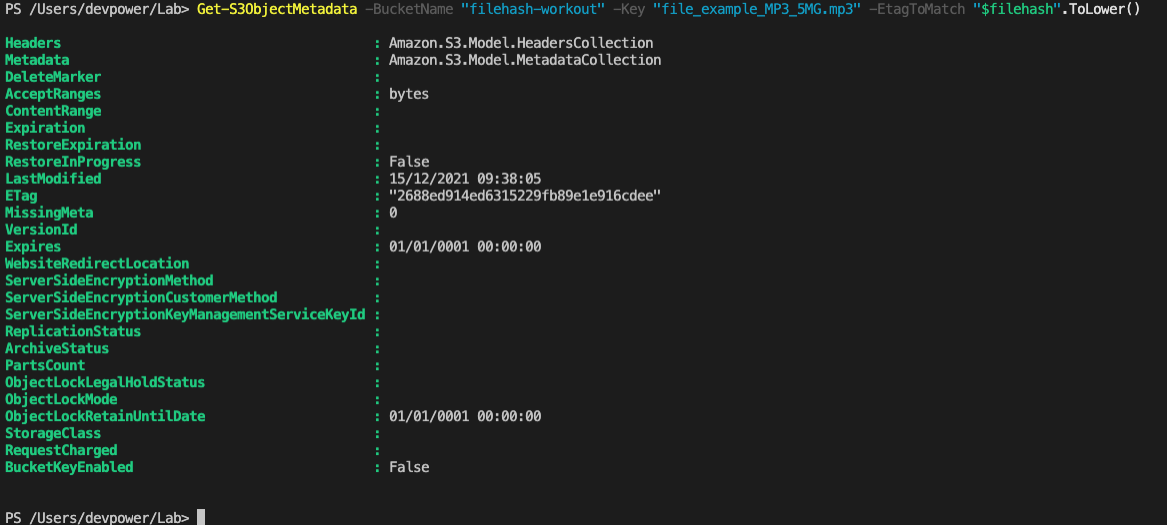
As the final step, we need to pass the MD5 hash of the file on our end and see if it matches the value on AWS:
Please note from the above, the hash value is stored in all lowercase on AWS.
If we send the file hash as we get from Get-FileHash, we get the following error:

When we convert the hash value to lowercase, we can get a successful result:
$filehash = (Get-FileHash -Path ./file_example_MP3_5MG.mp3 -Algorithm MD5).Hash
Get-S3ObjectMetadata -BucketName "filehash-workout" -Key "file_example_MP3_5MG.mp3" -EtagToMatch "$filehash".ToLower()
This technique works for files up to 16MB. For larger files, Write-S3Object uses multipart upload, and the ETag value becomes the MD5 hash of the part.
Clean Up
It’s always a good practice to clean up after a lab session:
Remove-S3Bucket "filehash-workout" -DeleteBucketContent -Force
Remove-Item ./file_example_MP3_5MG.mp3