-->

aws s3, cloudfront

In this tutorial, you will learn how to host a website with AWS services: Amazon S3 and Amazon CloudFront.

Introduction

AWS is a complete cloud platform offering hundreds of services. You can build very complex architectures for your applications with it. However, it’s not only for big projects. If your requirements are straightforward, such as hosting a small static landing page, you can also achieve them quickly. You will build one in the tutorial and can see how easily you can do it.

Prerequisites

  • AWS Account

What is a Static Website?

A static website comprises HTML, CSS, JavaScript and media assets (such as images, audio, video etc.). The main characteristic of a static website is it runs on the client-side, meaning the user’s browser. These days you can develop complicated web applications using frameworks such as Angular, React and Vue. However, they are still JavaScript-based frameworks/libraries, so they still run on the browser; hence they can be distributed as static websites.

Main advantages of static websites:

  • ✅ Performance: Once it’s downloaded, everything runs on the browser.
  • ✅ Security: You can distribute content only without login pages
  • ✅ Cost: It’s generally cheaper to host static websites
  • ✅ Maintenance: You don’t need to maintain your servers with managed services such as Amazon S3.

Without further ado, let’s get going with the implementation.

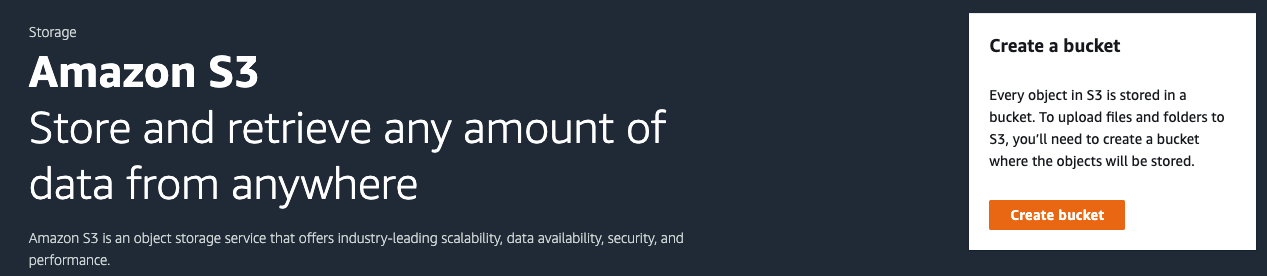
Part 1: Host a Single HTML website with Amazon S3

In this part, you will create a new bucket, set up permissions, upload your HTML file and test your website live using the S3 website endpoint URL.

Step 1: Open the Amazon S3 dashboard and click the Create bucket button

Amazon S3 dashboard showing Create bucket button

Step2: Create a new bucket

Naming your bucket is important if you are planning to use S3 endpoints. S3 provides two different types of website endpoints depending on the region. The two notations are:

  • s3-website dash (-) Region ‐ http://bucket-name.s3-website-Region.amazonaws.com
  • s3-website dot (.) Region ‐ http://bucket-name.s3-website.Region.amazonaws.com

You can see your bucket name will be in the name of your URL, so you might want to choose carefully. Also, you cannot rename a bucket after you’ve created it.

There are quite a few rules for bucket names. You can find the complete list here: Bucket naming rules.

If you have a domain name, then use that as your bucket name. Later you will see how to create a DNS entry to redirect your domain to the S3 bucket.

With regards to region selection, pick the geographical location that is closest to you and your audience. This approach helps with latency, costs and also some regulatory restrictions.

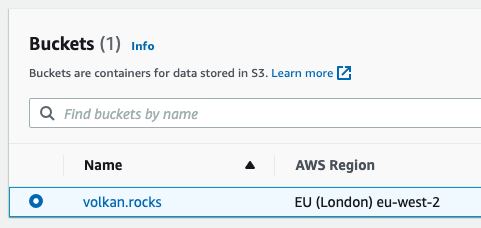
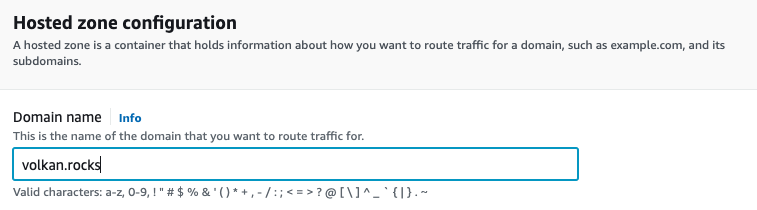
In this example, I will create my bucket in the London region with my domain’s name volkan.rocks.

![New bucket general configuration showing the bucket name (volkan.rocks) and region (eu-west-2)](/images/vpblogimg/2025/09/s3-bucket/02-choose-name-and-region.png)
Access the defaults for all the other settings, scroll down to the bottom of the page and click the **Create bucket** button.

After your bucket has been created, you should be redirected to the S3 dashboard and see your new bucket.

S3 dashboard showing the newly created bucket named volkan.rocks in eu-west-2 region

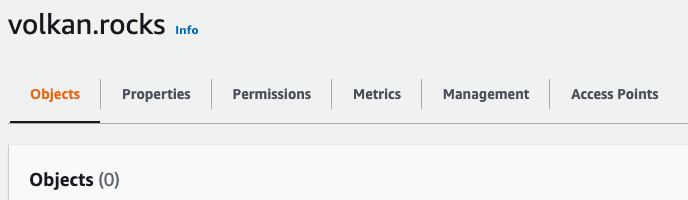
Step 3: Click the bucket name and switch to the Properties tab.

S3 bucket page showing all the tabs

Step 4: Scroll to the bottom of the page and click the Edit button in the Static website hosting section.

Static website hosting properties showing it's disabled by default

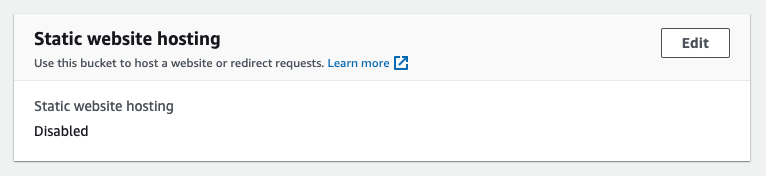
Step 5: Enable static website hosting

In the static website hosting properties, select Enable. You should now see all the other options.

Update the Index document value to index.html.

Accept the defaults for the rest and click the Save changes button at the bottom of the page.

![Static website hosting settings show it's enabled to host a static website and uses index.html as the index document](/images/vpblogimg/2025/09/s3-bucket/06-static-website-settings.png)
After you've saved the changes, you should be redirected back to the bucket properties. Scroll down again to confirm your changes have taken effect:

Updated static website hosting settings show it's enabled and the URL of the website

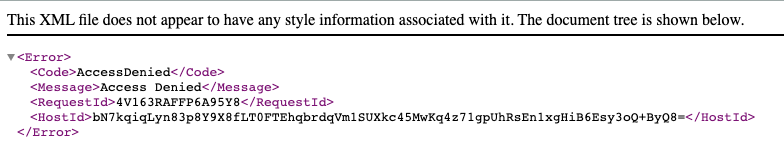
At this point, it’s hard to resist the urge to click the button to access your website. Since you haven’t uploaded an index document yet if you click on the click, you will see an error like this:

403 forbidden error

Don’t worry; you will fix it in the following steps.

Step 6: Create an index.html document

Create a file named index.html using your IDE or any text editor. Paste the following HTML code into the file:

<html>
  <body>
    <h1>My website is live!</h1>
  </body>
</html>

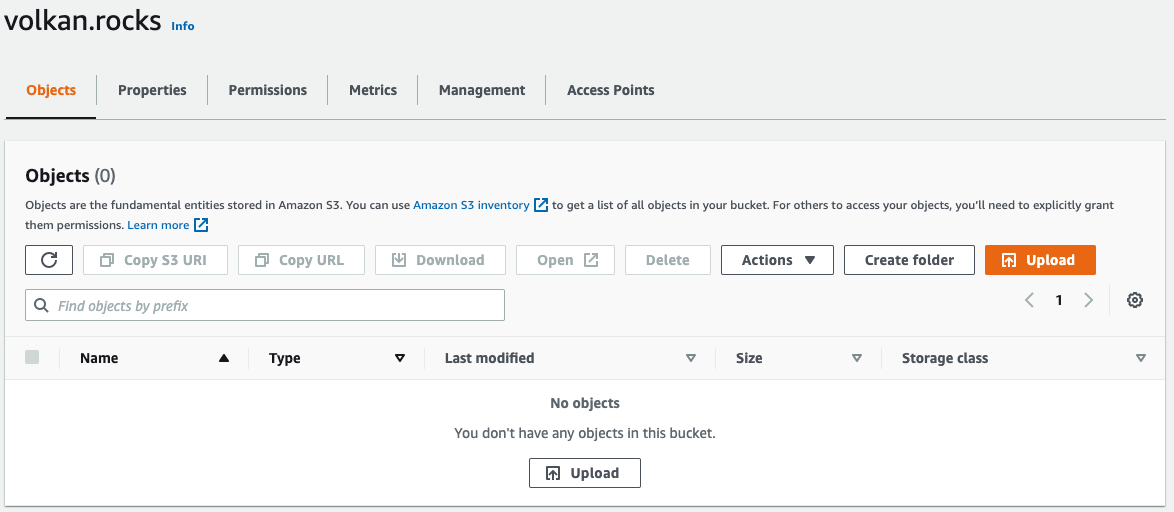
Step 7: Upload the index.html file to the bucket

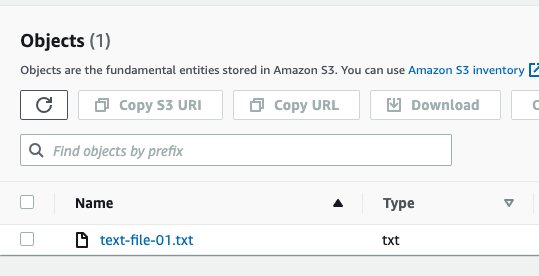
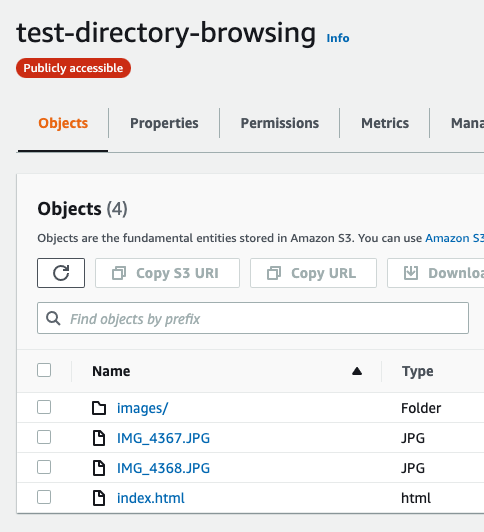
On your bucket page, switch to the Objects tab and click the Upload button.

Bucket objects tab showing the Upload button

You can drag and drop the file or click Add files button and browse your file system. Either way, once you’ve selected the file, you should see something like this:

index.html file selected as the file to upload

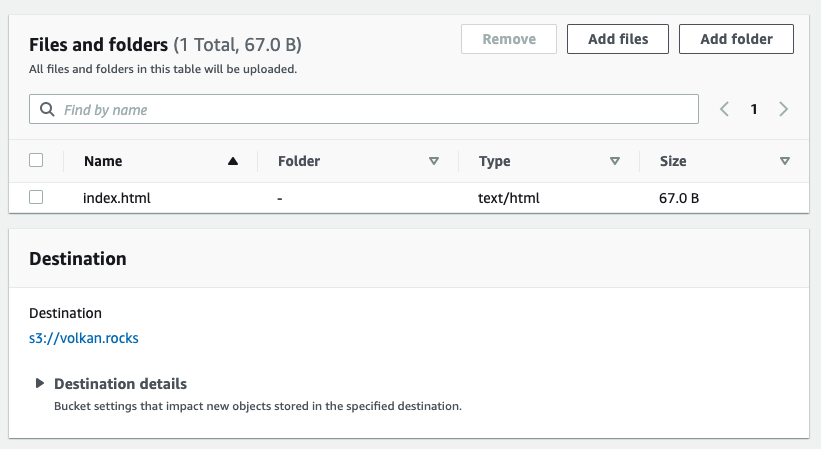
Click the Upload button at the bottom to transfer the file to the S3 bucket.

Once you’ve seen the Upload succeeded message on the screen, you can click on the Close button.

Upload status showing success and a close button

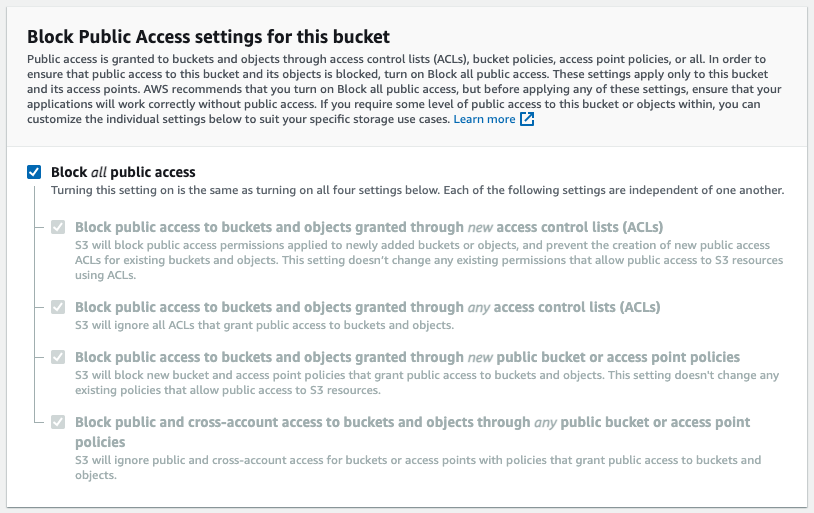
Step 8: Update the bucket permissions to enable public access

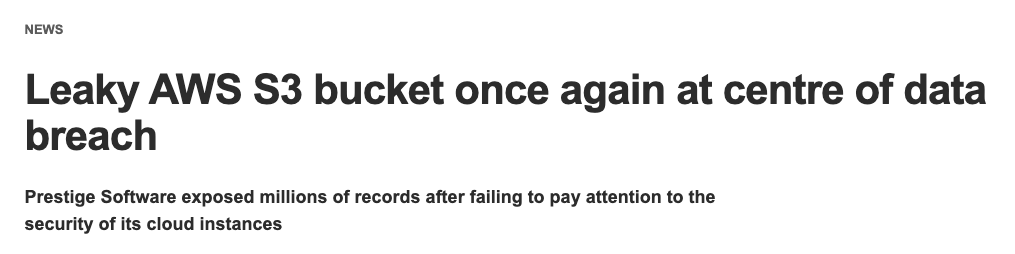
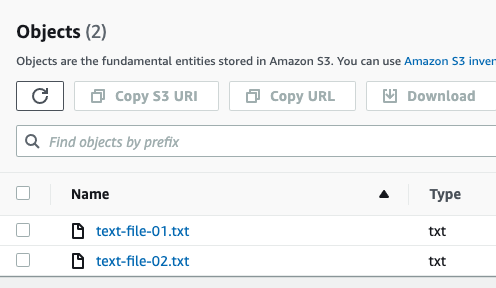
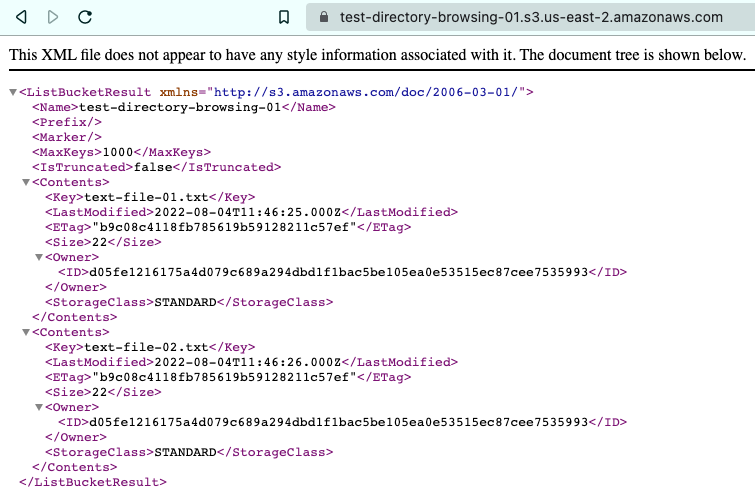
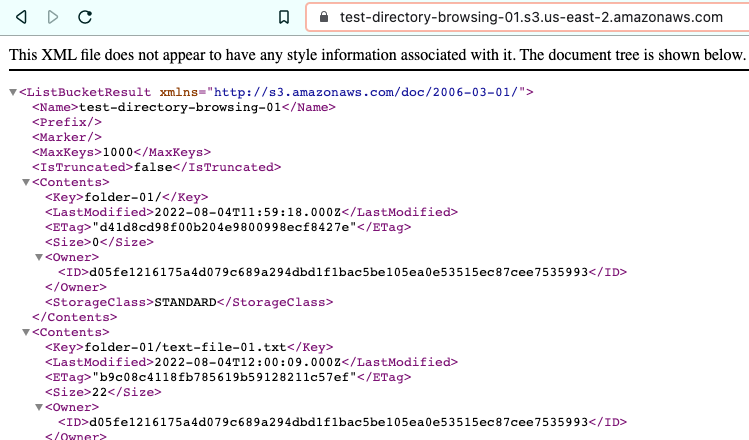
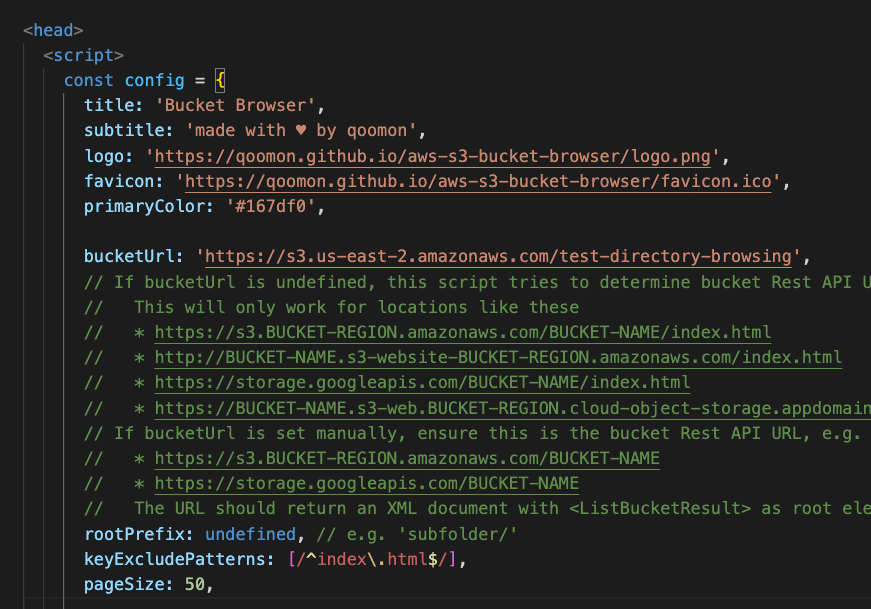
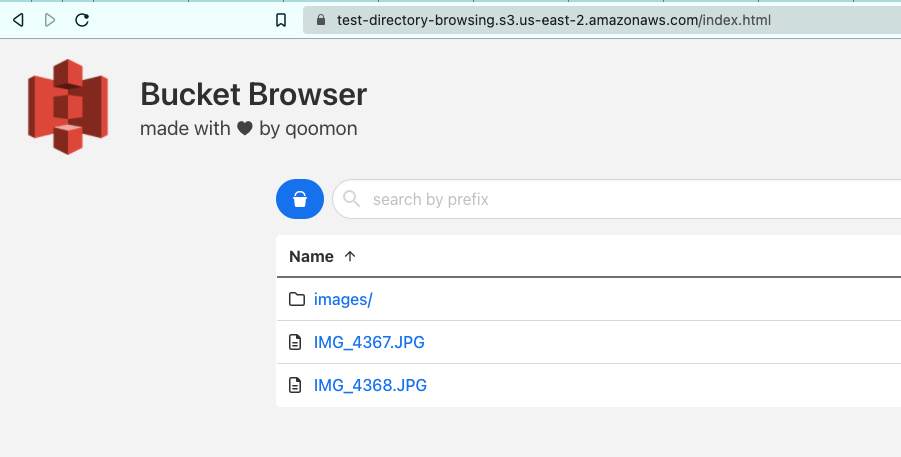
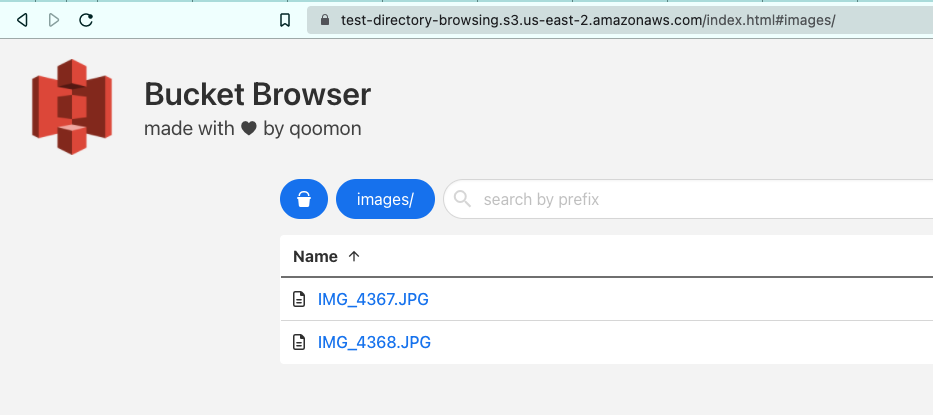
By default, all public access to the bucket and its objects is blocked. AWS is very serious about preventing accidental leaks caused by poorly configured S3 buckets, so they lock down everything by default and make it quite hard to turn it back on. In a previous post, I discussed public access to a bucket: How to easily browse Amazon S3 Buckets.

So, to enable static website hosting, first, you need to disable blocking all public access settings.

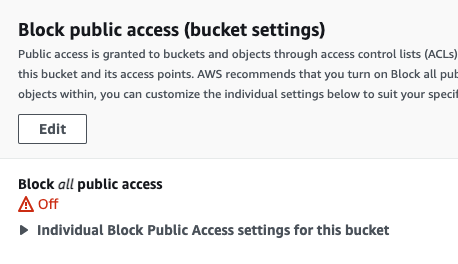
To do this, switch to the Permissions tab on your bucket page.

You should see in the overview section that it says “Bucket and objects not public”, and Block public access (bucket settings) is on.

Bucket permissions overview showing "Bucket and objects not public" and Block public access (bucket settings) is on.

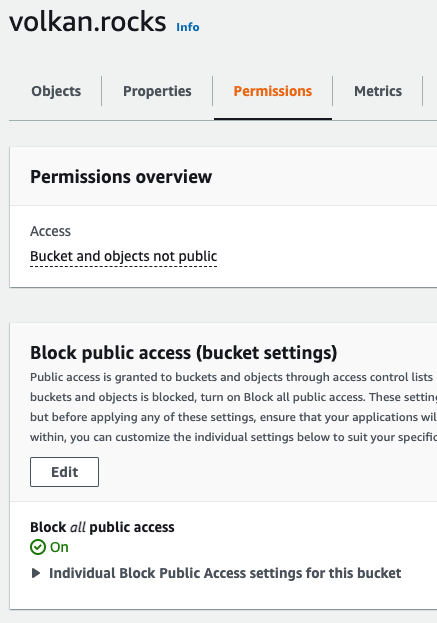
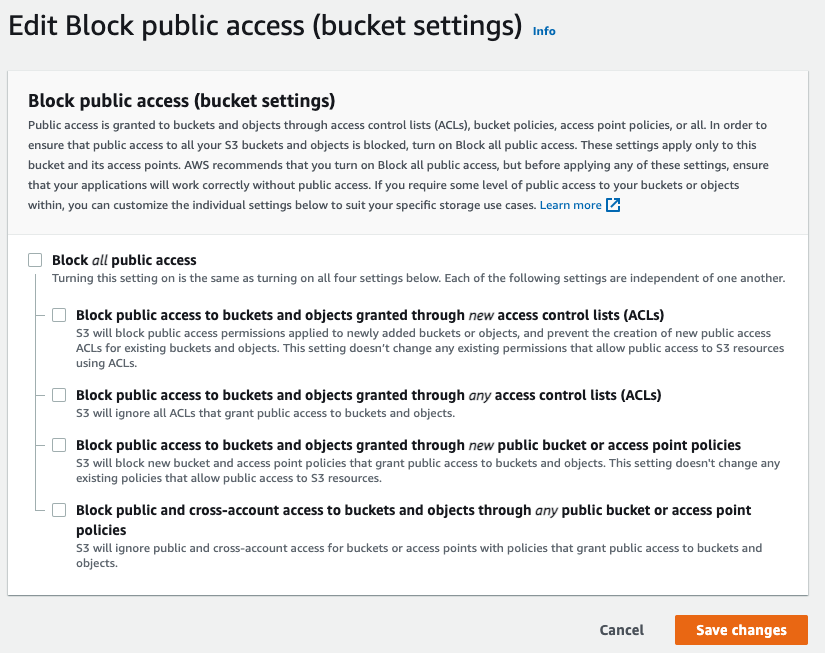
Click the Edit button in the Block public access (bucket settings) section.

Uncheck Block all public access and click the Save changes button.

Block public access setting unchecked

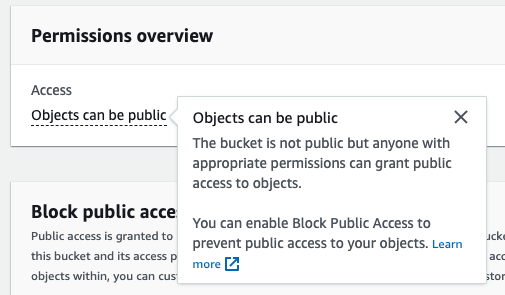
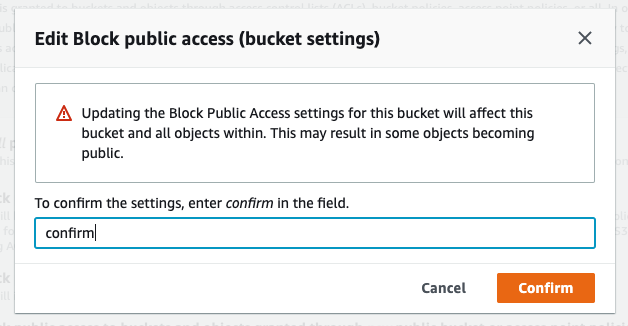
In the confirmation dialog box, type confirm and click the Confirm button.

Confirmation dialog box to disable block public access

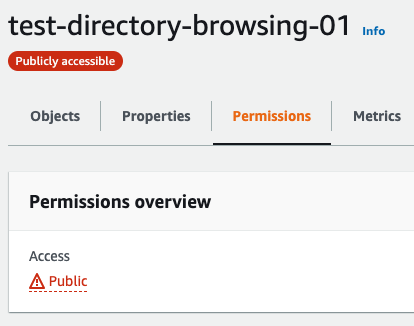
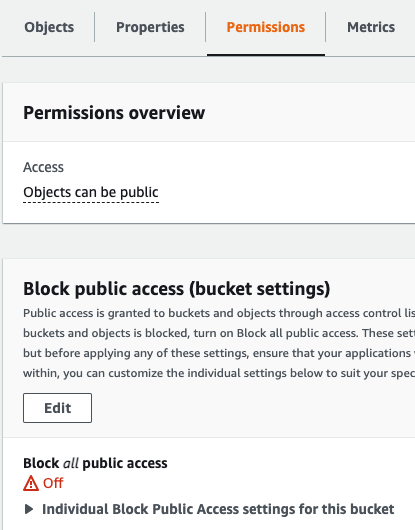
Now you should see the “Objects can be public” message in the permissions overview:

Permissions showing "Objects can be public" message and block all public access is off

Step 9: Add a bucket policy

In Step 8, you enabled the possibility of making objects public, but they are still private by default.

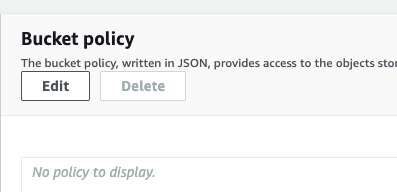
To make the bucket contents public while still on the Permissions tab, scroll down to the Bucket policy section and click the Edit button.

Bucket policy settings showing the Edit button

In the policy text area, paste the following policy:

{
    "Version": "2012-10-17",
    "Statement": [
        {
            "Sid": "PublicReadGetObject",
            "Effect": "Allow",
            "Principal": "*",
            "Action": [
                "s3:GetObject"
            ],
            "Resource": [
                "arn:aws:s3:::{Your Bucket Name}/*"
            ]
        }
    ]
}

Replace {Your Bucket Name} with the actual name of your bucket.

Then, scroll down and click the Save changes button.

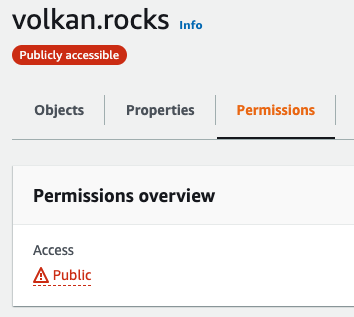
You will be redirected to the permissions page, and in the overview, you should see the objects in your bucket are now public:

Bucket permissions showing it's publicly accessible

Step 10: Test your website

Finally, you get to test your website. Go to the URL that you tested on Step 5 again, and this time, you should see that your website is up and running on the Internet:

Browser showing "My website is live" message

The URL is a bit ugly, but now you have a working website. Now let’s move on to the next section, where you beautify the URL by using your own domain.

Part 2: Use your own domain for your website

It is generally hard to write a tutorial that involves domains and DNS settings because there are so many registrars out there, and it is impossible to cover them in detail. In this tutorial, I will demonstrate using Amazon’s own DNS service Route 53. This section will assume you registered your domain via Route 53 and access to the Route 53 console.

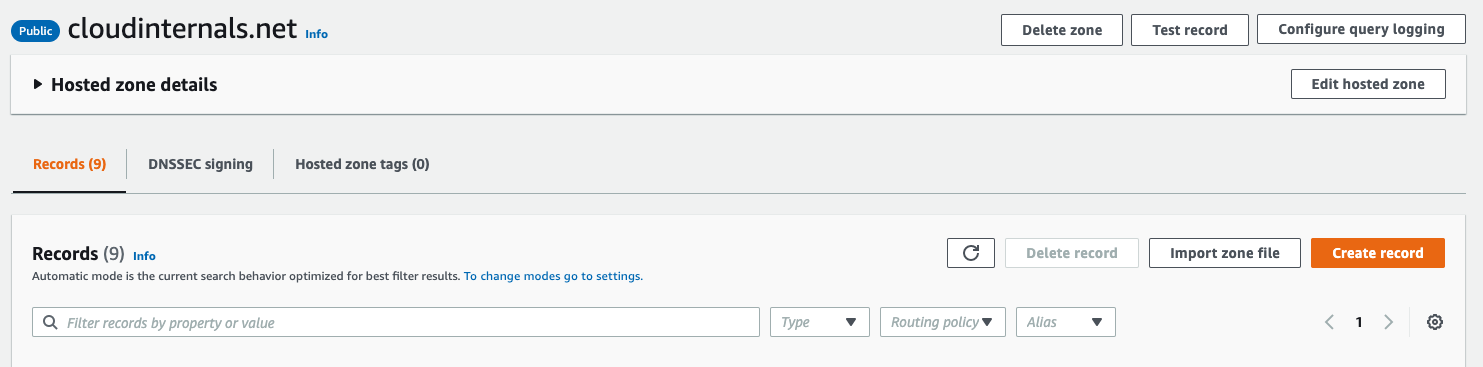
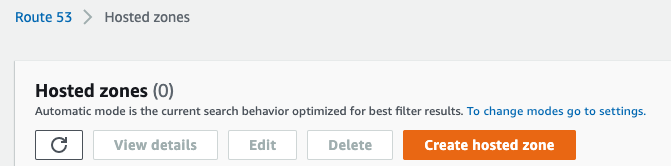
Step 1: Create a hosted zone

Go to Hosted Zones page and click the Create hosted zone button.

Route 53 hosted zones page

Step 2: Enter your domain’s name, scroll down and click the Create hosted zone button.

Hosted zone configuration showing the domain name

When a hosted zone is created, Route 53 allocates some nameservers for your domain. Note the names of the nameservers which you will need in the next step.

Hosted zone showing the default NS and SOA records

Step 3: Go to the Registered domains page and replace the nameservers with the ones from your hosted zone.

Click the Add or edit nameservers link under the current name server list. It should open a dialog box. Replace the values with the ones you copied from the hosted zone:

Name server settings in registered domain settings

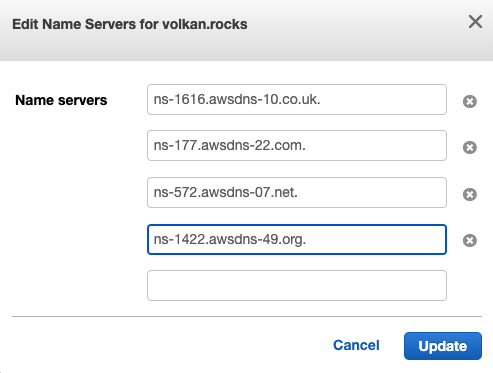
You will receive an email once the update request has been carried out by AWS. It generally takes less than a minute.

Step 4: Add an A record to point to your S3 bucket

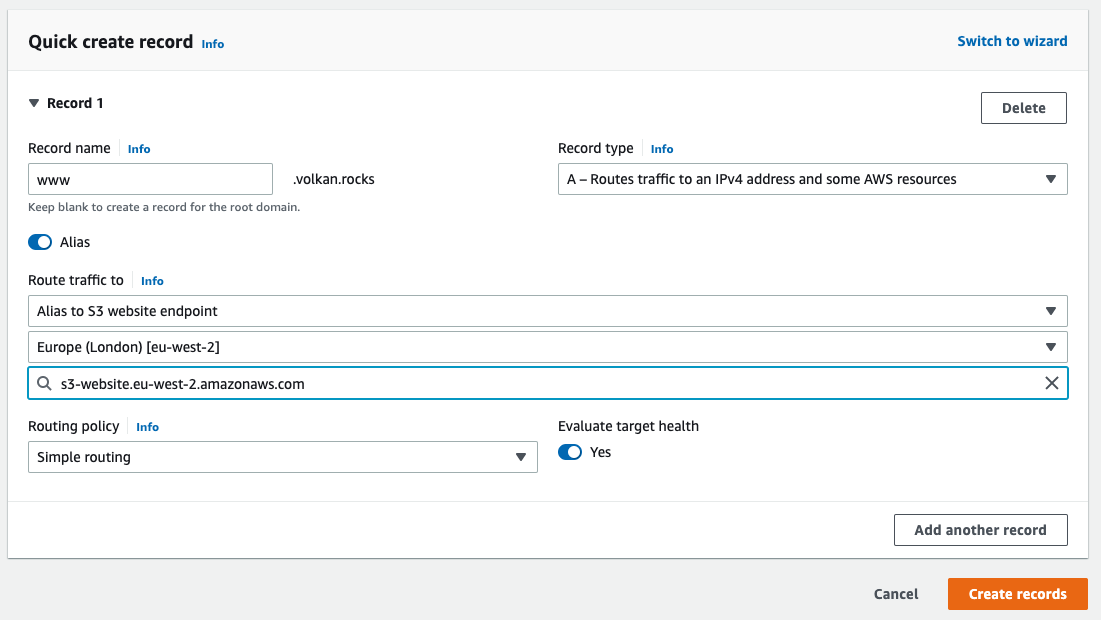
Since Route 53 and S3 are both AWS services, integrating each other is very easy. In hosted zone, click the Create record button. Then, select A - Routes traffic to an IPv4 address and some AWS resources as the record type.

Check the Alias radio button.

In the Route traffic to section, select Alias to S3 website endpoint in the first dropdown.

In the next dropdown, select the region of your bucket.

Finally, in the third dropdown, select the endpoint of your bucket.

So, your settings should look like this:

New record creating an alias to the S3 bucket

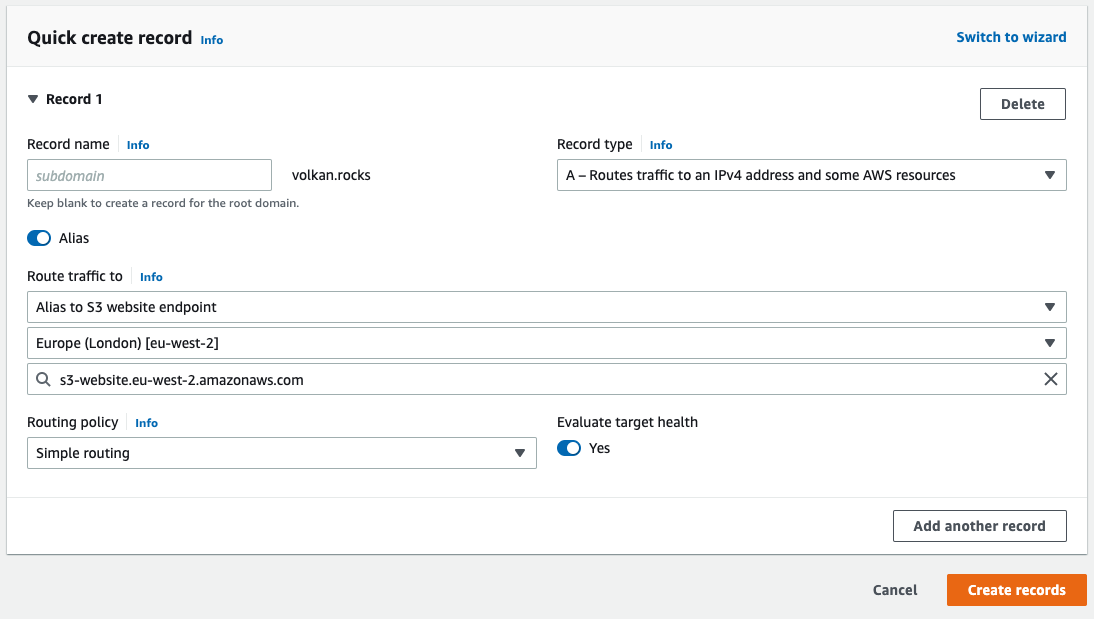
When you are all set, click the Create records button.

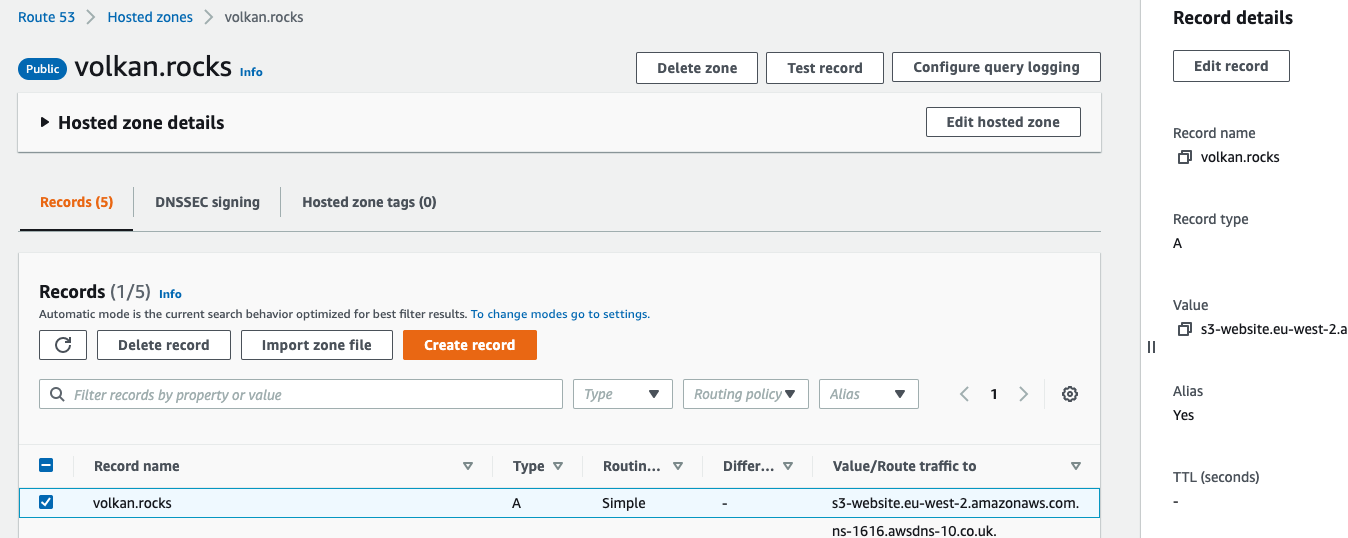
You should now see the A record in your DNS records:
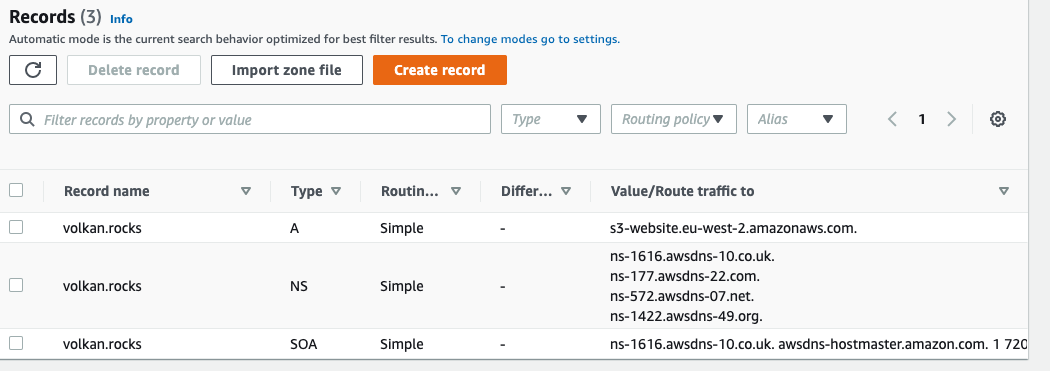
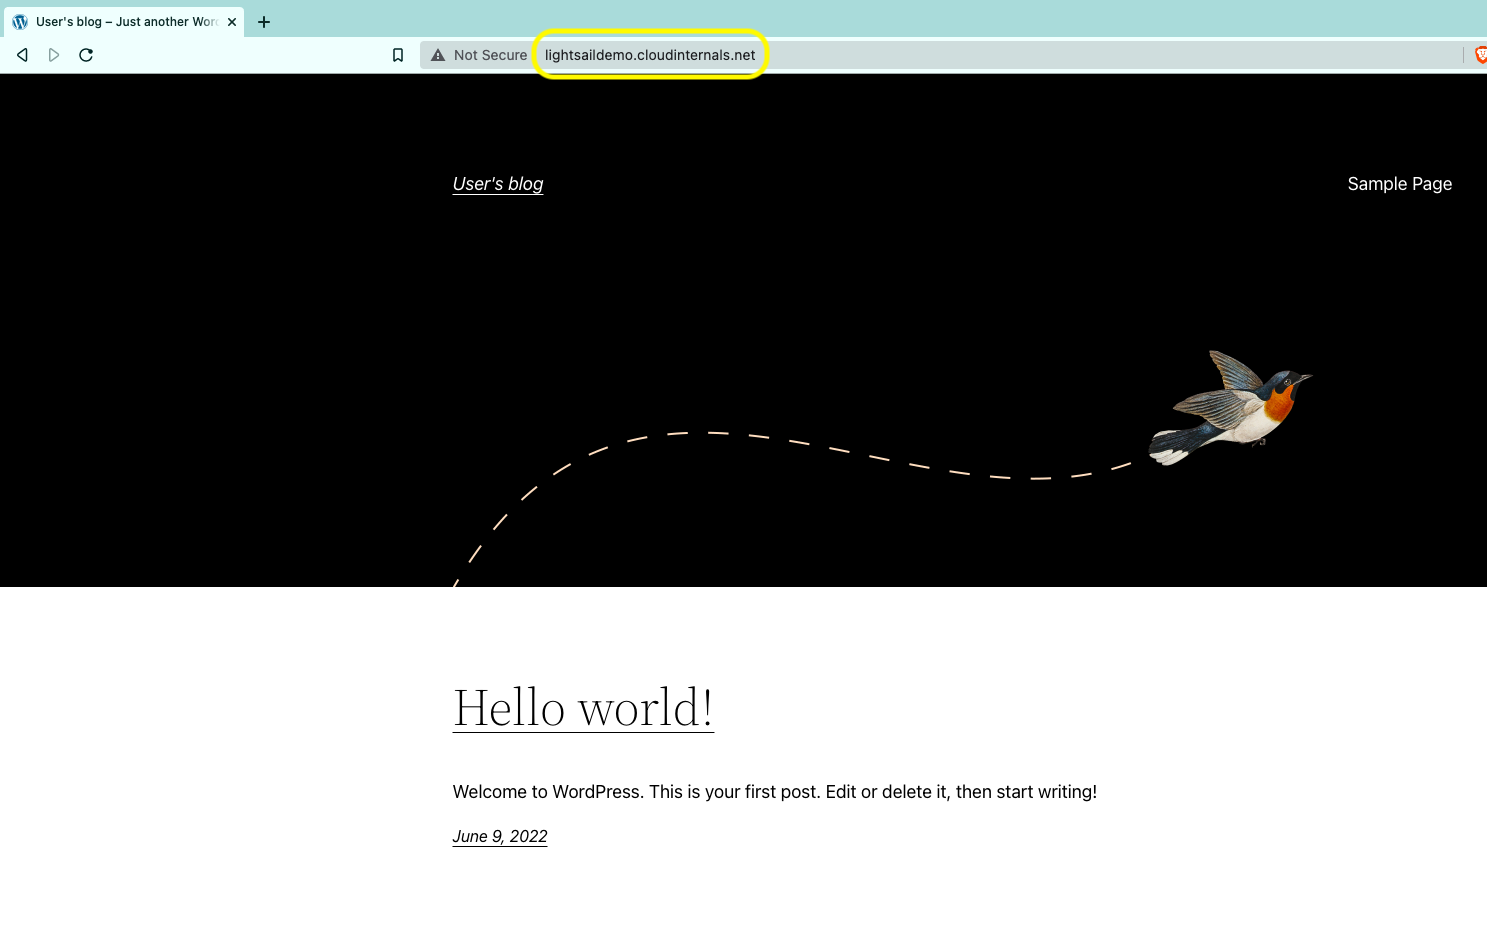
Hosted zone records showing the new A record

Step 5: Test!

Now visit your domain, and you should see your website running on your custom domain:

Browser showing the website is live and running at custom domain

Even though the website is now up and running, it’s generally considered to be a good practice to create a redirect for the www subdomain. www subdomain is a thing of the past, but most people think that’s the only way to visit a website, so for backwards compatibility, let’s go ahead and implement it.

Step 1: Create a new bucket named www.{YOUR DOMAIN}

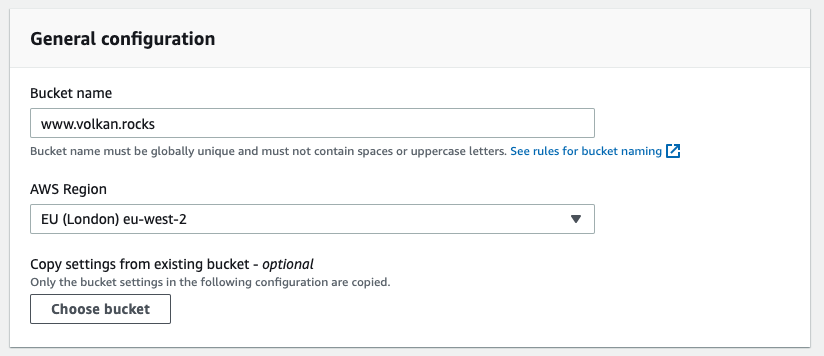
Scroll down and click the Create bucket button.

You should see the new bucket in your list:

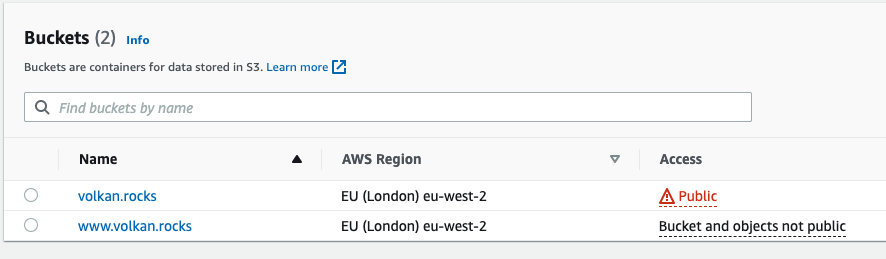
Click on the bucket’s name to view the bucket settings.

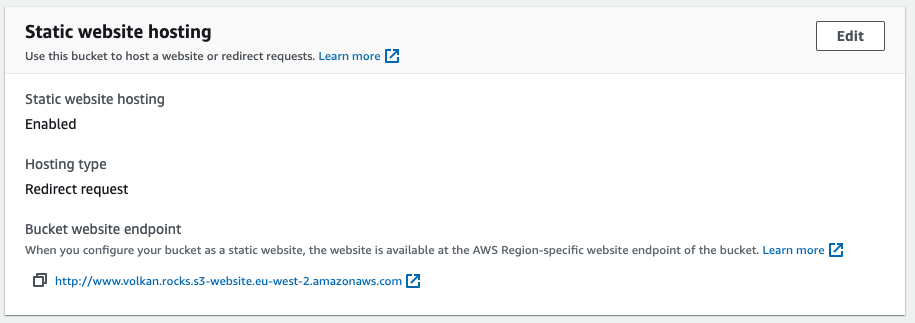
Step 2: Switch to Properties tab and update scroll down to the Static website hosting section

This step is very similar to what you’ve done in the previous part. In the Static website hosting section, click the Edit button.

Step 3: Enable static website hosting

Click the Enable radio button to enable static website hosting.

Up until now, you’ve just repeated what you’ve done previously. Now, the difference comes. Instead of selecting the “Host a static website” option, select Redirect requests for an object option.

Enter your domain name as the host name and click the Save changes button:

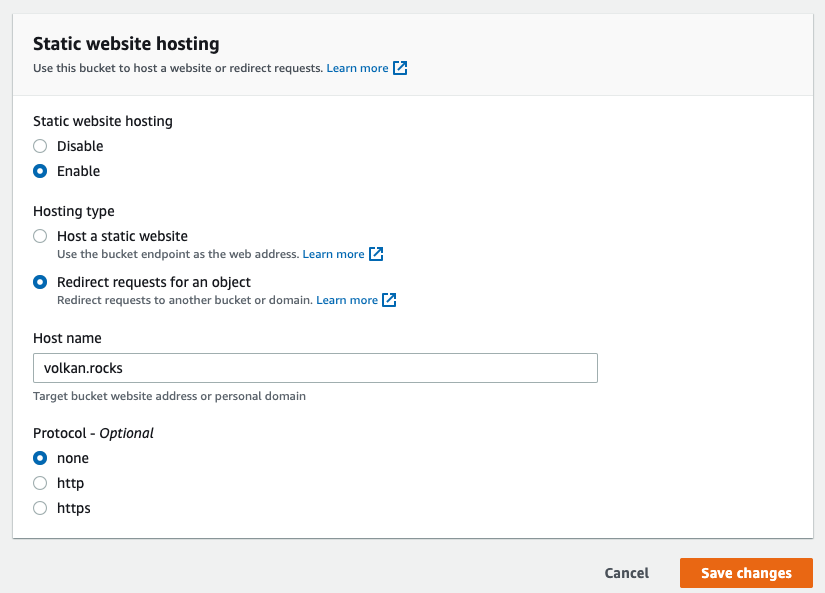
You should now see the static website settings like this:

You should be redirected to your domain if you click on the bucket website endpoint link. The problem is nobody will visit that link anyway. We still need to redirect “www.{YOUR DOMAIN}” to {YOUR DOMAIN}.

To achieve this, you need to add another A record to your DNS records, pointing the www subdomain to the new S3 bucket you’ve created. So your new DNS entry should look like this:

Click the Create records button to save your changes.

Step 4: Test the redirect

Open a new tab in your browser, and go to www.{YOUR DOMAIN} and you should be redirected to your root domain. It might take a few minutes for the DNS to propagate, so it might be a good time for a coffee break if you do not see the results immediately.

Part 3: Amazon CloudFront & Amazon Certificate Manager (ACM)

So far, you have implemented a static website running at your domain and a redirection for the www subdomain. What’s missing is HTTPS support. Unfortunately, Amazon S3 websites don’t support HTTPS. If you want to serve your site over HTTPS, you will need to create a CloudFront distribution.

What is CloudFront?

Before going forward with the implementation, let’s take a break and look into what CloudFront is and what it provides.

Amazon CloudFront is a Content Delivery Network (CDN) service. A CDN is a collection of servers spread out geographically. As the Internet is global, normally, you would receive traffic from all around the globe. If your site is hosted in the US, for example, a user from Europe will need to make a lot of hops to access your content. By using CDN, you can have your content cached in various locations all around the world. So that users pull the content from locations that are closer to them. With this approach, you can reduce latency and cut server costs. In this example, one added benefit will be the ability to generate an SSL/TLS certificate for your domain.

Now, let’s crack on with the implementation:

Step 1: Go to the Amazon CloudFront dashboard and click the Create a CloudFront distribution button.

Step 2: Setup origin

Click inside the Origin domain textbox, and you should see the S3 buckets you’ve created in the previous sections:

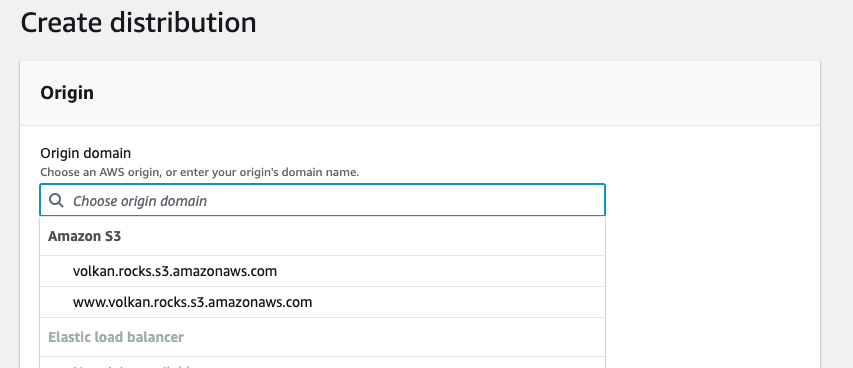
Select your domain’s bucket (without the www).

Step 3: Set up Origin Access Identity (OAI)

As you recall, currently, your bucket has public read access to serve its content. When you use a CDN, you wouldn’t want people going straight to your bucket to pull the content. It’s a good practice to restrict this access only to CloudFront to have better performance and more control over the distribution.

So, select Yes use OAI (bucket can restrict access to only CloudFront) radio button.

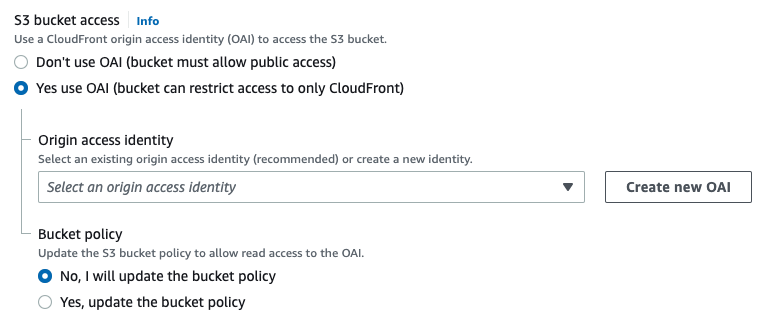
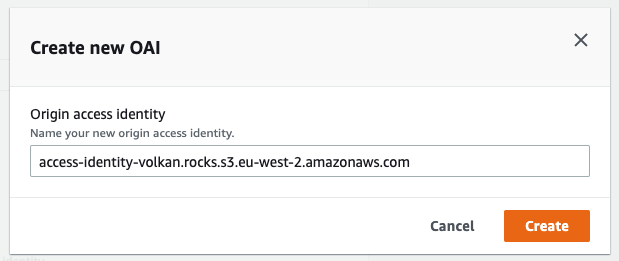
Currently, there is OAI to select, so click the Create new OAI button.

Leave the default name and click the Create button.

Also, select “Yes, update the bucket policy” option. You attached a bucket policy to allow public access in the previous section. By selecting “Yes, update the bucket policy”, you’re telling AWS to replace that bucket policy with a restricted one that only allows CloudFront to access the bucket contents.

Step 4: Set alternate domain name

Add your domain name as an alternate domain name.

This is important because otherwise your distribution will not be listed in Route 53

Step 5: Select price class

Next, scroll down until you see the Price class section.

Price class decision is more a financial decision rather than a technical one. You can leave the default, which is “Use all edge locations (best performance)”. As the label says, this option provides the best performance. What the label doesn’t say is it also costs the most. So before you make a decision, I’d recommend you take a look at this document: Choosing the price class for a CloudFront distribution.

Step 6: Request a Custom SSL certificate

Next up is an important setting: The SSL certificate.

Scroll down to the Custom SSL certificate section:

There is no certificate to select from currently, so click the Request certificate link, which should open a new tab.

First, enter the domains that the certificate will cover. You can request a wildcard domain as well. In this example, you will use the root domain only because that’s all you need for the time being.

So, enter the name of your domain in the fully qualified domain name textbox:

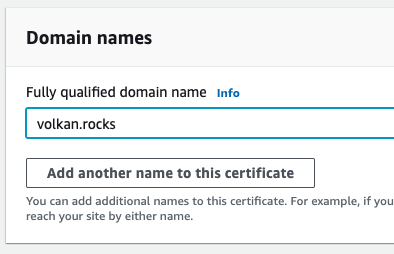
Leave the validation method as DNS validation and click the Request button at the bottom.

Step 7: Create the SSL certificate

You will be redirected to the certificates page after you’ve requested your certificate. Refresh the page to see your certificate.

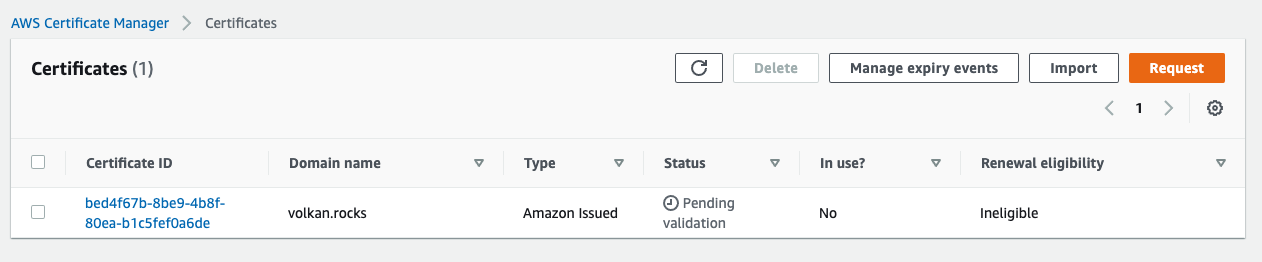
Click on the Certificate ID link.

In the Domains section, click the Create records in Route 53 button.

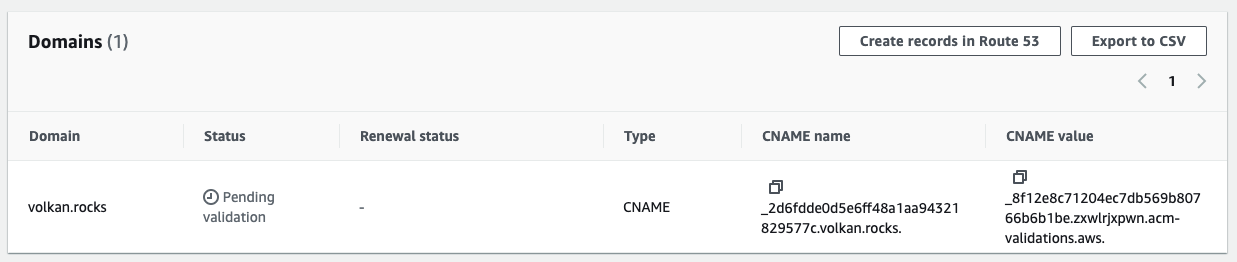
On the next page, click the Create records button.

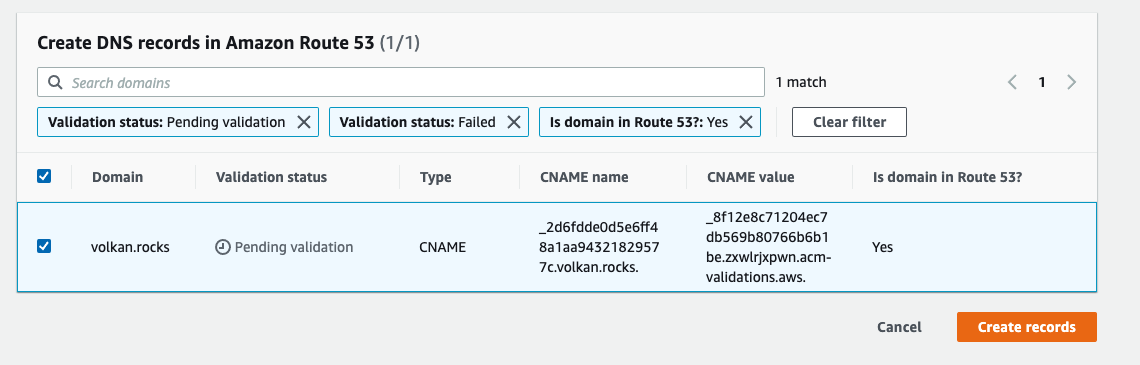
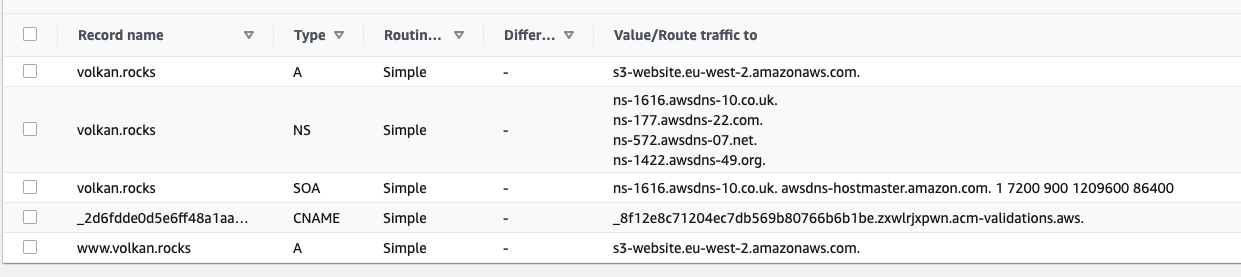
This will create the DNS record in your hosted zone. You can verify it by checking your hosted zone:

Wait a few minutes for the DNS propagation to take place, and you should see your certificate’s status has changed to Issued:

This is a great benefit of using AWS services together. With just a few button clicks, you were able to generate and validate an SSL certificate for your domain.

Step 8: Use the SSL certificate in CloudFront

Now go back to the previous tab where you were setting up CloudFront. Click the refresh icon next to the certificate dropdown list:

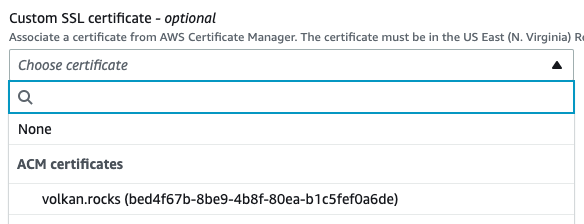
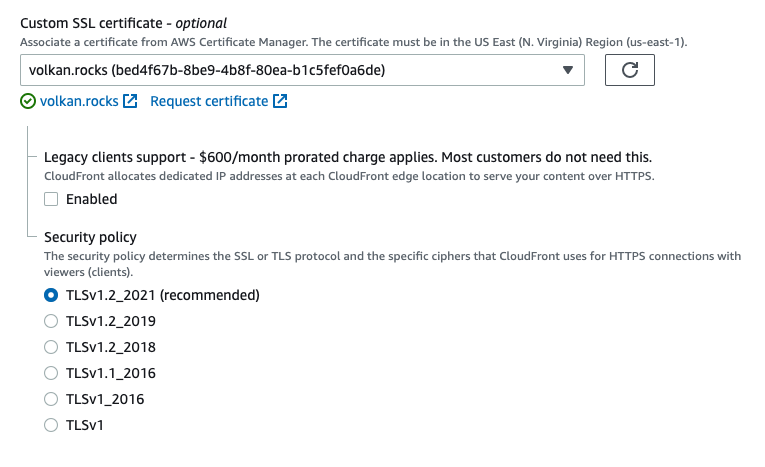
You should now see your newly issued SSL certificate in the dropdown list. Select the listed certificate and leave the defaults:

Step 9: Update the root document

Next, update the root document to match your website’s root document, which is index.html in this example.

Step 10: Create the distribution

Scroll down to the bottom and click the Create distribution button.

You should be redirected to your distribution page and see it’s started to be deployed.

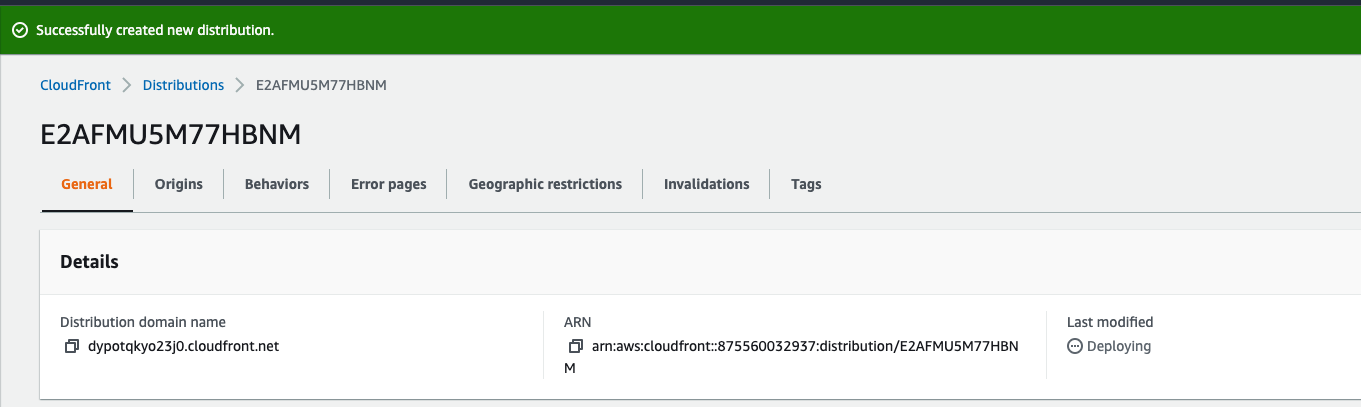
The deployment process may take a while depending on your selected price class. Wait a few more minutes for the deployment to finish. You should see its status as Enabled once the deployment has finished.

Step 11: Update your DNS to point to the CloudFront distribution

The final step is pointing your domain to your CloudFront distribution. To achieve this, open your Route 53 hosted zone settings.

Select the A record for your root domain and click Edit record on the right pane:

This time select Alias to CloudFront distribution in the Route traffic to dropdown list:

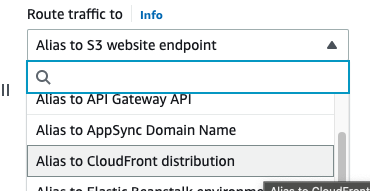
Your distribution should be listed in the dropdown:

Click the Save button.

Step 12: Test HTTPS

Now, it’s time for the final test. Open a new tab in your browser and enter the following URL: https://{YOUR DOMAIN}.

You should see your site is running over HTTPS:

![](/images/vpblogimg/2025/09/s3-bucket/52-site-running-over-https.png)
Click on the **padlock icon** and **Certificate** to investigate the SSL certificate. You should see it's a valid SSL certificate issued for your domain by Amazon:

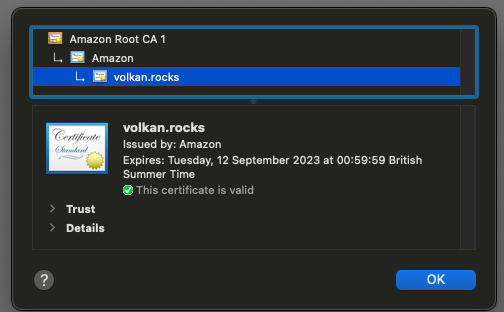
The great thing about this certificate is that it will be renewed automatically by Amazon. You can read more on that here: Managed renewal for ACM certificates.

Conclusion

This has been a long tutorial, but I hope you enjoyed it. It was meant to be a step-by-step tutorial so that you could follow along. AWS has lots of services, and they work nicely with each other. By using only AWS services, you are now able to run your own website over HTTPS in a serverless environment.

aws s3

Amazon Simple Storage Service (Amazon S3) is Amazon’s object storage service. It has lots of uses and integrates nicely with other AWS services when you need to store data. One thing it’s not meant to be used is publicly sharing your files.

File sharing services such as Box.com, Dropbox.com or Google Drive make public folders very easy. You visit the folder and get a nice web-based user interface that you can use to browse the files and subfolders. Amazon S3, on the other hand, tries its hardest to disallow public access.

Amazon S3 setting  showing block all public access is selected by default

Why is public access blocked by default?

Even though it would be convenient to access files publicly in some scenarios, it’s a security vulnerability in most cases. A poorly configured S3 bucket may leak confidential and sensitive documents. It’s a common occurrence that leaky buckets are the root cause of data breaches,

News about leaky AWS S3 bucket

It’s such a lucrative opportunity for hackers that many S3 bucket vulnerability scanners are out there. Take a look at this list to understand how popular it is: Amazon S3 bucket scanners.

So, unless you are absolutely sure you need public access, stick with the default settings and block public access.

How to share and browse files publicly with Amazon S3

Please double-check the bucket name before enabling public access to anything.

First, turn off Block public access settings.

Block public access settings turned off

Disabling block public access setting does not automatically make objects public. It opens the possibility of making objects public. After you’ve disabled the block public access, you see the permissions overview changes as shown below:

As the information box tells us, the bucket is not public at the moment but can be made public. You can test this easily by simply uploading a file and trying to access the file URL.

The uploaded file looks like this:

S3 object uploaded

Select the file and click the Copy URL button.

Then open a new browser tab and paste the URL. You should see an access denied error such as this:

Access denied to S3 object

The easiest way to make objects publicly readable and listable is to edit the bucket policy.

To do that, scroll down a bit and click the Edit button in the Bucket policy section.

Bucket policy Edit button

In the Edit bucket policy window, paste the following policy JSON:

{
  "Version": "2012-10-17",
  "Statement": [
    {
      "Sid": "PublicRead",
      "Effect": "Allow",
      "Principal": "*",
      "Action": [
        "s3:ListBucket",
        "s3:GetObject"
      ],
      "Resource": [
        "arn:aws:s3:::YOUR_BUCKET_NAME",
        "arn:aws:s3:::YOUR_BUCKET_NAME/*"
      ]
    }
  ]
}

Before you proceed, replace YOUR_BUCKET_NAME with the actual name of your bucket.

After you’ve updated the policy, check the Permission overview section, and you should see this:

Bucket permissions showing public access

Upload a few test objects to your bucket. In my example, my bucket looks like this:

The object list in the bucket showing 2 files

Select a file and click the Copy URL button. Now paste the URL in a new browser tab, and you should see your file’s contents (assuming it’s a file your browser can open like a text file in my example):

![](/images/vpblogimg/2025/09/s3-browser/10-test-file-contents.png)
To browse the bucket's contents, remove the file name from the URL and try the bucket root. This time you should see something like this:

File list showing file details

As you can see, it now lists the files (key being the file name), MD5 hashes, lengths and last modified dates.

If you create folders in the bucket, they are also listed in the object list. For example, I created a folder named folder-01 and uploaded the same files under that folder, and the refreshed file list looked like this:

File list XML showing folders

This is the easiest way to give your clients access to your buckets. They can read/download the individual files and also get a list of the bucket contents in XML format.

AWS S3 Bucket Explorer

Raw XML is efficient but may not exactly work for you if you are dealing with external clients. They may need a simpler user interface to view the files. There are a few experimental open-source projects out there. Some of them are now defunct; some of them barely work or are very primitive. In my research, I grew fond of this open source project, particularly: AWS S3 Bucket Browser.

The usage is quite simple: You download the template index.html file and update a few settings. Make sure to update the bucket policy and CORS permissions, and you’re all set.

In the following example, the bucket name is test-directory-browsing and the relevant part of index.html looks like this:

Screenshot of index.html showing the bucketUrl

My bucket policy is as shown below:

{
  "Version": "2012-10-17",
  "Statement": [
    {
      "Sid": "PublicRead",
      "Effect": "Allow",
      "Principal": "*",
        "Action": [
          "s3:ListBucket",
          "s3:GetObject"
      ],
      "Resource": [
        "arn:aws:s3:::test-directory-browsing",
        "arn:aws:s3:::test-directory-browsing/*"
      ]
    }
  ]
}

Finally, my CORS configuration looks like this:

[
  {
    "AllowedHeaders": [
        "*"
    ],
    "AllowedMethods": [
        "GET"
    ],
    "AllowedOrigins": [
      "https://test-directory-browsing.s3.us-east-2.amazonaws.com"
    ],
    "ExposeHeaders": [
      "x-amz-server-side-encryption",
      "x-amz-request-id",
      "x-amz-id-2"
    ],
    "MaxAgeSeconds": 3000
  }
]

When implementing it for your bucket, make sure to replace all instances of test-directory-browsing with your bucket name. Also, change your region if you use a region other than us-east-2.

The contents of the example bucket look like this:

Contents of the example bucket showing and index.html, a folder and two images

When I copy the URL of the index.html file and paste it into a new browser tab, I get this:

Bucket browser showing the files

It’s nicely formatted. Since it’s open source, you have full control over the CSS and the images so you can modify them to your liking. When you click a folder, it also shows its contents with the folder name placed on top, such as this:

Files listed under a folder

As you can see, it’s very intuitive and allows your users to browse your public content very easily.

Conclusion

AWS tries their best to lock the buckets and their contents, but in some cases, you still might want to give your users public access to your buckets’ contents. You can achieve this by updating your bucket policy without needing any external tools.

In some scenarios, users may need an easy-to-use user interface to browse through the folders and files in your bucket. If that’s your use case, try out this GitHub repository. After a few quick modifications to your bucket and uploading an index.html file, you can give your customers a good experience browsing your files.

aws wordpress, lightsail

This article shows you how to host a WordPress website on AWS using Amazon Lightsail. AWS offers multiple ways of running applications. One of the most versatile services is Amazon Elastic Compute Cloud (EC2), where you can create virtual machines. The thing about EC2 is they may be overwhelming for simple use cases. For common use cases such as creating a basic virtual machine and starting a WordPress website, you might want to have a simpler alternative. Amazon Lightsail is intended to simplify achieving such basic goals.

In this post, we will look into creating a new WordPress website with Amazon Lightsail.

What is Amazon Lightsail?

AWS services are generally like LEGO bricks. You can mix and match them to build complex infrastructure. This comes at a cost, though. Sometimes, you need a pre-packaged simple solution to achieve a simple task. Some hosting providers offer virtual private servers (VPS) with one-click application deployments, such as Linode and Digital Ocean. Amazon Lightsail is AWS’s solution offered to this market.

It was announced in 2016. Unlike an EC2 instance, you don’t select individual components of a server. You rather select a pricing plan which includes a pre-packaged server with a configuration proportional to the pricing. This alone simplifies many tasks that might be daunting to people who are not tech-savvy and just want to get a site up and running as fast as possible.

Without further ado, let’s take a look at how Lightsail works.

Getting Started

When you visit Amazon Lightsail Dashboard first thing you notice is that it’s quite different from a regular AWS service:

Amazon Lightsail dashboard

It might take some time to get used to this UI but fortunately, it’s quite intuitive so getting everything set up should not be too much of a hassle.

Let’s get started with our WordPress site:

  1. In the dashboard, click Create Instance button in the middle of the screen.

Create instance button

  1. The first thing you need to do is to approve or change the Instance location. The closest region to your location is pre-selected.

Change the availability zone button

When choosing the instance location, be mindful of your target audience. Being close to your users will reduce the network latency and will make a better experience for your users.

Select availability zone

  1. Next, you pick your operating system image.

Select operating system image

In terms of price and performance, I’d strongly recommend choosing Linux/Unix as your platform, which we’ll be selecting in this article.

  1. Now it’s time to select WordPress, which is already the first item on the list and selected. WordPress is such a popular application that it’s always the first in such lists.

Quick Trivia

According to WordPress’s official site, WordPress is used by 43% of all websites on the Internet.

If you intend to host multiple websites, you can also choose WordPress Multisite option, the second option in the list.

Select application

  1. Now it’s time to select the pricing plan. You don’t have to worry about the little details fo the instance. You just pick the plan closest to your budget.

Select instance plan

At the time of this writing, the first 3 months of the first 3 plans ($3.5, $5 and $10 plans) were free. This is a good opportunity to try out a new WordPress website for free and make a decision about going forward afterwards.

In this article, we are going to proceed with the $5 plan.

Select the $5 plan option

  1. Give your instance a unique and memorable name to identify your website

Change instance name

  1. Click Create Instance button at the bottom of the screen. You should be redirected to the instances dashboard and view the instance’s status.

New instance status

In about 2-3 minutes, the instance should be up and running:

New instance running

  1. Test installation. Visit the IP address allocated to your website, and you should see a default WordPress installation:

WordPress default home page

Add /wp-admin to the IP and you should be able to see the WordPress login page:

WordPress login page

Congratulations! Your website is up and running! 🎉🎊🍾

Configuring WordPress

Now that you have a freshly installed WordPress instance, it’s time to configure and add content. As you went through the steps in the installation process, you must have noticed that you didn’t provide a username and password to log in to your instance. So finding out the username and password is our next step.

  1. In the Use your browser section, Click Connect using SSH button

Connect using SSH button

  1. You should end up in an SSH terminal in a new tab:

SSH terminal

  1. In the terminal, run the following command:
cat bitnami_application_password

This should simply print the default administrator password:

Default password in the terminal

Copy the password shown in the terminal

  1. In a new tab, go to https:// {your public IP address} /wp-admin
  2. Use the “user” as the default user and the password you previously copied from the terminal to log in to your WordPress dashboard.

Default password in the terminal

You should end up seeing something like this:

WordPress dashboard

At the time of this writing, the installed WordPress version was 5.9.3, but a major upgrade (6.0) was available. As upgrading WordPress is outside this article’s scope, we will not cover it. But please keep in mind that keeping your WordPress installation and all the plugins up-to-date is a good practice.

Set up Static IP Address and Custom Domain

Now we have a fully-fledged WordPress site, but we still have two problems:

  1. We can’t give our users an ugly-looking IP address
  2. The default IP address is dynamic and will change every time your instance is stopped and started again.

To address both issues, first, we need to set up a static IP address and point a domain or subdomain to that IP address.

IP Address

  1. Go to the Lightsail networking page: Lightsail Networking

It should look something like this:

Networking tab

Click Create Static IP button.

  1. In the Attach to an instance section, select your instance from the list:

Select instance to attach IP

  1. Give it a meaningful name and click Create

Rename IP address and click create

Up to 5 static IP addresses are free of charge, ONLY when they are attached to an instance. So be mindful of releasing them when not in use.

  1. This should take you to the IP address details and it should show that it’s been assigned to your instance:

Static IP attached to the instance

  1. Test your blog again by visiting the IP address and you should still see the blog running.

Custom Domain

Once you have your static IP address, it’s fairly straightforward to point to your domain/subdomain. It completely depends on your DNS provider. In this example, I’m going to assume your domain is already registered and hosted on Amazon Route53.

  1. Go to your hosted zone in Amazon Route53 and click Create record:

Create a record in Amazon Route53 hosted zone

  1. Enter your subdomain in the Record name (or leave it blank if you’re going to point root domain)

Enter record details and click create records

Make sure the record type is A.

  1. It may take a few minutes for the DNS records to propagate. After a while when you visit your domain/subdomain, you should still your blog:

Test blog with the custom domain

Conclusion

This article covers the origins of Amazon Lightsail service and how it compares to Amazon EC2. It covers setting up a new WordPress instance from scratch and shows setting up an IP address and pointing a domain to the new blog.

Resources